Obstacles – DR Power Sprint (2000 - 2004) User Manual
Page 16
DR
®
TRIMMER/MOWER
™
Assembly & Operating Instructions
10
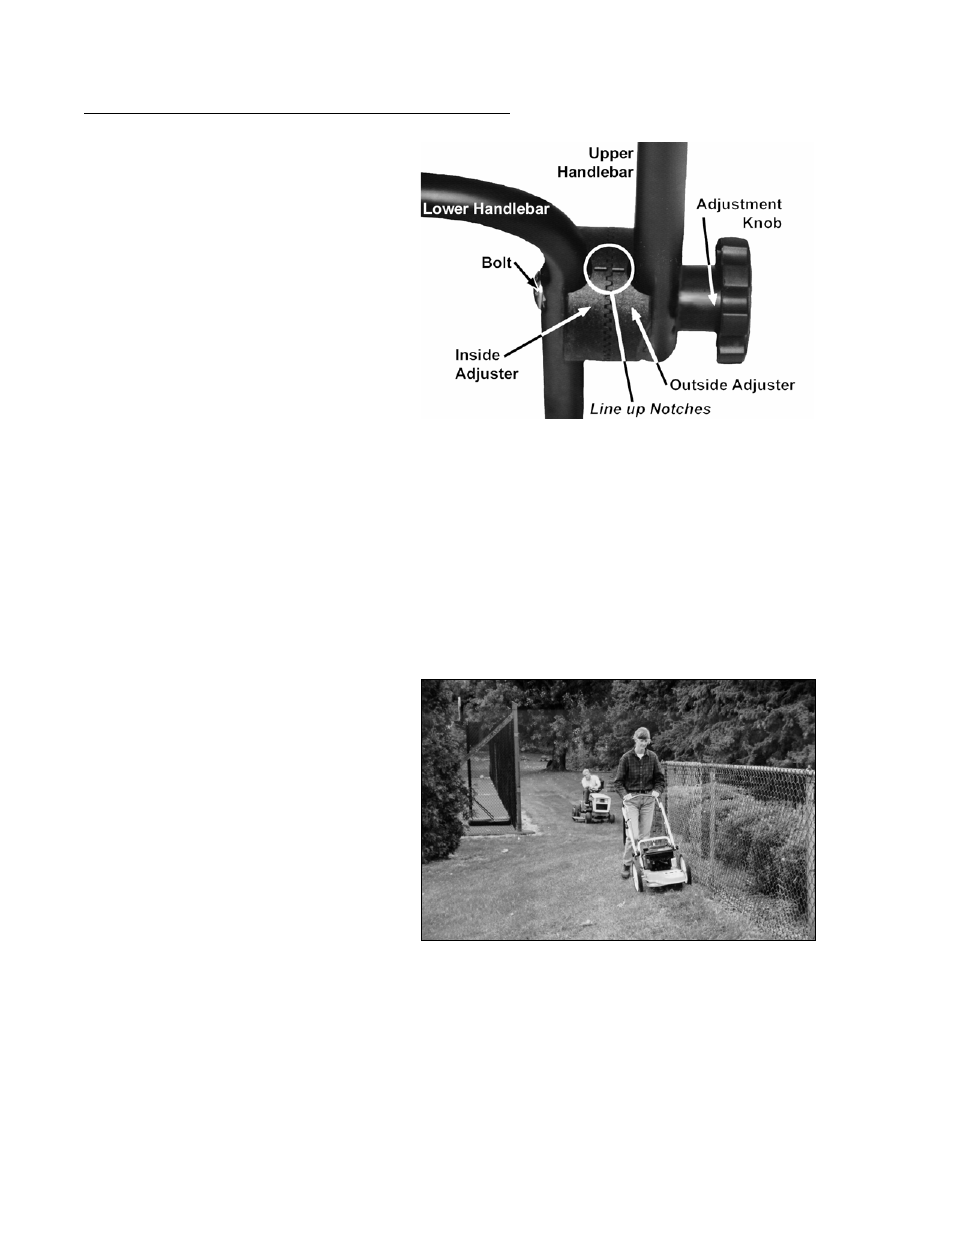
There are two ways to adjust the height of the handlebar:
1. Loosen both of the adjustment knobs
and move the handlebar up or down as
needed. It's important that the
adjustment is the same on both sides.
Use the notches on the adjusters
(Figure 16) to measure how many
teeth you've moved away from the
center. When you've found a
comfortable height, tighten the
adjustment knobs securely.
2. For additional height adjustment
options, there are two holes in the
upper and lower handlebars where the
adjustment knobs are located. Most
people start with the handlebars set in
the lower holes of both the upper and lower handlebar. You can adjust the height up or down
by removing the adjustment knob assembly and repositioning the handlebars to a higher or
lower hole. Be sure the notches in the two adjusters line up when you reassemble them
(Figure 16).
Please Note: When you change the position of the handlebar, you will need to adjust the PTA
™
lever up or down to maintain proper PTA function. Please see page 21.
Obstacles
Many Owners like to mow easy, open
areas with their regular riding or walk-
behind mower, then they finish trimming
all the odd and hard-to-reach spots with
the DR
®
TRIMMER/MOWER
™
(Figure
17).
The DR
®
TRIMMER/MOWER
™
discharges cut material to the right.
Always try to cut and trim with the uncut
tall grass or weeds on the left.
)
Suggestion: For the neatest
appearance, do your trimming first,
discharging clippings away from borders
and shrubs, then do your mowing.
•
Always check your work area before trimming and remove any debris that might tangle or
damage the machine.
•
If you do run into debris and the trimmer gets tangled, turn off the engine and disconnect the
spark plug wire before attempting to untangle the machine.
Figure 16
Figure 17