DR Power Sprint (2000 - 2004) User Manual
Page 24
DR
®
TRIMMER/MOWER
™
Assembly & Operating Instructions
18
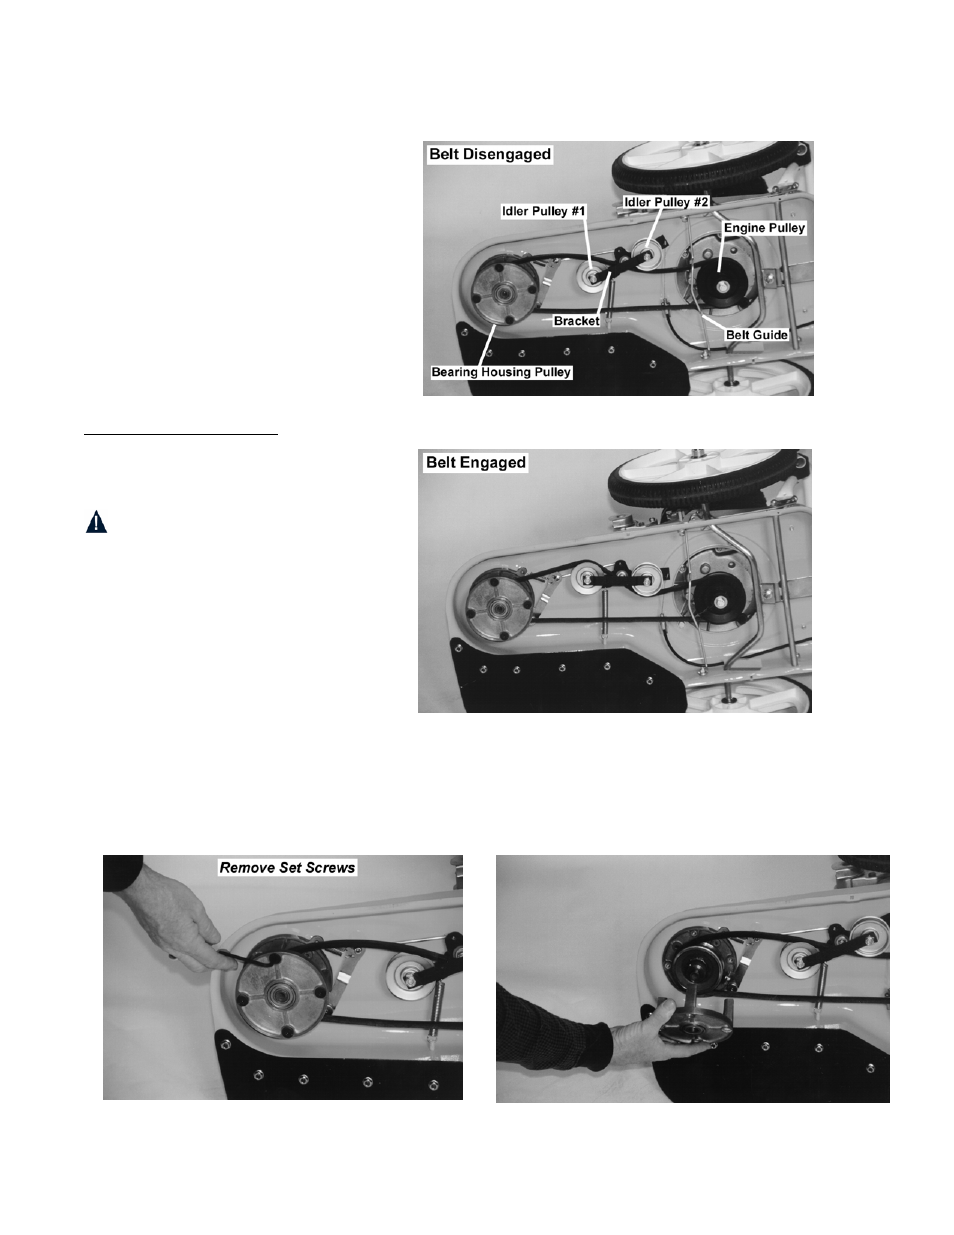
To Remove and Replace the Belt
Figures 25 & 26 show the belt and pulley
system with the belt disengaged and
engaged.
Please Note: We turned the Trimmer on
its side to take these pictures. To do so,
we had to remove the gas and oil from
the machine. You can access the
underside of the Trimmer without having
to drain the gas and oil by tilting it back
on its handlebar.
Important! Use only DR
®
Belts for
replacement parts. Do not use hardware
store variety belts.
Tools & Supplies Needed:
• 9/16" wrench or socket
• 3/16" Allen wrench
• Belt, Part #145721
WARNING! Before performing any
maintenance procedure, the engine
should be stopped and the spark plug
wire disconnected.
1. Remove the Mow-Ball
™
Support
assembly. See page 15.
2. Remove the stone guard. See
page 17.
3. Remove the bottom shield. See
page 17.
4. Remove the four Allen set screws on the underside of the lower bearing housing plate
(Figure 27). The lower bearing should come off with the plate (Figure 28).
Figure 25
Figure 26
Figure 27
Figure 28