Setting up your trimmer, Warning, Step 1: connect the battery wires – DR Power Sprint (2000 - 2004) User Manual
Page 7: Step 2: add oil and gas
DR
®
TRIMMER/MOWER
™
Safety & Operating Instructions
1
Setting Up Your Trimmer
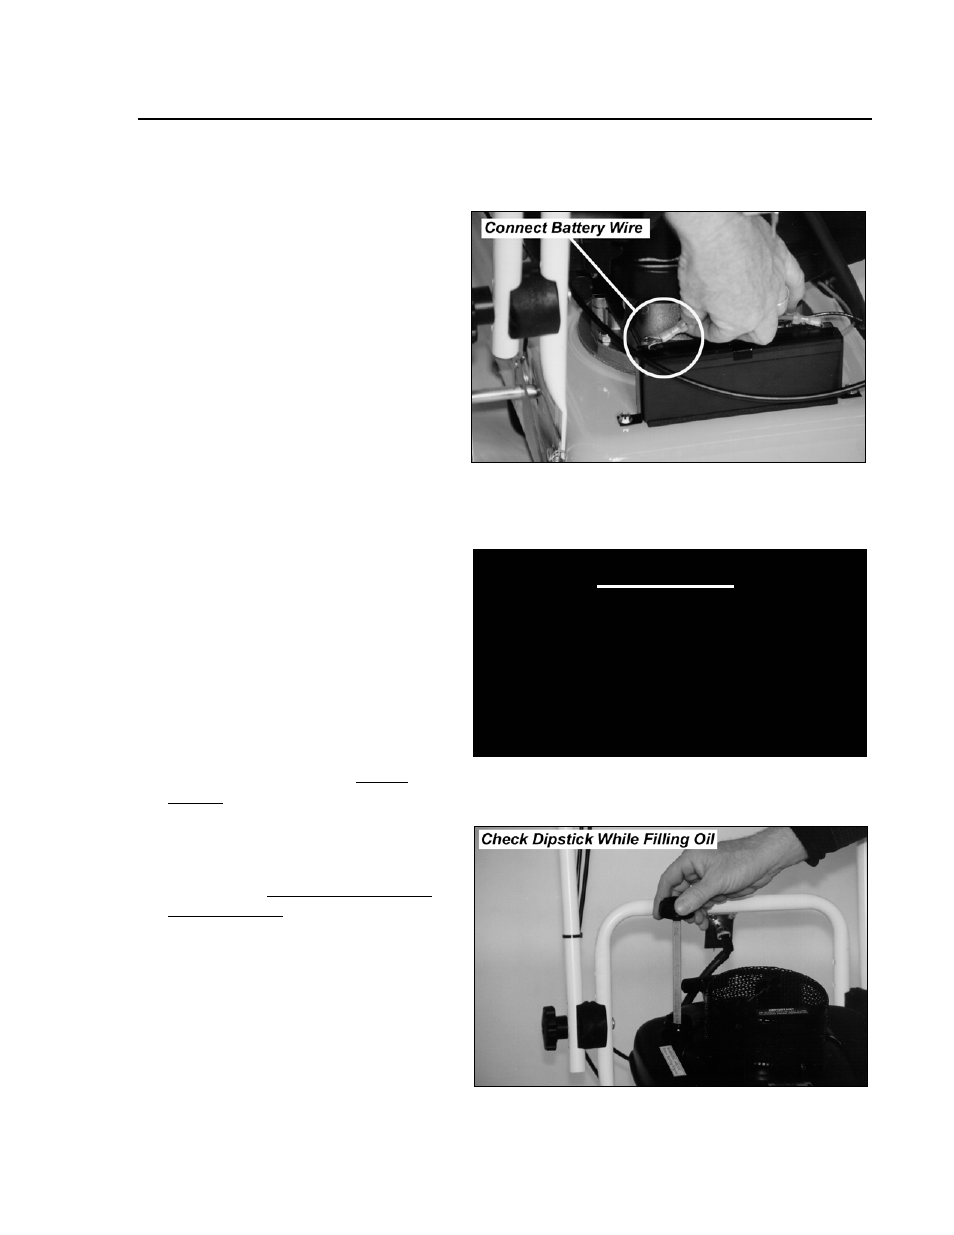
Step 1: Connect the Battery Wires
(Electric-Starting models only)
To prevent the battery from discharging
during shipment, all electric-starting
trimmers are shipped with at least one
battery wire disconnected.
Connect the black wire by pushing the
plastic connector onto the negative (-)
terminal (Figure 1). See the red wire for
comparison.
Step 2: Add Oil and Gas
Reminder: To avoid confusion, we
recommend leaving the caps on the fuel
and oil fills until you are ready to pour
either gasoline or oil into the correct fill.
1. Use SAE30 High Detergent oil. Add
approximately 15 ounces of oil and
wait one minute for the oil to settle.
Check the dipstick, then continue
adding small amounts of oil and
rechecking the dipstick until it reaches
the full mark (Figure 2). Do not
overfill.
Important! To get an accurate
reading when checking the oil level
the machine should be on a level
surface, and the dipstick should be
screwed down.
Please refer to your engine
manufacturer's owner's manual for
detailed oil information.
2. Fill the gas tank to within 1/4 inch of
the top with fresh, unleaded gas. See
your engine manufacturer's owner's
manual for detailed fuel
recommendations.
Figure 1
Figure 2
WARNING!
THIS MACHINE IS SHIPPED WITHOUT OIL!
TRACES OF OIL MAY BE IN THE
RESERVOIR FROM FACTORY TESTING, BUT
YOU MUST ADD OIL BEFORE STARTING
THE ENGINE. FILL THE RESERVOIR
SLOWLY, CHECKING THE DIPSTICK
FREQUENTLY TO AVOID OVERFILLING.