Installing the flywheel/belt guards – DR Power RapidFire 5.5 HP Subaru (July 2013 - Present) Operating Manual User Manual
Page 11
CONTACT US AT www.DRpower.com 11
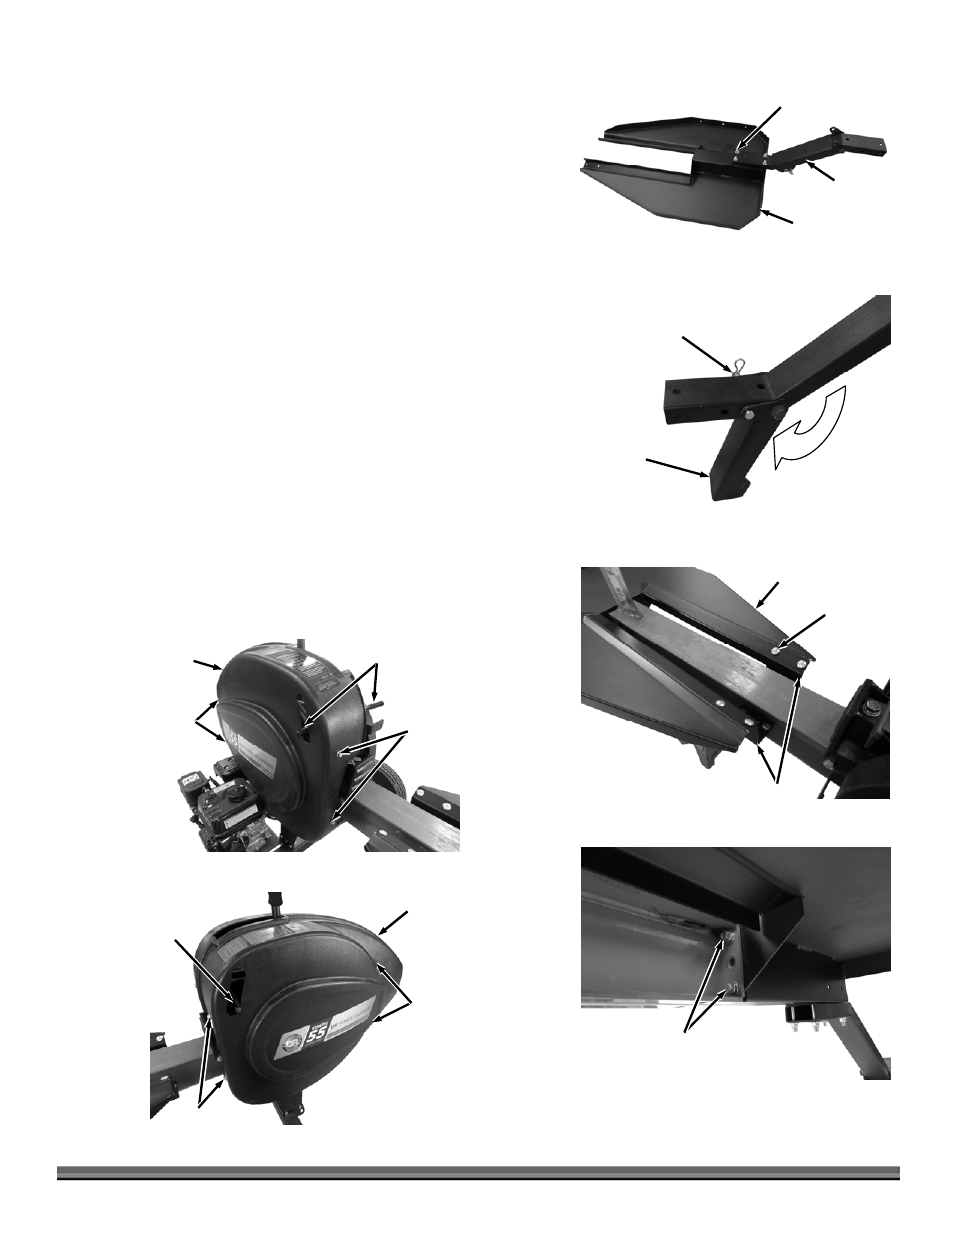
2. Install the Tow Bar to the end Tray with four Bolts and Lock Washers (from
product package) using two 9/16" Wrenches (Figure 8).
3. Pull the Hitch Clip and Clevis Pin from the Leg and fold it to the down
position. Align the holes and secure the Leg with the Clevis Pin and Hitch
Clip (Figure 9).
4. For easier alignment in the following step, slightly loosen the Side Bracket
Hardware using a 9/16" Wrench (Figure 10).
5. Position the Tray onto the Side Brackets and install the four Carriage Bolts
and Locknuts (from the tray kit) by hand.
6. Install the four Bolts, Lock Washers and Flat Washers (from the tray kit) to
secure the Tray to the end of the Beam using a 9/16" Wrench (Figure 11).
7. Tighten all remaining Tray hardware using a 9/16" Wrench.
Installing the Flywheel/Belt Guards
1. Cut the Straps from the Guards with Wire Cutters and separate them.
Note: Observe the mounting bracket locations for aligning the guards and also the
Safety Interlock levers that will fit into the slots of the guards. The
engagement handle may need to be held slightly forward to allow for
clearance with the cover while installing.
2. Position the right side Guard half onto the Splitter and secure with four
Flange Bolts using a 9/16" Wrench (Figure 12).
3. Position the left side Guard half onto the Splitter with the edge overlapping
the right side half and secure with four Bolts using a 9/16" Wrench (Figure
13).
Flange
Bolts
Figure 12
Safety Interlock
Lever
Guard
Flange
Bolts
Tray
Figure 8
Bolts and Locknuts
Support
Leg
Hitch Clip
and Clevis Pin
Figure 9
Support
Leg
Tray
Figure 10
Side Brackets
Bolts and
Locknuts
Bolt, Lock Washer
and Flat Washer
Figure 11
Tray
Beam
Flange
Bolts
Figure 13
Safety
Interlock
Lever
Guard
Flange Bolts