Changing and adjusting the belts – DR Power RapidFire 5.5 HP Subaru (July 2013 - Present) Operating Manual User Manual
Page 17
CONTACT US AT www.DRpower.com 17
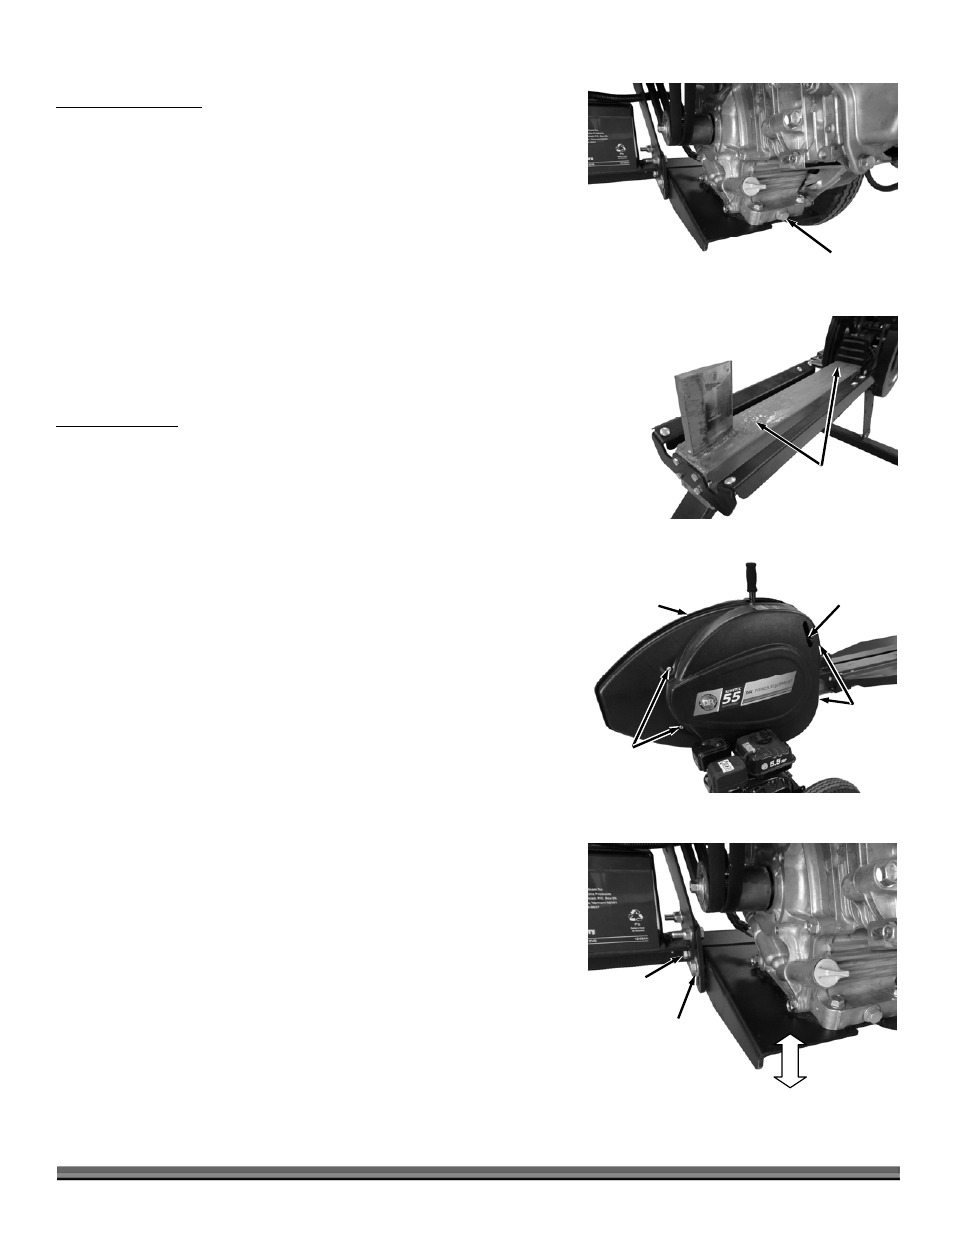
Changing Engine Oil
One of the easiest methods to remove oil from this Engine is to use a siphon
style Oil Extractor. If you do not have one you can purchase it from us at
www.DRpower.com.
Tools and Supplies needed:
Clean Approved Container for used Oil
9/16" Wrench (Subaru)
10mm Wrench (DR)
1. Place an approved Container under the Oil Plug.
2. Remove the Oil Drain Plug with a 9/16" Wrench (Subaru) or a 10mm
Wrench (DR) to drain the Oil into the Container (Figure 28).
3. Reinstall the Oil Drain Plug.
4. Add oil as described in “Adding Oil and Gasoline” in Chapter 2.
Rail Maintenance
Between each use of the LOG SPLITTER, we recommend applying a rust
preventative (Fluid Film or equivalent) to any bare metal areas on the top of the
rail (Figure 29). This will assure the smoothest return action of the ram.
Changing and Adjusting the Belts
Tools and Supplies needed:
Two 9/16" Wrenches
DR Belts
1. Remove the four Flange Bolts that secure the Right Hand Guard with a
9/16" Wrench and remove the Guard from the Splitter (Figure 30).
2. Loosen the front two Engine Mount Pivot Bolts and Locknuts with two 9/16"
Wrenches (Figure 31).
3. Loosen the rear two Angle Setting Bolts with Flat Washers using two 9/16"
Wrench.
4. Pivot the Mount up slightly and remove the Belts.
Note: The weight of the Engine should be enough to tension the Belts properly but
depending on hardware looseness and cleanliness of Engine Mount pivot
area, you may need to push down slightly to aid in proper tension. The Belts
perform best with a slight amount of slack to allow for some slippage when
the Wedge encounters a tough log. Too much tension may stall the engine or
slip the belt on the engine pulley.
5. Install the new Belts and adjust tension as needed.
6. Tighten the two Engine Mount Bolts that are at the center of the machine
(shown) first and then tighten the outer two Bolts.
7. Position the Guard and secure with the four Flange Bolts using a 9/16"
Wrench.
Figure 29
Top of Rail
Oil Drain
Plug
Figure 28
Front Bolts
and Locknuts
Figure 31
Loosen Belts
Tighten Belts
Rear Bolts and
Flat Washers
Flange
Bolts
Figure 30
Safety
Interlock
Lever
Guard
Flange
Bolts