Replacing the battery, Battery care (electric start models) – DR Power RapidFire 5.5 HP Subaru (July 2013 - Present) Operating Manual User Manual
Page 19
CONTACT US AT www.DRpower.com 19
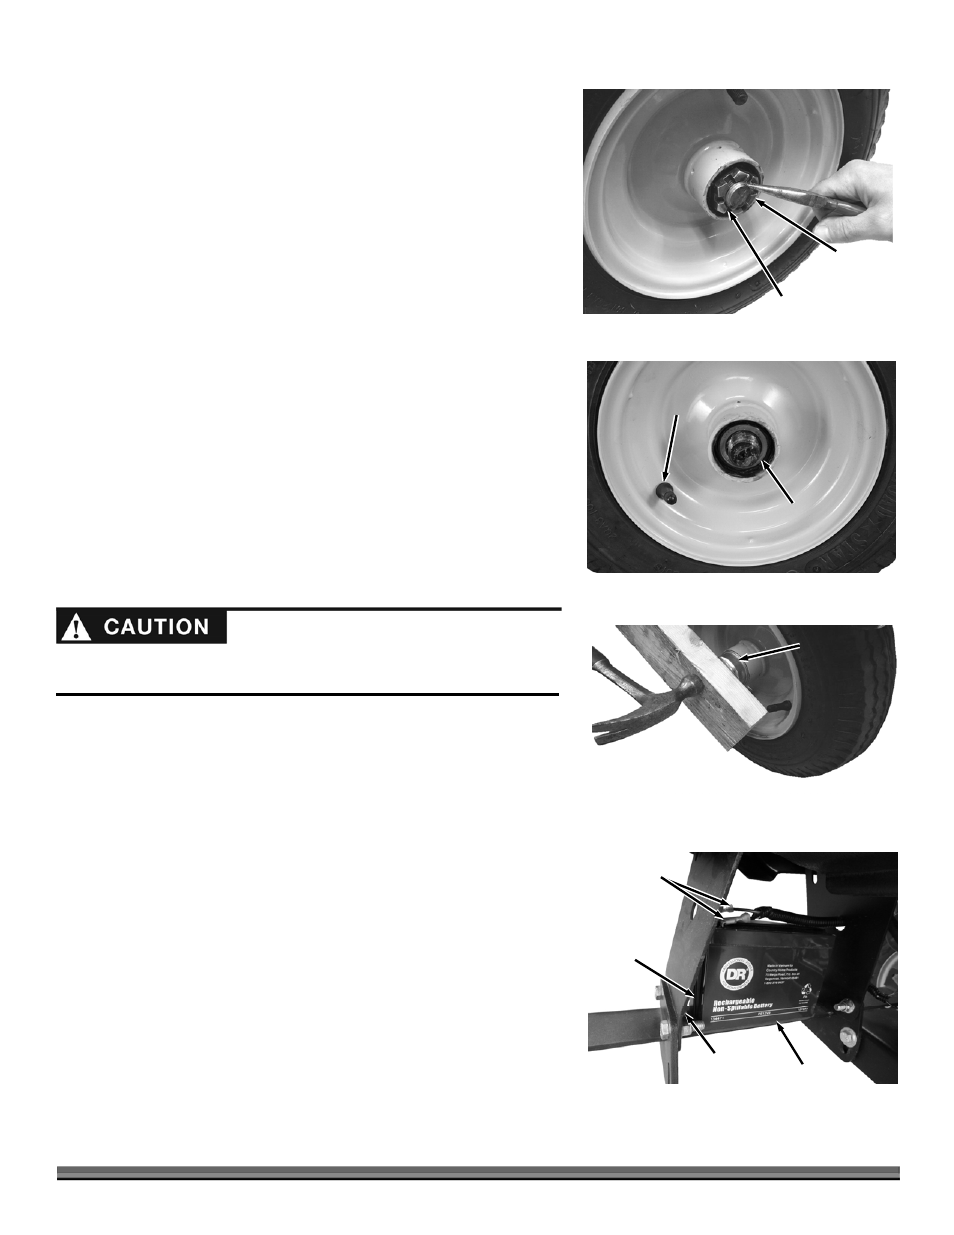
3. Straighten the ends of the Cotter Pin with Needle Nose Pliers so the Cotter
Pin can be pulled from the hole in the Axle (Figure 36).
4. Remove the Castle Nut with the Channel Lock Pliers.
5. Pull the Wheel assembly and Taper Bearing from The Axle (Figure 37).
6. Slide a Wheel Assembly onto the Axle Shaft with the Valve Stem facing out.
The open side of the Wheel Hub with the loose Taper Bearing will be facing
towards you.
7. Screw the Castle Nut onto the Axle and tighten it with an Adjustable
Wrench to seat the Bearings (Figure 36).
8. Back the Castle Nut off and then snug it up to the Bearing lightly.
9. Insert a Cotter Pin through the slots of the Castle Nut and into the hole in
the Axle.
10. Bend the ends of the Cotter Pin with Needle Nose Pliers to secure it.
11. Place the Dust Cap onto the Wheel Assembly and secure it by placing a
piece of wood over it and pounding lightly with a Hammer until it is seated
against the lip (Figure 38).
12. Jack the back of the Splitter up and remove the Jack Stands.
13. Lower the Splitter to the ground.
Replacing the Battery
Tools Needed:
Two 7/16" Wrenches
1. Disconnect the Battery Terminals (Figure 39).
2. Remove the Bolts and Locknuts that secure the Battery Strap using two 7/16"
Wrenches.
3. Remove the Strap and the old Battery.
4. Install the new Battery.
5. Install the Battery Strap and secure with the Bolts and Locknuts using two
7/16" Wrenches.
6. Attach the Battery Terminals. Black Wire to the negative black Terminal and
Red Wire to the positive red Terminal.
Battery Care (electric start models)
Proper care can extend the life of a Battery. Follow these recommendations to
ensure your Battery’s best performance and long life:
Do not allow the Battery charge to get too low. If the machine is not used,
charge the Battery every 4 – 6 weeks. Operate the engine for at least 45
minutes to maintain proper Battery charge.
Figure 36
Castle
Nut
Cotter Pin
Figure 38
Wheel
Assembly
Dust Cap
Battery
Figure 39
Battery
Terminals
Bolt and
Locknut
Battery
Strap
Figure 37
Taper
Bearing
Valve
Stem
When working with batteries take care not to short the positive terminal with
the battery strap