Replacing the wheels, Rotating the teeth (from dull to sharp edge) – DR Power 14.5 HP Pro (November 2014 - Present) User Manual
Page 15
CONTACT US AT www.DRpower.com 15
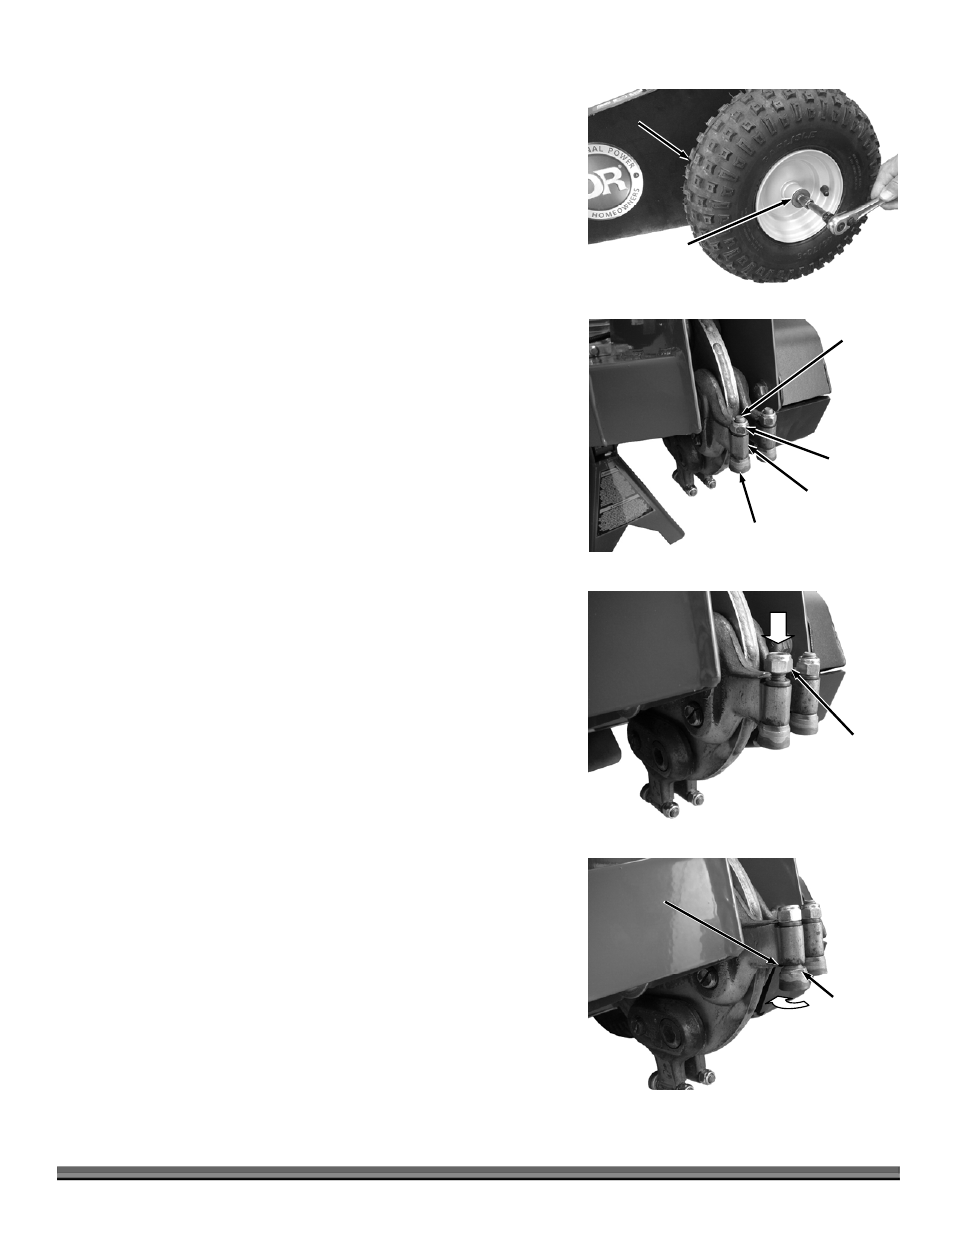
Replacing the Wheels
Tools and Supplies needed:
1/2" Wrench
Jack Stand or Block
1.
With the Stump Grinder on the ground, remove the Bolt, Lock Washer and
Large Flat Washer from the Axle with a 1/2" Wrench (Figure 20).
2.
Block the Stump Grinder up so the Wheels are off the ground and remove
the Wheel.
NOTE: The Wheel on the right hand side has a Bushing in each end of the Wheel
Hub (make sure the Bushings are in place when installing the Wheel). The
left hand Wheel has a Keyway built in with a key to hold it from spinning
when the Brake is applied (make sure the Key is installed in the slot when
installing the Wheel).
3.
Reinstall the Wheel and secure with the Bolt, Lock Washer and large Flat
Washer using a 1/2" Wrench.
Rotating the Teeth (from dull to sharp edge)
Tools and Supplies needed:
1/2" Wrench
Dead Blow Hammer
Gloves
CAUTION! Wear Gloves when working near the teeth. Without Gloves your
hands may get cut from the sharp edges.
1.
Block the front end of the Stump Grinder so the Cutter Head is just off the
ground.
Note: It may help to mark the "Dull" cutting edge prior to rotating the Teeth so you
can be sure you have rotated to an unused cutting edge.
2.
Loosen the Locknut on the Tooth until the top of the Locknut is flush with
the top of the Tooth threads (Figure 21).
3.
Lightly tap on the top of the Locknut with a Dead-blow Hammer so the
Tooth will drop down away from the Tooth Mount (Figure 22).
4.
Rotate the Tooth until the next flat area on the side of the Tooth is aligned
with the flat area of the Mount (Figure 23).
5.
After the tooth has been turned to the desired position push the Tooth up
into the Mount and tighten the Locknut. There are no torque specification
needed for the Locknut, but make sure you tighten them firmly.
6.
Repeat steps 2-5 for the remaining Teeth as needed.
Tire
Figure 20
Bolt and
Washer
Locknut
Figure 21
Tooth
Tooth
Mount
Tooth
Threads
Locknut
Figure 22
Flat Area
on Tooth
(3 places)
Flat Area
on Mount
Figure 23