Replacing the cutting teeth, Replacing the clutch – DR Power 14.5 HP Pro (November 2014 - Present) User Manual
Page 16
16
DR
®
STUMP GRINDER
Replacing the Cutting Teeth
Tools and Supplies needed:
1/2" Wrench
1/2" Socket
Torque Wrench
Dead Blow Hammer
Gloves
CAUTION! Wear Gloves when working near the teeth. Without Gloves your
hands could suffer cuts from the sharp Teeth.
1.
Block the front end of the Stump Grinder so the Cutter Head is just off the
ground.
2.
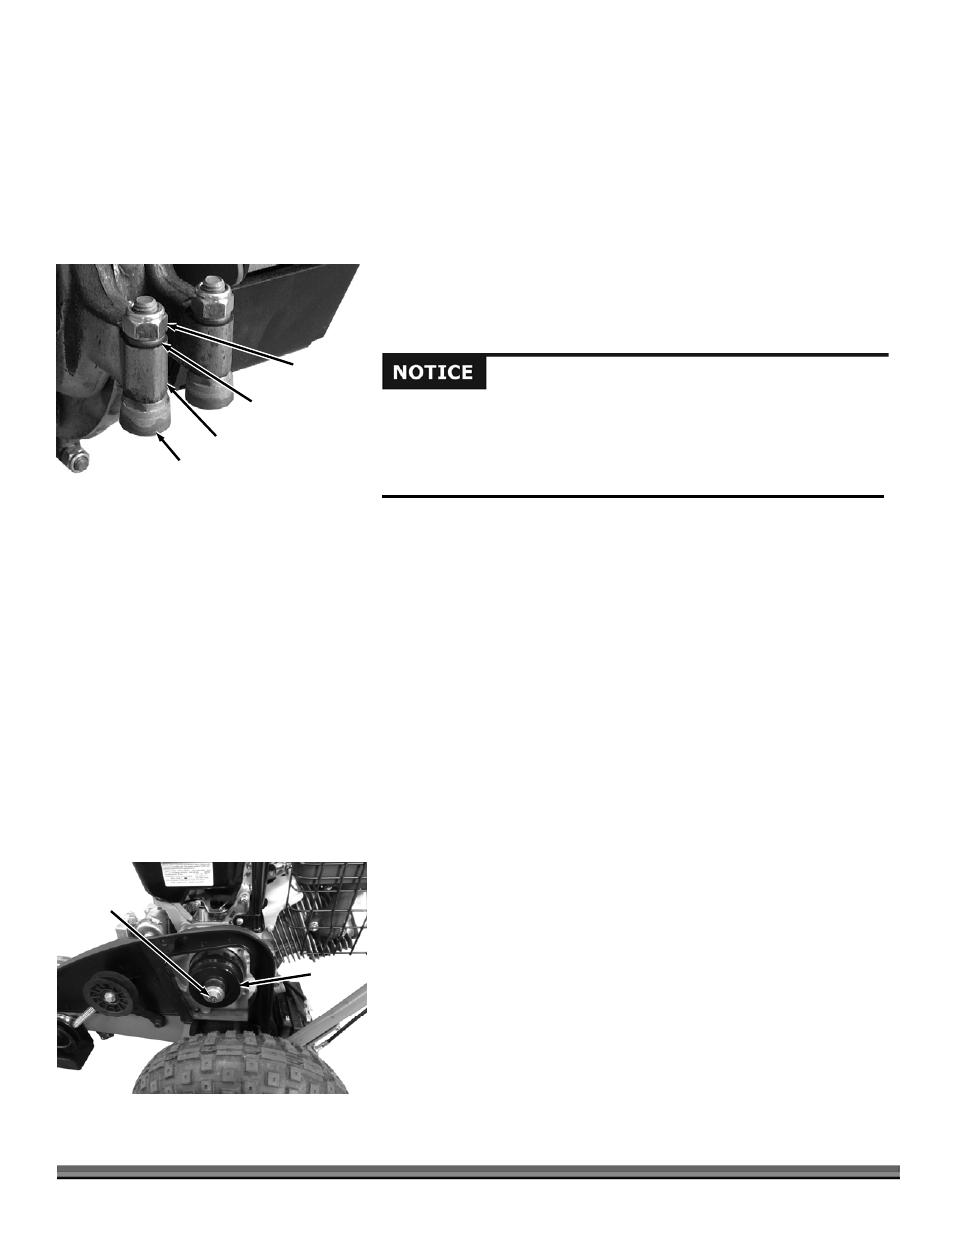
Remove the Locknut from the tooth threads (Figure 24).
3.
Lightly tap on the top of the Tooth Threads with a Dead-blow Hammer to remove the Tooth from the Tooth Mount.
Note: In the next step make sure that the flat spot on the mount and one of the flat spots on the Tooth are aligned properly before
tightening the Tooth hardware. Ensure that the Spacer Stays in position at the Locknut end of the Tooth.
4.
Insert a new Tooth into the Mount and hold it up into position in the Mount as you secure with a new Locknut. Torque the
Locknut to 20 ft. lbs.
5.
Repeat steps 2 through 4 for the remaining Teeth as needed.
CAUTION! Check wear of the Head Assembly each time the Teeth are replaced. Replace the Head Assembly if it is damaged or
worn. Ensure that all parts are secure and tight. Large Allen Head Bolts should be at 180 ft. lbs. torque.
Be sure to use the new Locknuts provided with the replacement teeth.
Failure to replace the Head Assembly when damaged or worn may result in Cutting Teeth coming loose and damaging
the machine.
The Locknuts should be snug, but do not over tighten.
Replacing the Clutch
Tools and Supplies needed:
1/2" Wrench (Premier)
5/8" Wrench (Pro and Pro-XL)
Never Seize type Grease
Dead Blow Hammer
1.
Remove the outer Belt Guard and Belt as described in “Replacing the Belt”
on page 15.
2.
Place a 1/2" Wrench (Premier) or 5/8" Wrench (Pro and Pro-XL) onto the
Clutch Bolt and rotate the Wrench counterclockwise until you feel some
resistance (Figure 25).
Clutch
Figure 25
Bolt, Lock
Washer and
Flat Washer
Locknut
Figure 24
Tooth
Tooth Mount
Spacer
If you tip the machine back on the Handlebars (only recommended
temporarily for service), make sure you turn off the fuel (see Figure 1 on page
6). Never tip the machine back on the Handlebars for long periods or for
storage. Oil will get into the muffler if the machine is tipped completely back
for long periods of time and could damage the engine.