Lubricate cables, Adjusting the handlebars – DR Power 14.5 HP Pro (November 2014 - Present) User Manual
Page 17
CONTACT US AT www.DRpower.com 17
3.
Hit the Wrench sharply with a Dead Blow Hammer to start the Bolt turning
on the Engine Shaft.
4.
Remove the Bolt, Lock Washer (Premier), Flat Washer, Spacer (Pro and Pro-
XL), Clutch and Key (Premier) from the Engine Shaft.
5.
Apply a never seize type grease to the Engine Shaft and install the new
Clutch and Key (Premier, align the Clutch Key Slot with the Key on Engine
Shaft) and secure with the hardware using a 1/2" Wrench (Premier) or 5/8"
Wrench (Pro-Pro-XL).
Lubricate Cables
Supplies needed:
SAE 30 Oil
1.
Lubricate the upper ends of the Throttle and Brake Cables with SAE 30 Oil
where the cable goes into the sheathing.
2.
Work the Cable Levers to work the Oil in between the Cable and Sheathing.
Adjusting the Handlebars
Supplies needed:
Two 9/16" Wrenches
1/2" Wrench
1.
Remove the left Wheel as described in the “Replacing the Wheels” section.
NOTE: The Brake Lever can be locked to aid in loosening the Hardware in the next
step, but must be unlocked to remove the Brake Drum.
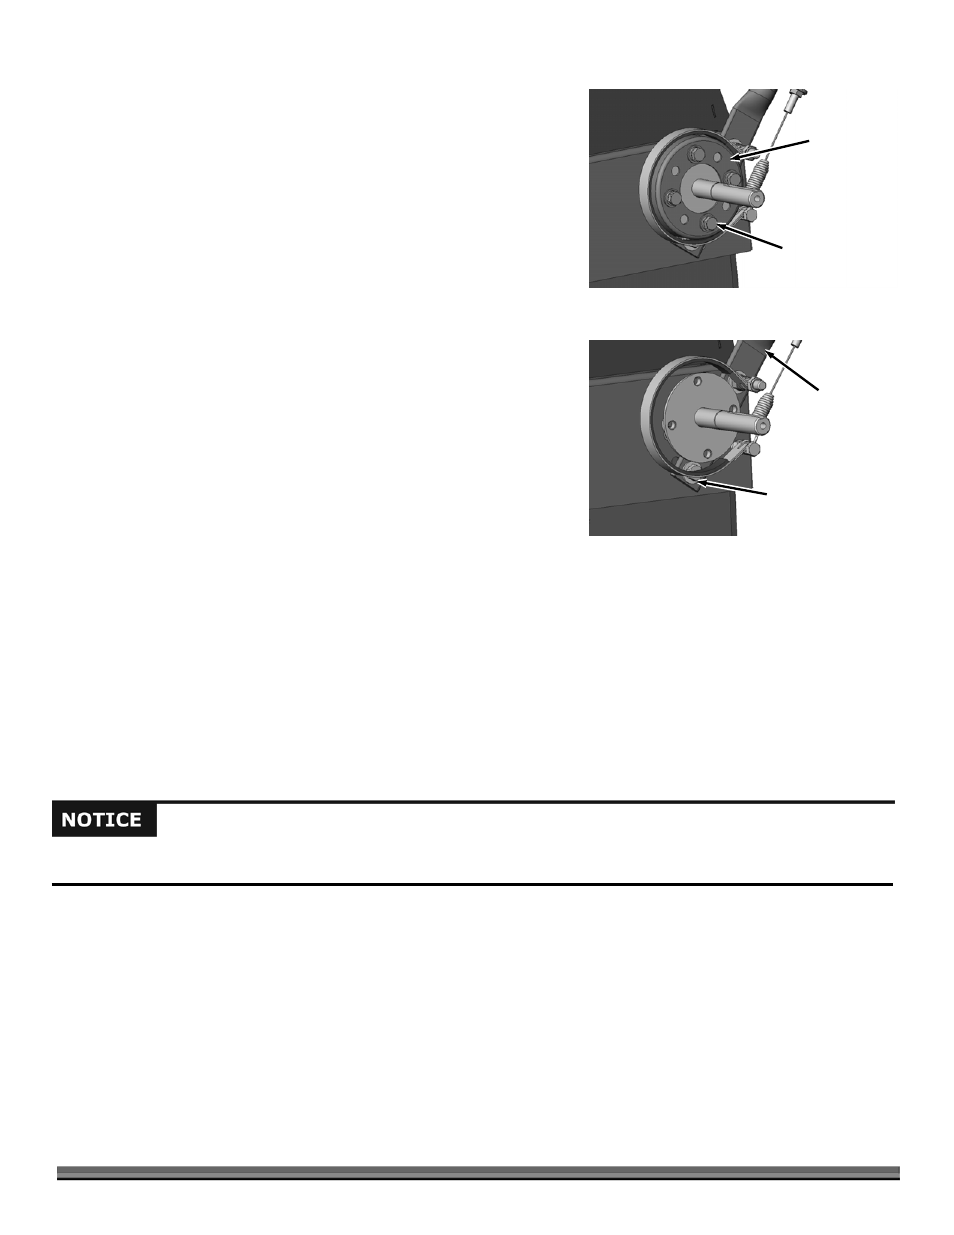
2.
Remove the four Bolts, Lock Washers and Flat Washers from the Brake Drum with a 1/2" Wrench and pull the Drum from the
Axle (Figure 26).
3.
Remove the bottom Bolt, Flat Washers and Locknuts from both Handlebars with two 9/16" Wrenches and just loosen the
upper Hardware (Figure 27).
4.
Rotate the Handlebars forward to adjust them higher or back to make them lower and align with the holes in the Frame.
5.
Reinstall the bottom Bolt, Flat Washers and Locknuts into both Handlebars and tighten all Handlebar Hardware with two
9/16" Wrenches.
6.
Reinstall the Brake Drum and Wheel on the left side of the machine.
Bolt, Lock Washer
and Flat Washer
Figure 26
Brake Hub
Bottom Bolt, Flat
Washers and Locknut
Figure 27
Handlebar
When the Handlebars are adjusted to the highest setting, you should change the position of the Exhaust Deflector so it is oriented
45º downward to the left so it is not pointing directly at the Handlebar. The paint may be damaged if the Deflector is not rotated.