Adjusting the brake – DR Power 14.5 HP Pro (November 2014 - Present) User Manual
Page 18
18
DR
®
STUMP GRINDER
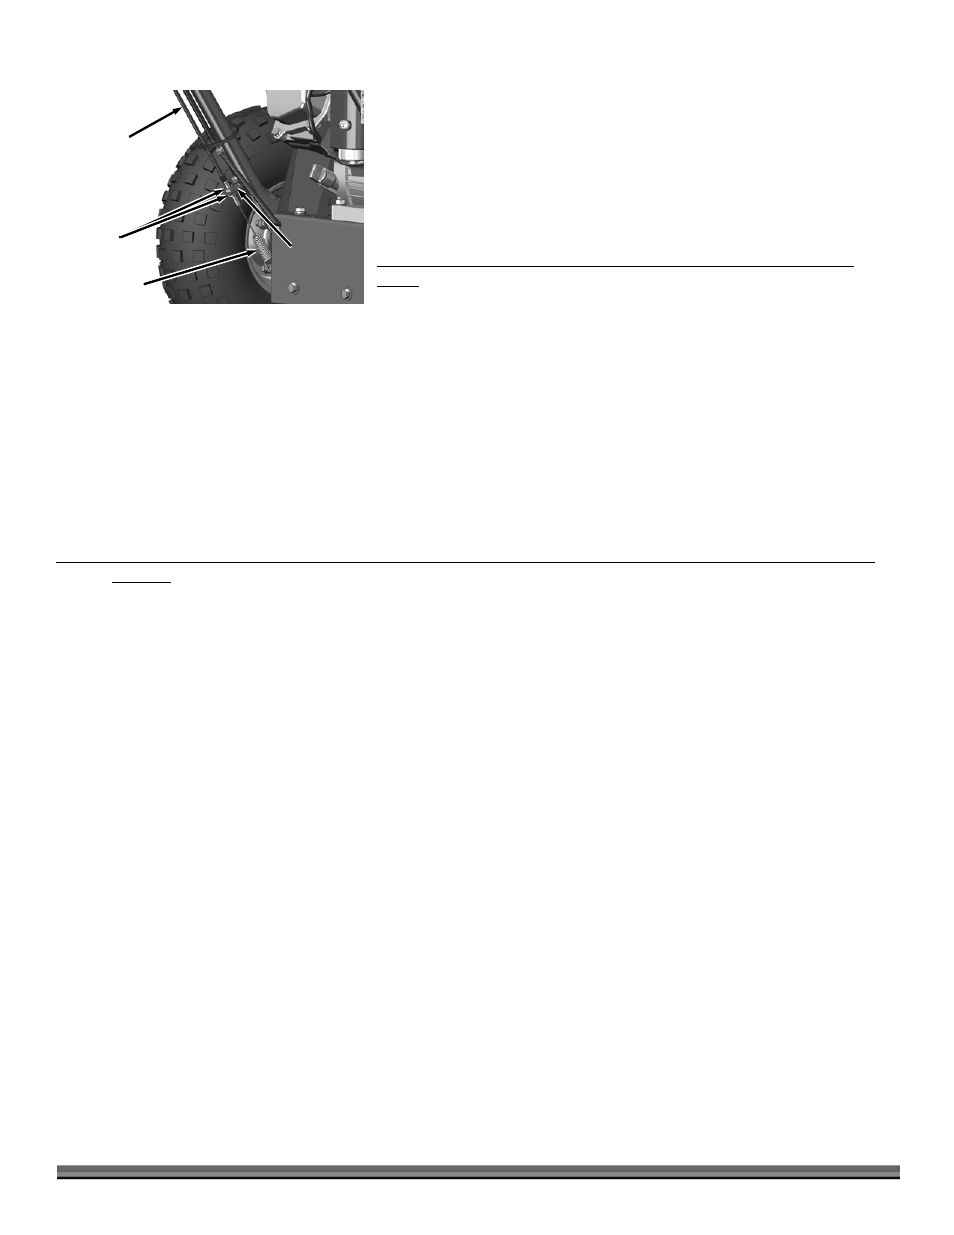
Adjusting The Brake
Tools and supplies needed:
1/2" Wrench
Blocking Material
NOTE: You must block the machine up so the left-side Wheel is just off the ground
and can rotate freely to perform the following steps.
Tightening the Brake Cable (if the Brake does not hold the Wheel in
place)
1.
Loosen the lower nut a few turns so it moves away from the Bracket (Figure
28).
2.
As you rotate the Wheel forward (with Wheel Lever unlocked), tighten the upper Nut until you feel a slight resistance at the
Wheel.
3.
Tighten the lower Nut up against the Bracket.
4.
Lower the Stump Grinder to the ground and test the Brake and pivoting (side to side) action.
5.
If the left-side Wheel rotates forward while the Brake Lever is locked, the Cable needs more tightening. Repeat steps above as
needed.
NOTE: When the Cable is adjusted correctly and the Brake Lever is locked, the left-side Wheel will still rotate in reverse (towards the
operator) with some effort, but should not rotate forward.
Loosening the Brake Cable
(if the Brake does hold the Wheel in place, but pushing the machine with the Brake off is
difficult)
1.
As you rotate the Wheel forward (with Wheel Lever unlocked), loosen the upper Nut until the Wheel turns more freely but you
still feel a slight resistance at the Wheel (Figure 28).
2.
Tighten the lower Nut up against the Bracket.
3.
Lower the Stump Grinder to the ground and test the Brake and pivoting (side to side) action.
4.
If the left-side Wheel holds when the Brake is applied, but the machine is hard to push ahead when the Brake is released, the
Cable needs more loosening. Repeat steps above as needed.
Adjusting
Nuts
Figure 28
Brake Cable
Spring
Bracket