DR Power VT1 (1-ton) (Feb 2012 - Present) User Manual
Page 12
12
DR
®
VERSA TRAILER
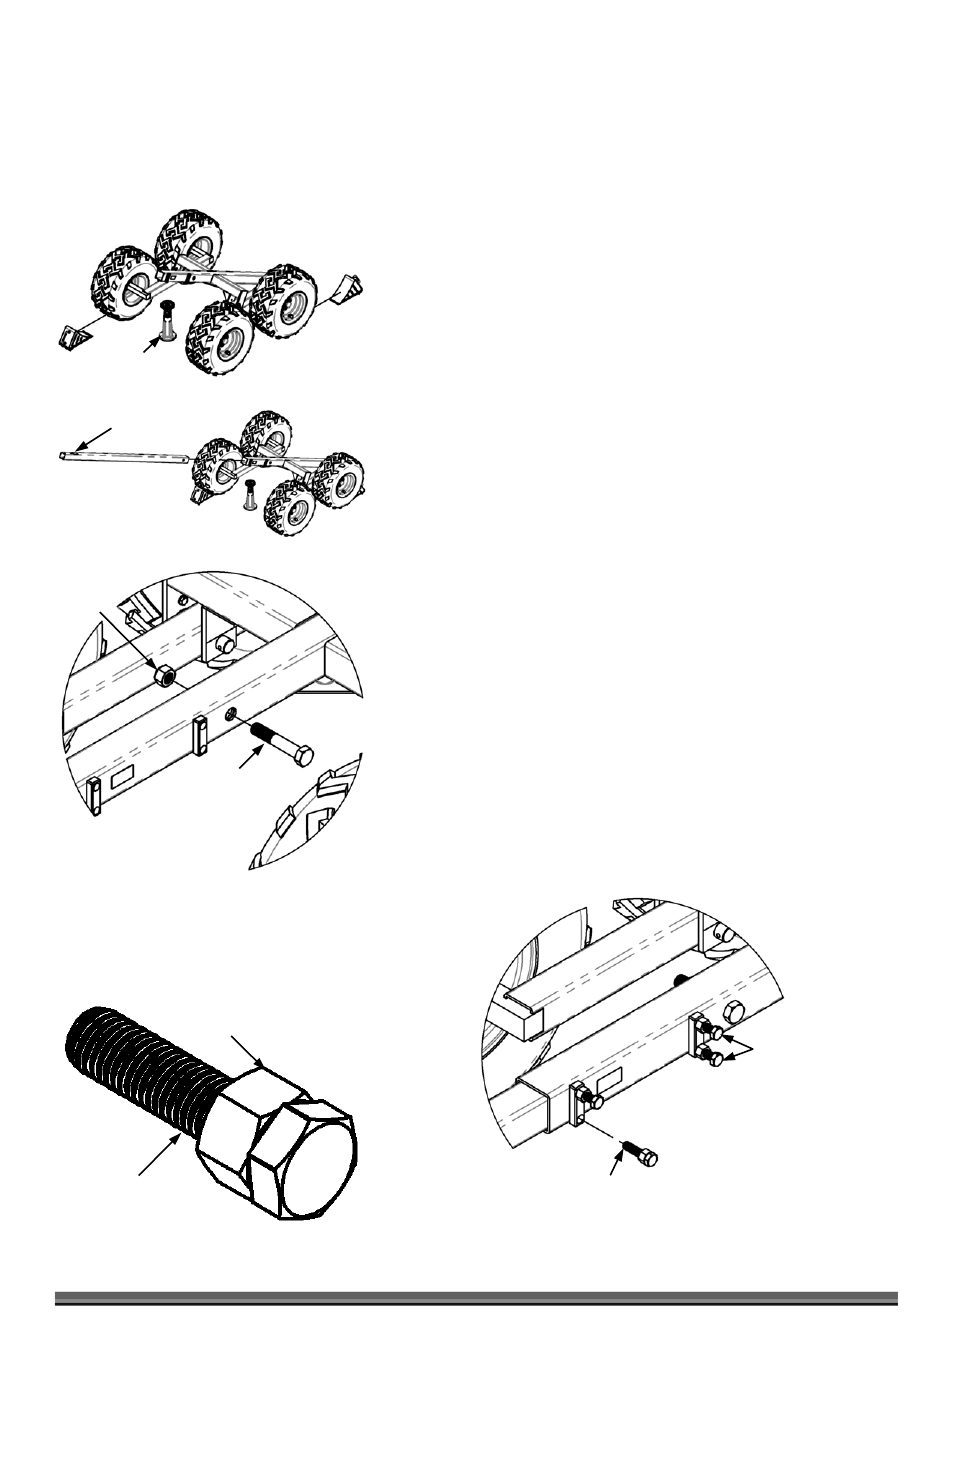
7. Place a Jack Stand under the front of the Main Frame, which should
naturally be tipped backwards (Figure 11). Also place one wheel chock in
front of one of the Front Wheels and one wheel chock behind one of the
Rear Wheels to ensure the Trailer will not roll on you during assembly.
8. Slide the Tow Bar (with the Warning Label on top) into the Main Frame,
lining up the Mounting Hole with the hole in the Main Frame (Figure 12).
Gently allow the weight of the Tow Bar to force the front of the Main
Frame down onto the Jack Stand.
9. Install a M20 x 110mm Bolt and Washer (Figure 13) in the Mounting Hole,
and install a M20 Lock Nut. Tighten with Adjustable Wrenches or a 30mm
Socket and an Adjustable Wrench.
10. Back the Jam Nuts on the four Retaining Bolts (Figure 14) all the way to
the head of the Bolts.
Note: You will need to back all Jam Nuts off, to the head of the Retaining Bolts for
all hardware shipped in the Hardware kit prior to installation (Figure 14)
. Be sure
to tighten the Bolt first and then secure it by tightening the Jam Nut.
11. Insert the four Retaining Bolts into the Bosses on the left side of the Main
Frame and securely tighten with an 18mm Socket (Figure 15).
12. Screw in the Jam Nuts against the Boss and tighten with an 18mm
Wrench.
Jam Nut
Retaining Bolt
Figure 14
Figure 11
Jack Stand
Figure 12
Warning Label
Figure 13
M20 x 110mm Bolt
M20 Lock
Nut
Retaining Bolt(s)
Figure 15
Final position of
the Jam Nut(s)