6 transport controls, 7 controller assignment – ESI K.ON User Manual
Page 12
K.ON
ESI
9 faders can send out MIDI controller values. They are divided into 3 groups. When the first
indicator LED next to the FUNC_B button is on, the faders are adjusting volume of channel 1 ~ 8;
when the second indicator is on, they adjust volume of channel 9 ~ 16. When the third indicator is
on, the user defined CSx MIDI controllers will be sent out instead. These 3 modes can be switched
by FUNC_B. Like the 8 controller knobs, the faders can be used together with knobs, number
buttons or +, - buttons after selecting them with the SELECT button. M.VOLUME on the lower left
adjusts the main volume.
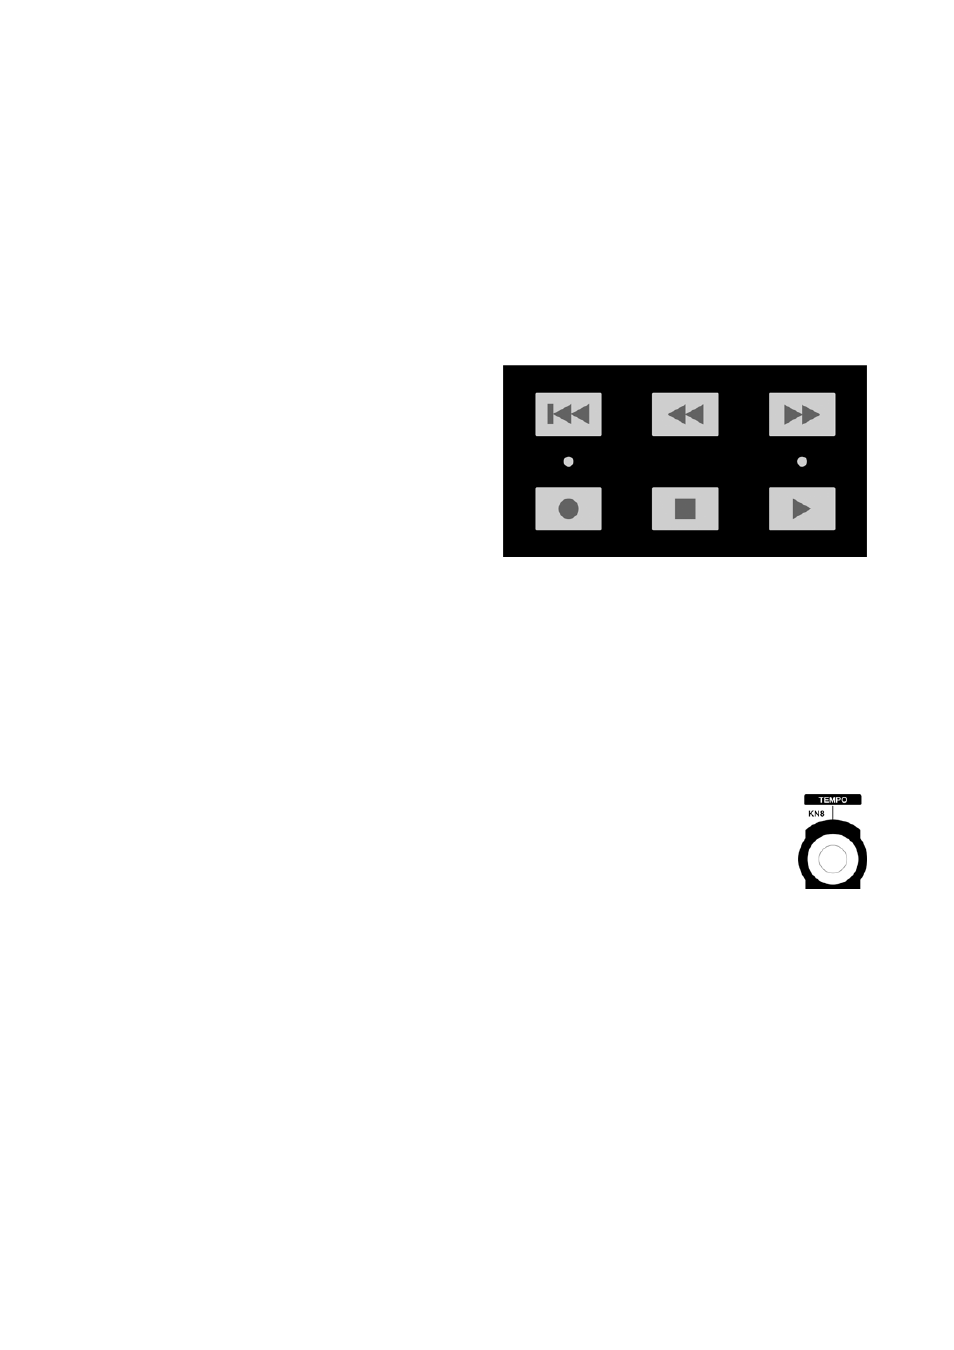
4.6 Transport Controls
The transport control buttons can be used to remote
control your sequencing software.
12
Please consult the manual of your audio / MIDI
sequencing or notation software on how to control
the transport functions remotely via MIDI.
The table in section 5.3 shows the MIDI controller
values K.ON is sending out. Depending on your
software, there might be a preset that matches these
values or there might be a learn function that detects the signals from K.ON and allows you to
assign them to functions of the software.
To start playback, you push the PLAY button. The LED above the button indicates the PLAY
mode. To start recording, you push the RECORD button. A red LED indicates the RECORD mode.
Please note that the PLAY and RECORD buttons can only be used after pushing STOP first as
PLAY and RECORD modes are exclusive, i.e. they cannot be used simultaneously.
Tempo
When in PLAY or RECORD mode, K.ON sends out MIDI sync clock information. The
tempo can be changed with the TEMPO controller knob (make sure to select the top row
of controllers via FUNC_A button first as described in section 4.5. The tempo can be
changed during playback and software or devices supporting MIDI clock information
will then automatically synchronize to K.ON. If the tempo value is changed when not in
PLAY or RECORD mode, it will be used the next time you push PLAY or RECORD.
4.7 Controller Assignment
The 8 controller knobs, 8 faders (the first, M.VOLUME, has a fixed function and cannot be
reassigned), Pitch & Modulation and the 2 pedal connectors can be used to send out different MIDI
controllers by reassigning different controller values to them. Typically you need to select the fader
/ knob, etc. for which you want to change the assignment first and then enter into the edit mode.
You can select the fader / knob via the SELECT button.
Assigning to Controller Knobs
Select the controller you want to assign via the SELECT button by pushing it several times and
browsing through the knobs. Press the CONFIGURE button and the system enters into edit mode
for the selected controller. The numeric display now displays the currently assigned MIDI controller