Installation – Fire Magic 53816 Cut & Clean Combo (Cutting Board & Trash Chute) User Manual
Page 3
REV 0 - 1106271049
L-C2-372
3
INSTALLATION
The Cut & Clean Combo was designed to be installed
over a trash can. A built-in trash can is available from your
FireMagic dealer.
Ensure a trash can is properly installed into your island,
then proceed as instructed below.
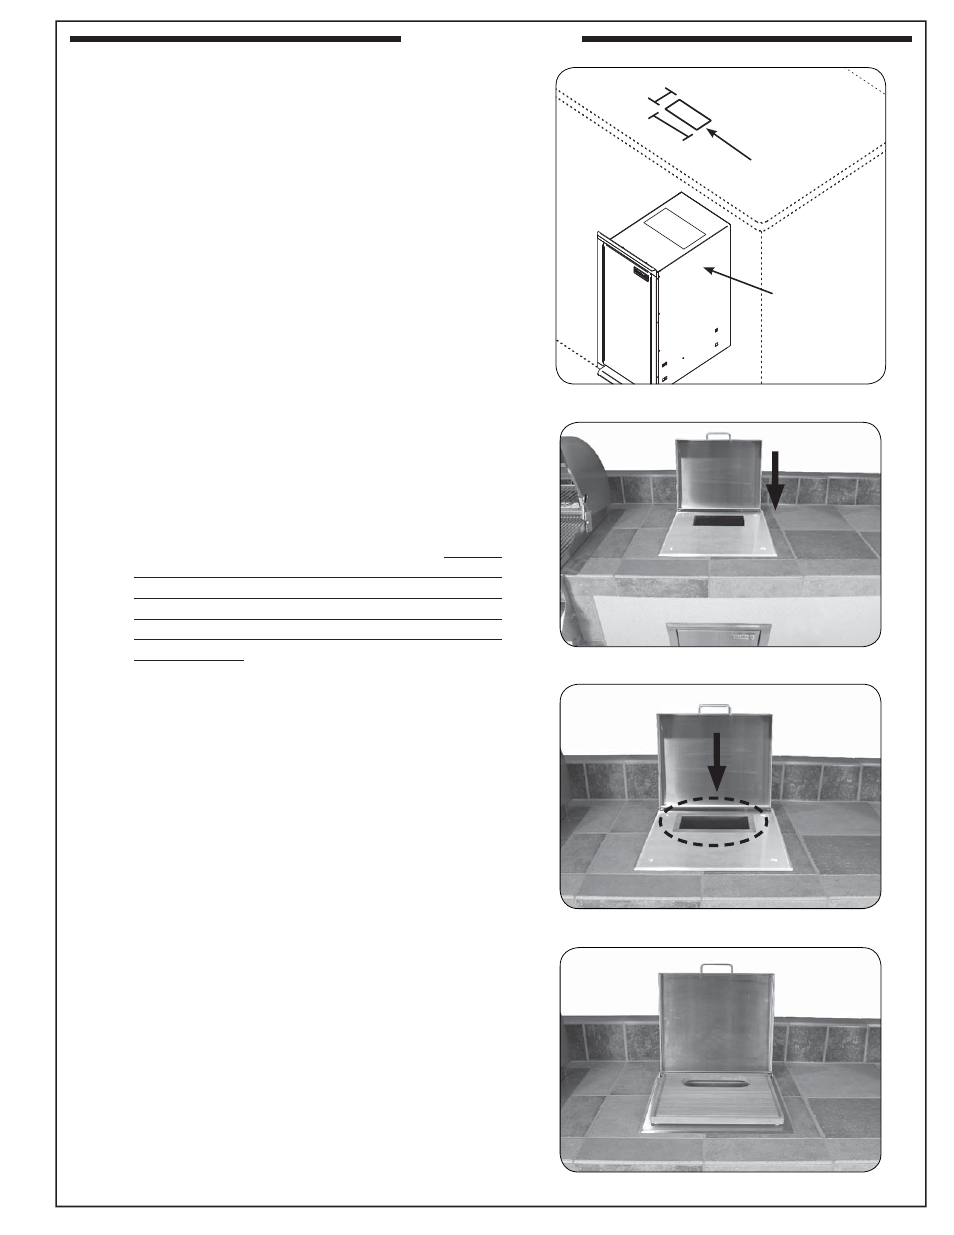
1. Determine the location on the countertop that the cut-
out (for the unit's trash chute) must be, based upon
the location of the trash can below (Fig. 3-1).
Note: If your unit is to be installed over a FireMagic trash
can; the cut-out must be directly above the opening
found on the top of the trash can. The opening on
the trash can must fi rst be knocked-out. Fig. 3-1
illustrates this setup.
2. Once the countertop cut-out is created, drop the unit
assembly into place (Fig. 3-2). Use silicone to secure
the unit to the countertop.
3. Drop the trash chute into place (Fig. 3-3).
Note: If your unit is to be installed over a FireMagic
trash can; the trash chute should properly and
completely drop down into the opening of the trash
can. The opening is larger than the trash chute
to allow for tolerance during installation. A cover
plate is supplied to close up any resulting gaps.
Secure the cover plate around the trash chute, and
onto the trash can by using silicone or appropriate
screws. Reference the orientation drawing on the
previous page.
4. Position the cutting board in place (Fig. 3-4).
Fig. 3-1 Countertop cut-out
Fig. 3-2 Drop unit into place
(countertop)
Countertop cut-out
for trash chute
4.5"
9.5"
(shown installed
over a FireMagic
trash can, not
included)
Fig. 3-3 Drop trash chute into place
Fig. 3-4 Position cutting board in place