Fitting options – Fronius Selectiva Plus (three-phase) User Manual
Page 34
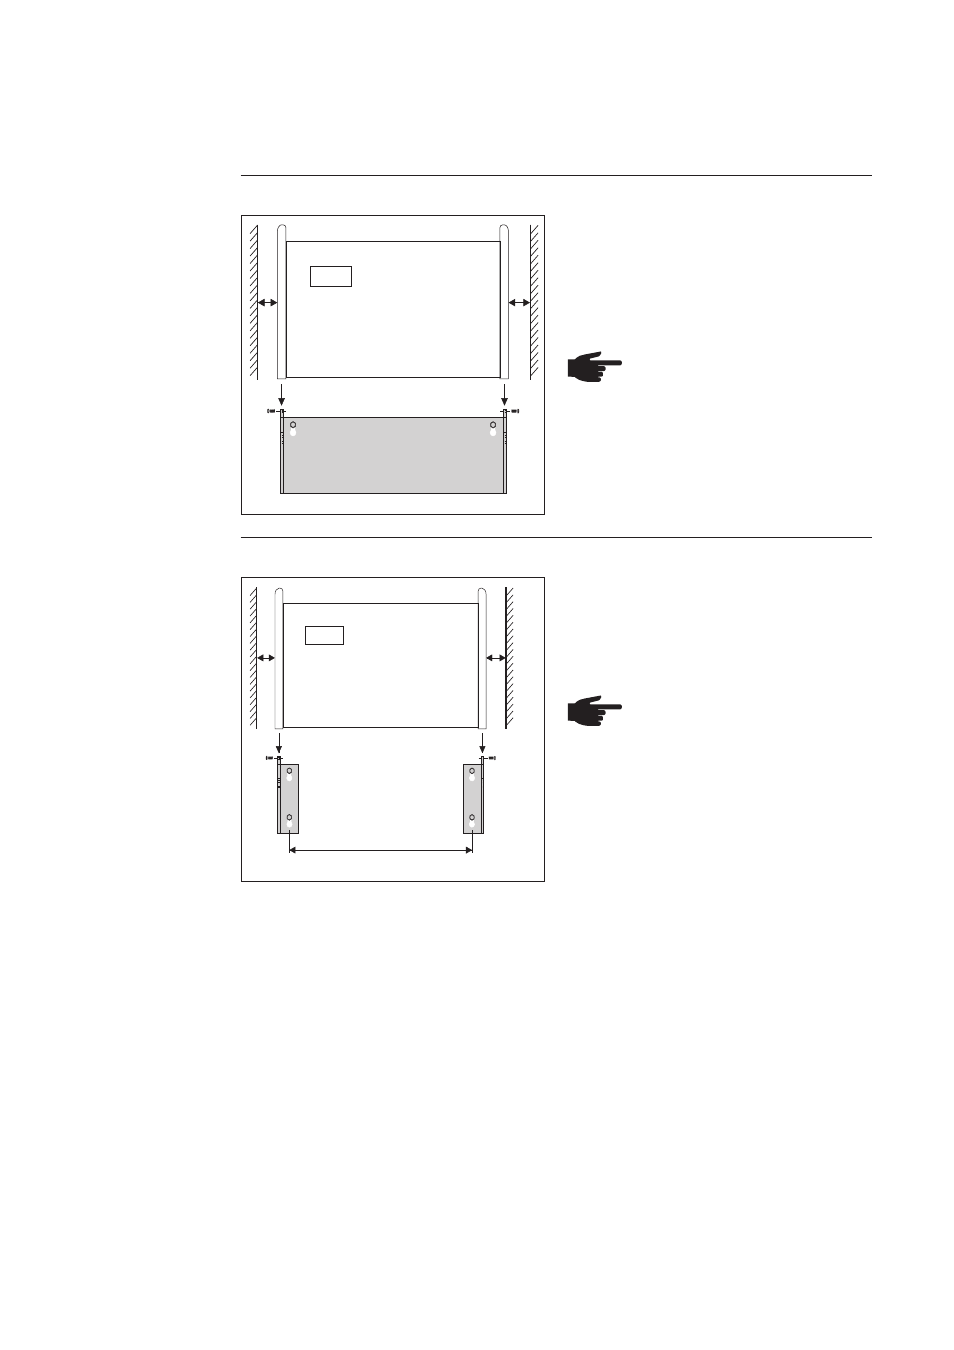
4
Fit the charger to the wall using the
optional wall bracket:
1.
Drill two holes in the wall, insert
suitable dowels and mount wall
bracket using 2 M6 x 80 mm hexagon
screws
NOTE! If fixing to the wall, please
note the weight of the charger.
Only fix to a wall that is suitable
to this purpose.
2.
Place charger on the wall bracket and
secure using the Torx screws inclu-
ded with the charger.
Fitting options
Mounting on the
wall
min. 100mm (3,94 inch)
min. 150mm (5,91 inch)
557 mm
min. 100mm (3,94 inch)
min. 150mm (5,91 inch)
Mounting Type 7 kW on the wall
Mount the charger on the wall using the
optional fitting panels:
1.
Drill holes in the wall, insert suitable
dowels and mount using 2 M6 x 80
mm hexagon screws for each panel
NOTE! If fixing to the wall, please
note the weight of the charger.
Only fix to a wall that is suitable
to this purpose.
2.
Place charger on fitting panels and
secure using the Torx screws inclu-
ded with the charger.
Mounting Type 14 kW on the wall
(21.93 in.)
Minimum clea-
rances
Important! Observe minimum clearances for ventilation purposes. Ensure an adequate
supply of fresh air. To ensure an adequate supply of fresh air, leave a minimum gap of
100 mm to the left and right of the cooling vents.