Test tank and demonstration – Greenheck Fire Ready Hood - GRRS User Manual
Page 20
20
Fire Ready Hood
Test Tank and Demonstration
WARNING
The safety pin must be in place in the extinguisher
tank until the unit is ready to be returned to service
or to be tested. Always wear safety glasses during
this procedure.
WARNING
Be careful of the protective caps on the nozzles.
These will fly off the nozzles when the unit is actuated.
Always wear safety glasses during this procedure.
Once the hood has been installed, it may be necessary
or desired to test the unit with a test tank filled with
pressurized nitrogen (optional).
1. Following the “Removing the Extinguisher Tank”
instructions on page 25, remove the extinguisher tank
and replace it with a test tank.
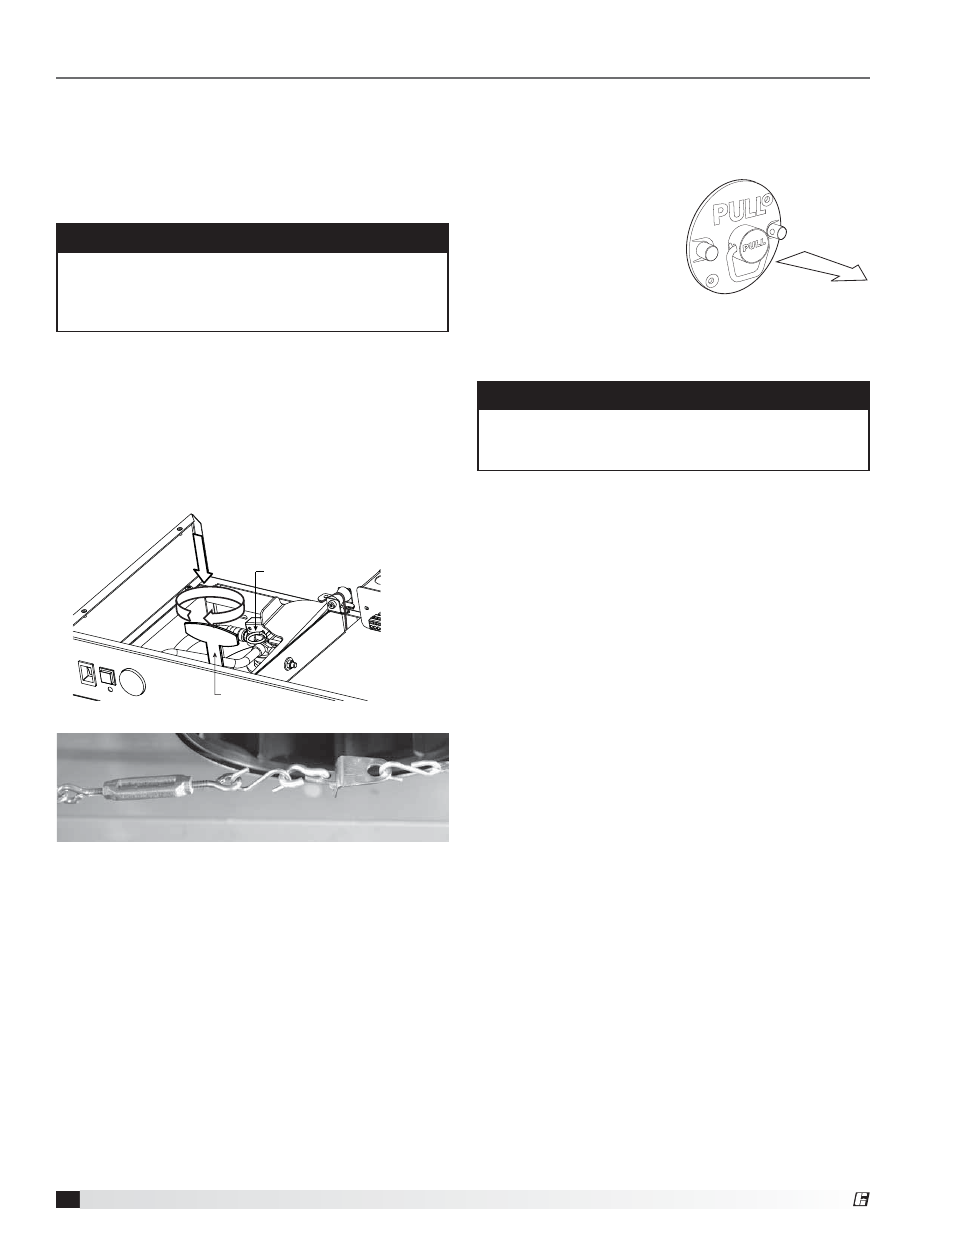
B. Manual Pull Kit (if installed)
Raise the unit to its operational position after the test
tank has been installed. Remove the plastic break rod
from the pull face with an allen wrench (refer to manual
pull station appendix for
more detailed information
on this). Pull the handle
to actuate the unit. Refer
to the “Manual Pull Kit”
section on the method to
return the pull station to an
operational state.
2. The unit can be actuated one of two ways:
A. Cut Test Links
Replace the actuator arm’s safety key. Loosen the
turnbuckle in the fusible link cable assembly (underside
of hood). Replace one of the fusible links with a test link.
Retighten the turnbuckle to the proper tension. Remove
the safety key and raise the unit to its operational
position. To test, cut the test link with wire cutters or
similar.
3. Nitrogen should be released from each nozzle
simultaneously.
4. Replace the test tank with the extinguisher tank, the
test link with a fusible link, and place the unit to its
operational position. The unit is now ready to be put
into service.
Turnbuckle
Fusible Link
Safety Key
Safety Pin
®