Greenheck AX Pitch Protractor - Warning: Must be printed at 100% on either 11x17 (tabloid) or European Standard A3 paper size User Manual
Pitch protractor for model ax, Instructions
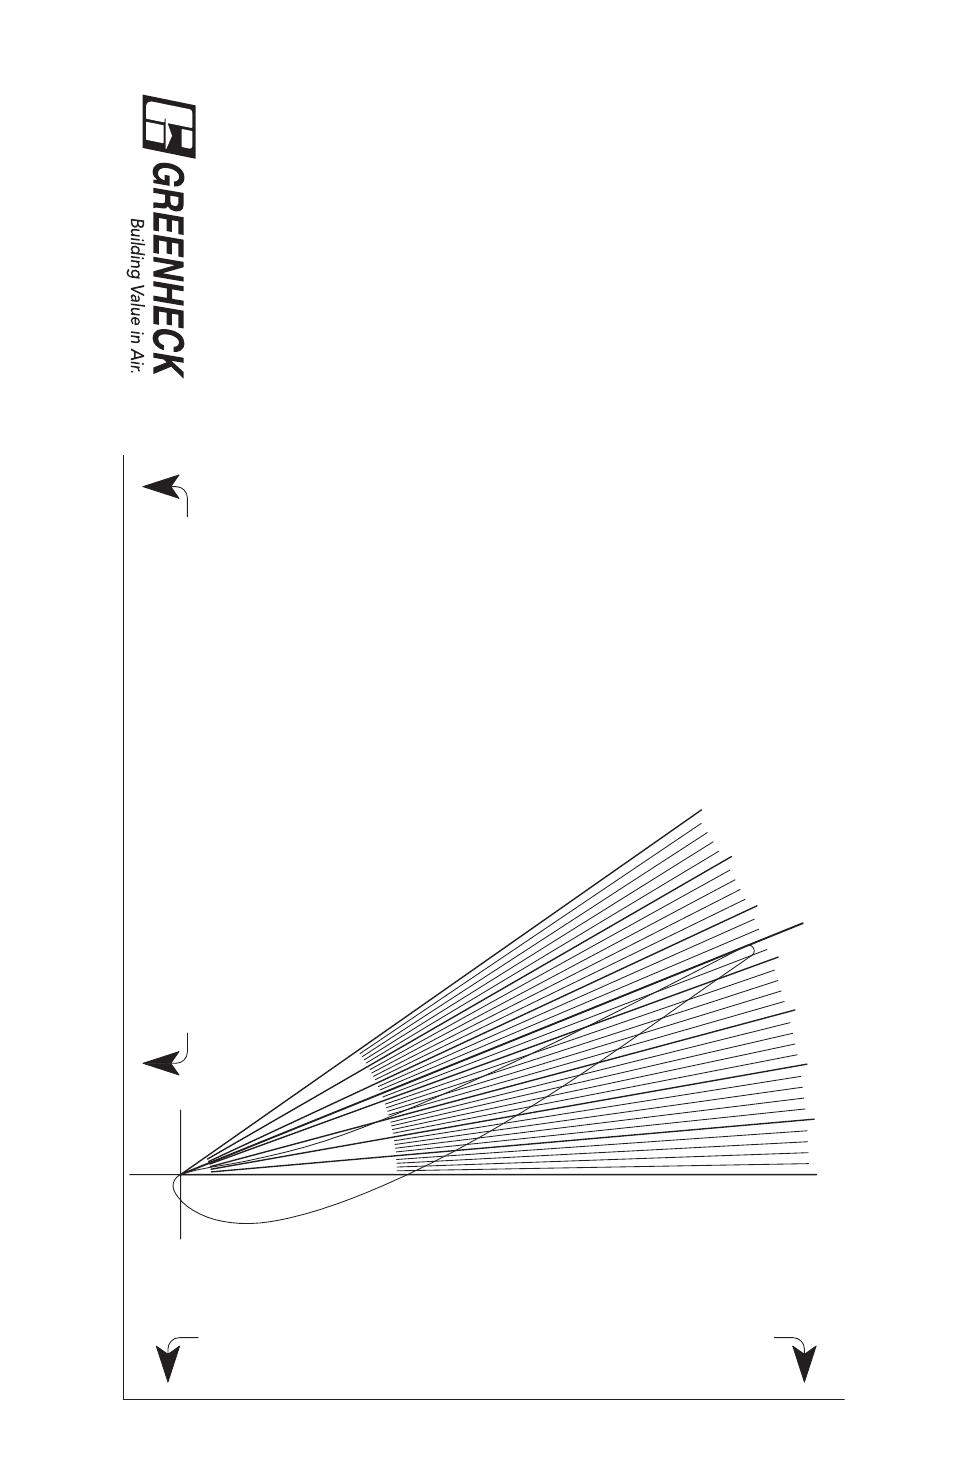
0º
5º
10º
15º
20º
25º
30º
35º
ALIGN THIS EDGE PARALLEL TO FAN CASING EDGE
ALIGN THIS EDGE TO F
AN CASING AXIAL LINE
22º
Instructions:
•
Follow Blade Pitch Adjustment Pr
ocedur
e as outlined in the AX High Performance
Axial Installation, Operating and Maintenance Manual (Part #464664).
•
Align pr
otractor template edges to corr
esponding axes shown on Pitch Pr
otractor
(next page).
•
Place leading edge of the blade on the p
rotractor c
rosshair as shown
. Identify
cur
rent pitch by locating deg
ree line the trailing edge lies on. (Example
has
22º pitch).
•
Adjust blade to desir
ed angle while maintaining leading edge on the cr
osshair
. This
requir
es r
epositioning the pitch pr
otractor
.
•
Use a marker to trace blade pr
ofile on Pitch Pr
otractor or fan casing.
•
A
djust r
e
maining blades to the traced pr
ofile.
•
Tighten blades as dir
ected in the AX
High Performance Axial Installation, Operating
and Maintenance Manual (Part #464664).
•
Remove Pitch Pr
otractor fr
om fan casing.
Note
:
The blade outline
is for a counte
r-clockwise A
X
fan.
Clockwise model blades have trailing edge of the blade
at the cr
osshair and leading edge on degr
ee line.
®
Pitch Protractor for Model AX
W
arning: Pitch Protractor for Model AX must be printed
at 100% on either 11x17 (T
abloid) or European Standard
A3 paper size.