Service manual, Aintenance – Hypertherm Powermax900 Service Manual User Manual
Page 54
3-27
M
AINTENANCE
Service Manual
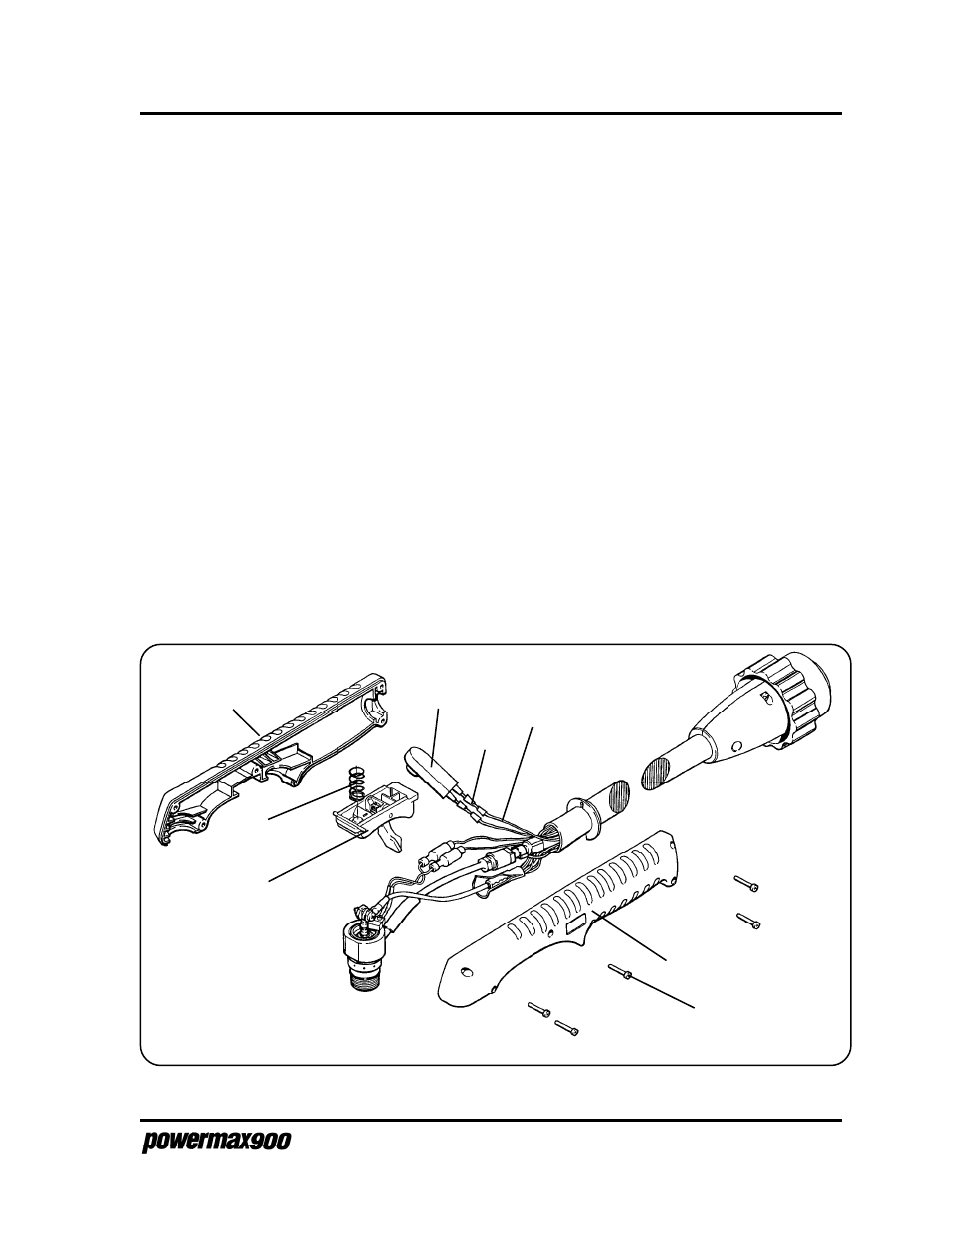
Handle
Figure 3-18 PAC125T Torch Switch Removal
Violet
Wires (2)
Splices
Torch
Switch
Screw (5)
Handle
Spring
Safety
Trigger
Torch Switch Removal and Replacement
To remove and replace the torch switch, order the torch switch repair kit (see Section 7 for part
number) and refer to the following procedure and Figure 3-18. See Section 7 for a complete list of
torch parts.
1.
Ensure the Powermax900 power switch is positioned to O (off), unplug the power
cable, and disconnect the gas supply.
2.
Remove the 5 screws that secure the handle halves together.
3.
Remove the torch switch from the handle.
4.
Remove the torch switch by cutting the 2 splices at the torch lead (violet wires).
5.
Replace the torch switch by crimping the switch wires and the violet wires from the torch lead
together with the splices.
6.
Install the torch switch back into the handle. Be certain that the torch switch slides into
position above the safety trigger, and that trigger movement activates the switch pushbutton
and then releases. While positioning the handle halves together, be careful not to pinch any
wires.
7.
Replace the 5 screws to secure the handle halves together.