3 assembly of mig/mag system – Kemppi MXP 37 Pipe Stee User Manual
Page 8
EN
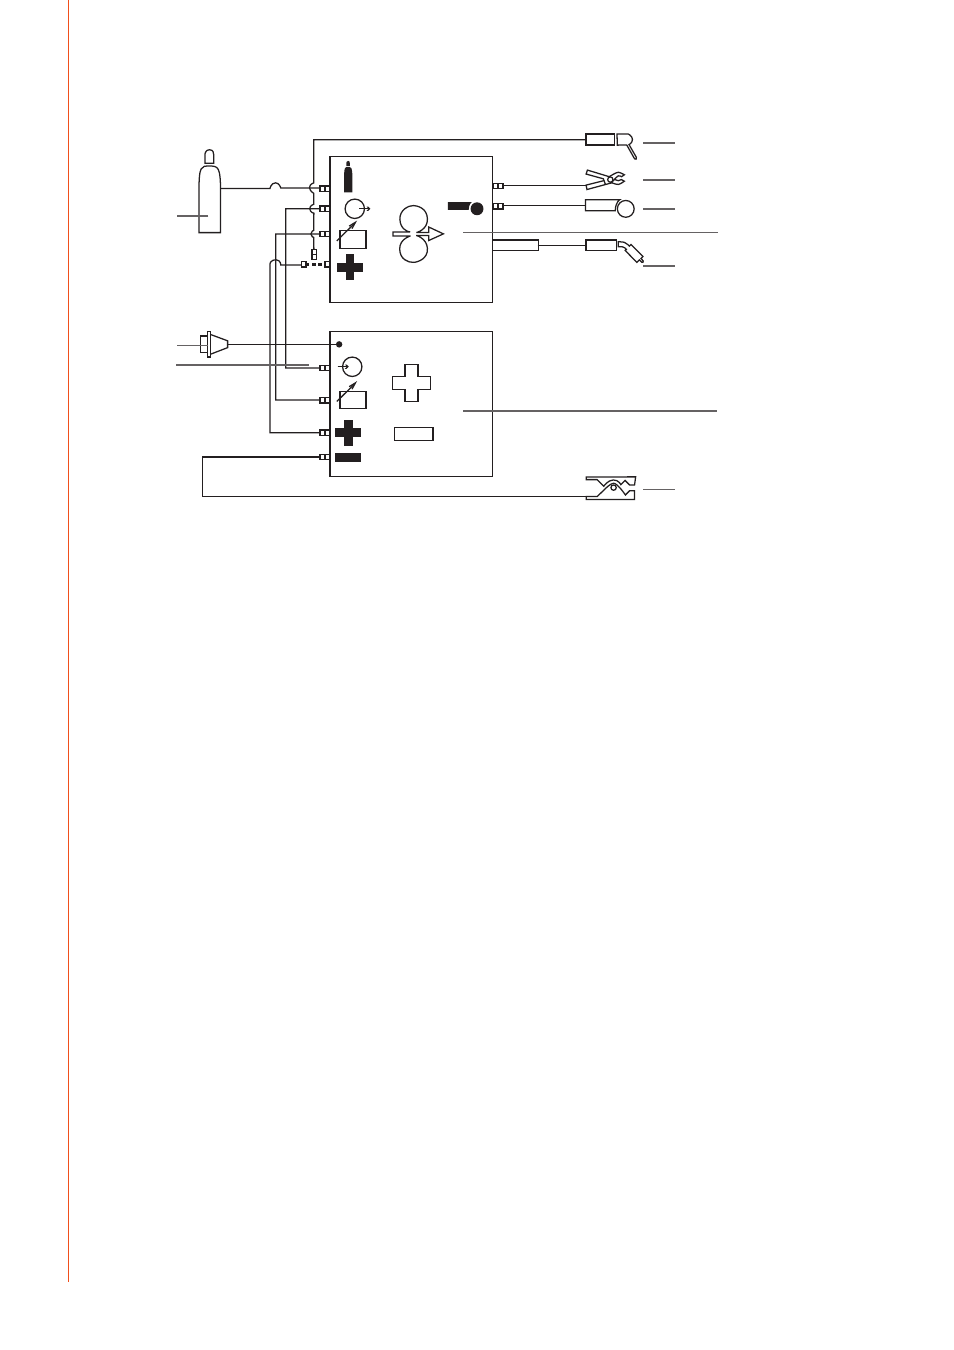
2.2.2 Air-cooled system: FastMig X 450 + MXP
1.
4.
5.
10.
6.
8.
2.
3.
7.
9.
V
V
1.
Wire feed unit
2.
FastMig X 450 power source
3.
Gas supply
4.
MMA electrode holder
5.
Remote control device
6.
Air-cooled welding gun
7.
Power cable
8.
Earth return cable and clamp
9.
Measurement cable (from power source to wire feeder)
10. Voltage sensing cable (from wire feeder to work piece)
NOTE!
MXP wire feeders can also be used with FastMig Pulse power source, but in that case
measurement cable and voltage sensing cable will not be used.
2.3 Assembly of MIG/MAG system
Assemble the units in the order mentioned below. Follow the additional mounting and
operation instructions delivered with each package.
1. Installation of power source
Read and follow the installation instructions given in the FastMig power source operating
manual.
2. Mounting of power sources to transport cart
Read and follow the instructions given in the transport cart assembly instructions.
3. Mounting the FastMig MXP wire feed unit to the power source
Remove the cover sticker on top of the power source. Screw the fastening pivot into the
power source – hand tighten only. Place the supplied plastic spacers over the pivot. Lift the
MXP wire feeder into place, locating over the pivot.
4. Connecting cables
Connect the cables in accordance with the equipment notes provided in this manual.
The polarity of the welding wire (+ or –) can be selected by connecting the wire feed unit to
either the positive or negative power source terminals.
Most MIG/MAG applications run the wire feed unit connected to the positive terminal of the
power source.
FastMig MXP 37 Pipe, MXP 38
6