Step-by-step – Kreg Crown-Pro User Manual
Page 6
800-447-8638
www.kregtool.com
Step-by-Step
Step-by-Step
Right Outside Corner:
• Position your Crown-Pro™
to the left of the blade.
• Rotate your saw away
from the Crown-Pro™.
Right Inside Corner:
• Position your Crown-Pro™
to the left of the blade.
• Rotate your saw towards
the Crown-Pro™.
Left Outside Corner:
• Position your Crown-Pro™
to the right of the blade.
• Rotate your saw away
from the Crown-Pro™.
Left Inside Corner:
• Position your Crown-Pro™
to the right of the blade.
• Rotate your saw towards
the Crown-Pro™.
Use the diagrams below to set your Crown-Pro
TM
based
on your type of cut (Step 3) and set your saw angle
based on your wall angle (Step 4)
Position your molding on the Crown-Pro™
and make your cut.
Once the Crown-Pro™ and the miter saw have
been correctly set, it’s time to make your fi rst cut.
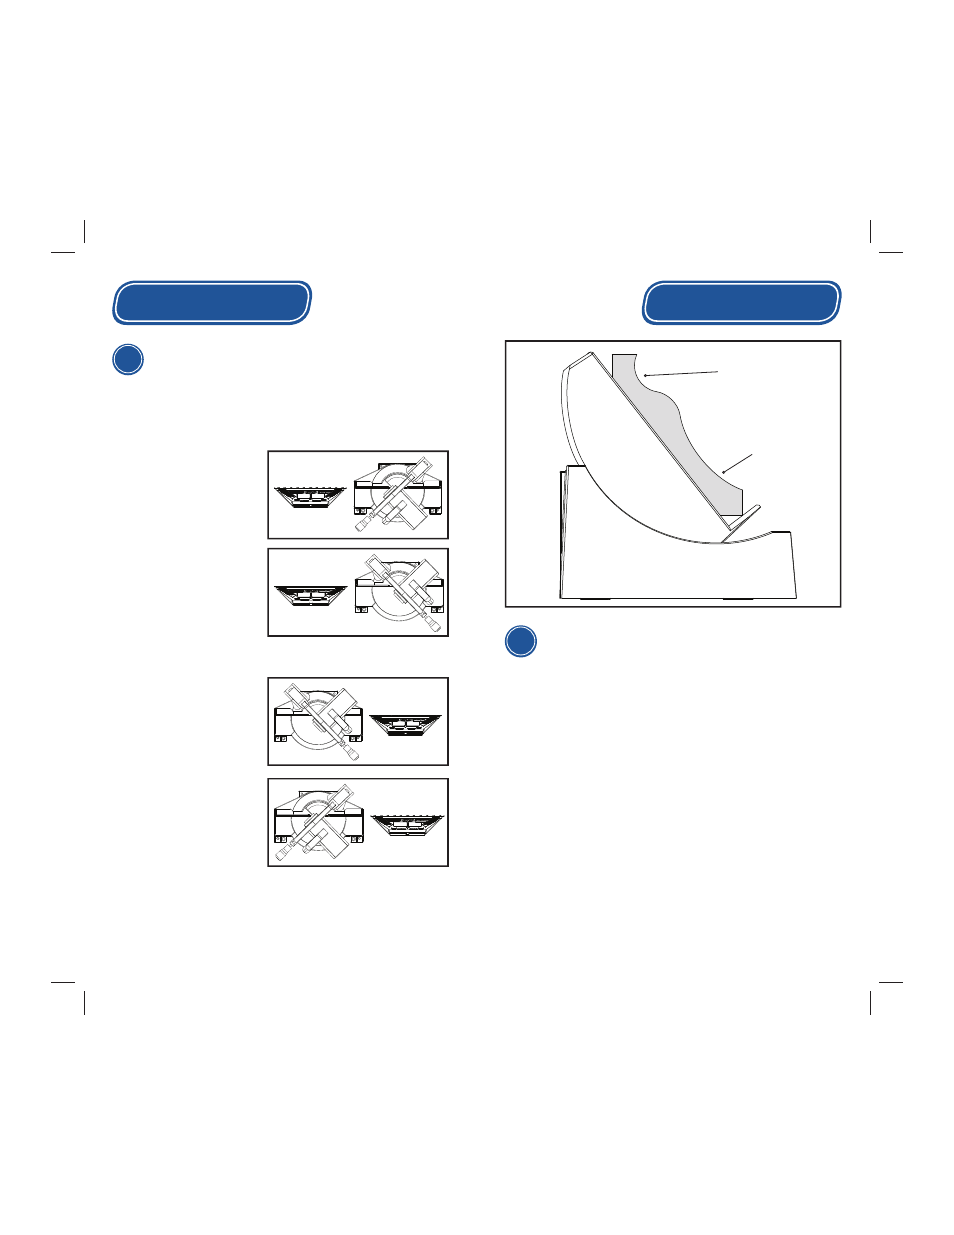
Before you set the molding in the Crown-Pro™
you must fi rst fl ip it 180°. This will make it so your
molding is upside down (as shown). So, the bottom of
your molding will actually be face-up in the Crown-Pro
™
.
Place the inverted molding onto the Crown-Pro™,
hold it in place with your hand, and make your cut
as desired.
Prepare to make your cut
5
6
Bottom of Molding
(against the wall)
Top of Molding
(against the ceiling)
*Diagrams indicate rough positioning only. During actual use,
Crown-Pro™ will rest directly on the saw bed, close to the blade.