Installation instructions – Kreg KKS-KBKSYS Bench Klamp System User Manual
Page 2
Installation Instructions
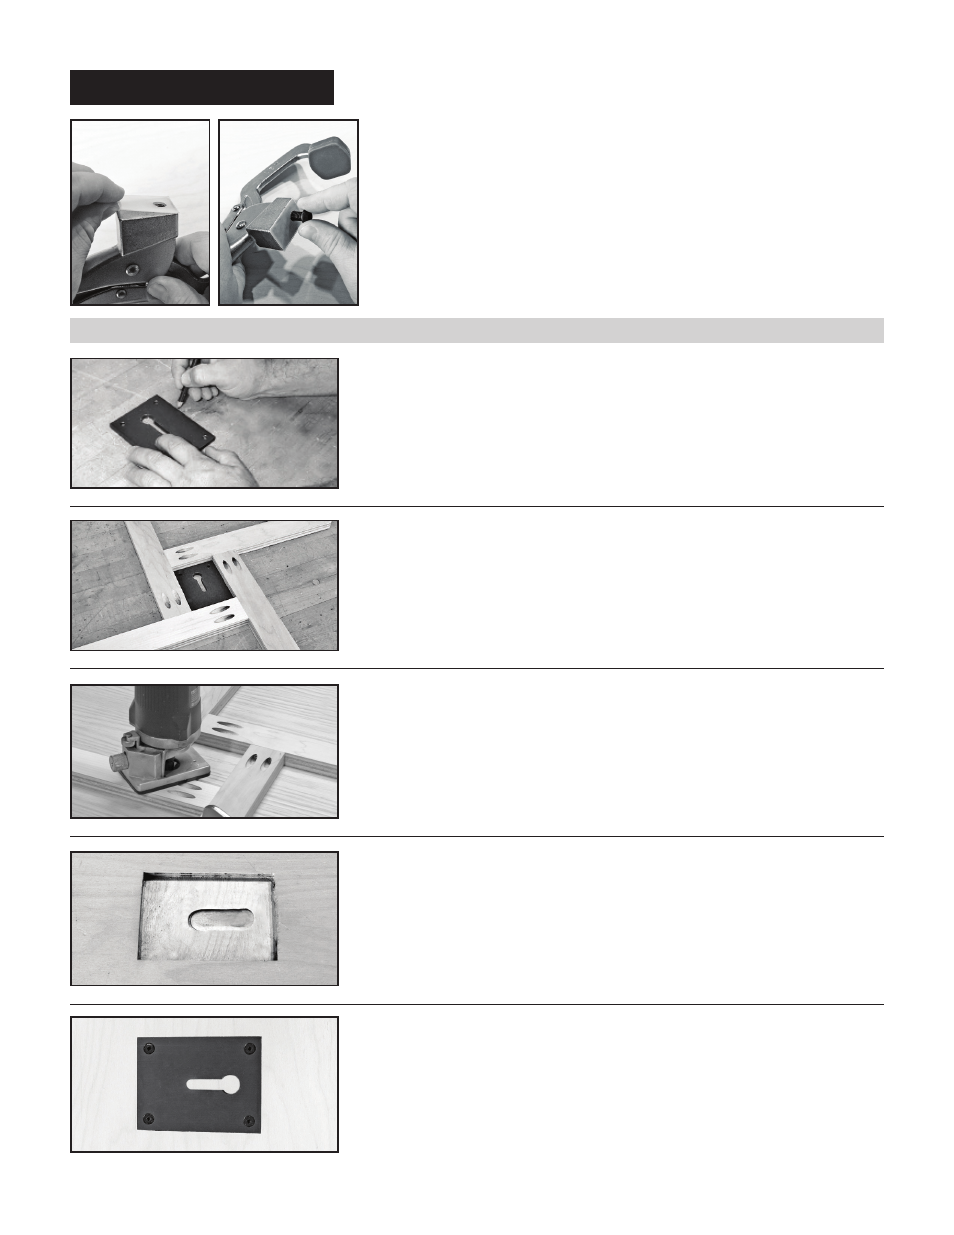
Determine Location for Installation
The Klamp Plate is uniquely designed to offer you a clamping solution where other clamps simply
can not go. Consider placing the Klamp Plate/KLBK in the center of your workbench. Once you
have determined a good location, position the plate accordingly, and mark around it with a pencil.
This will be your guide for routing later on.
2)
Construct a Routing Template
It’s necessary to construct a template for accurate routing of your workbench. Make sure that you
use 4 pieces of stock with identical thickness, so that your routing depth will be true and without
discernable variation. Begin by placing the Klamp Plate on a work surface, and positioning your 4
pieces around it, as shown in the image to the left. Align the 4 pieces around the plate, snuggly.
Join them together using Pocket-Screw Joinery, or any other technique you are comfortable with.
3)
Begin Routing
Clamp, screw, or nail your template to the workbench, over the pencil marks that you made
earlier. Remember to keep your clamps clear of the router’s intended path. Set the flush trim
bit depth to the thickness of the Klamp Plate/KLBK, plus the thickness of the template you have
constructed. Starting slightly more shallow than intended is highly recommended, as you can
always rout deeper, but it’s very difficult to replace wood that you have already removed. If this
does happen, paper or wood shims can be added to raise the effective height once again. Use
a wood chisel to remove the remnant wood from the corners. When this step is complete, you
should be left with a space in your workbench identical to the size of the plate you are installing.
4)
Key-Hole Routing
Because the Anchoring Screw protrudes below the Klamp Plate when inserted, you must rout an
additional space below the Key-Hole for smooth operation. Place the plate into the newly routed
surface on your workbench and use a pencil to outline the Key-Hole onto the workbench. Use a
Forstner or Spade style drill-bit to rout an additional ¼” of material below the Key-Hole. Use a
wood chisel to finish, if necessary. Place the plate into the completed workbench, and ensure
that the Bench Klamp is able to move freely across the key-hole.
5)
Finishing Touch
Drill pilot holes and use wood screws to install the Klamp Plate/KLBK in solid wood and plywood
surfaces of 1-½” and thicker. Drill appropriately sized holes and use machine screws, washers and
nuts in all particle board and MDF installations, as well as solid wood and plywood surfaces of less
than 1-½” in thickness.
6)
Prepare the Bench Klamp
TM
Begin by separating the Plastic Glide Pad from its paper backing. Then, carefully center and adhere
the pad to the base of the Bench Klamp™. Any part of the pad which extends beyond the Bench
Klamp™’s base may be trimmed off, using a scissors. This Pad protects the anodized aluminum of
the plate, from the steel Klamp.
Once finished with the pad, insert the Anchoring Screw into the base of the Bench Klamp. Start with
the Anchoring Screw roughly ½ of the way in, and test it on the Klamp Plate/KLBK. The goal is for
the Anchoring Screw to “slip-fit” into the key-hole of the Klamp Plate/KLBK. If the connection is too
tight, the Bench Klamp will not be able to move freely across the key-hole. If the connection is too
loose, you may get vibrations and imperfect clamping results. Once you have the Anchoring Screw
positioned to your liking, allow a minute for the Thread Locking Compound to cure.
1)
(The following steps are for recessed mounting only)