QuickLabel Kiaro! User Manual
Page 148
UW-5 Unwinder
132
Kiaro! User Guide
Note: These thumb nuts may need to be loosened at a later time when aligning labels
during unwinding.
5
Fasten the UW-5 unwinder to the R-U bracket using the supplied thumb screws.
Note: These thumb screws may need to be loosened at a later time when aligning labels
during unwinding.
6
Use the Moving feature in the Kiaro! Maintenance Utility. This utility will prepare
the printer for lifting and moving onto the brackets. Preparing for Moving
7
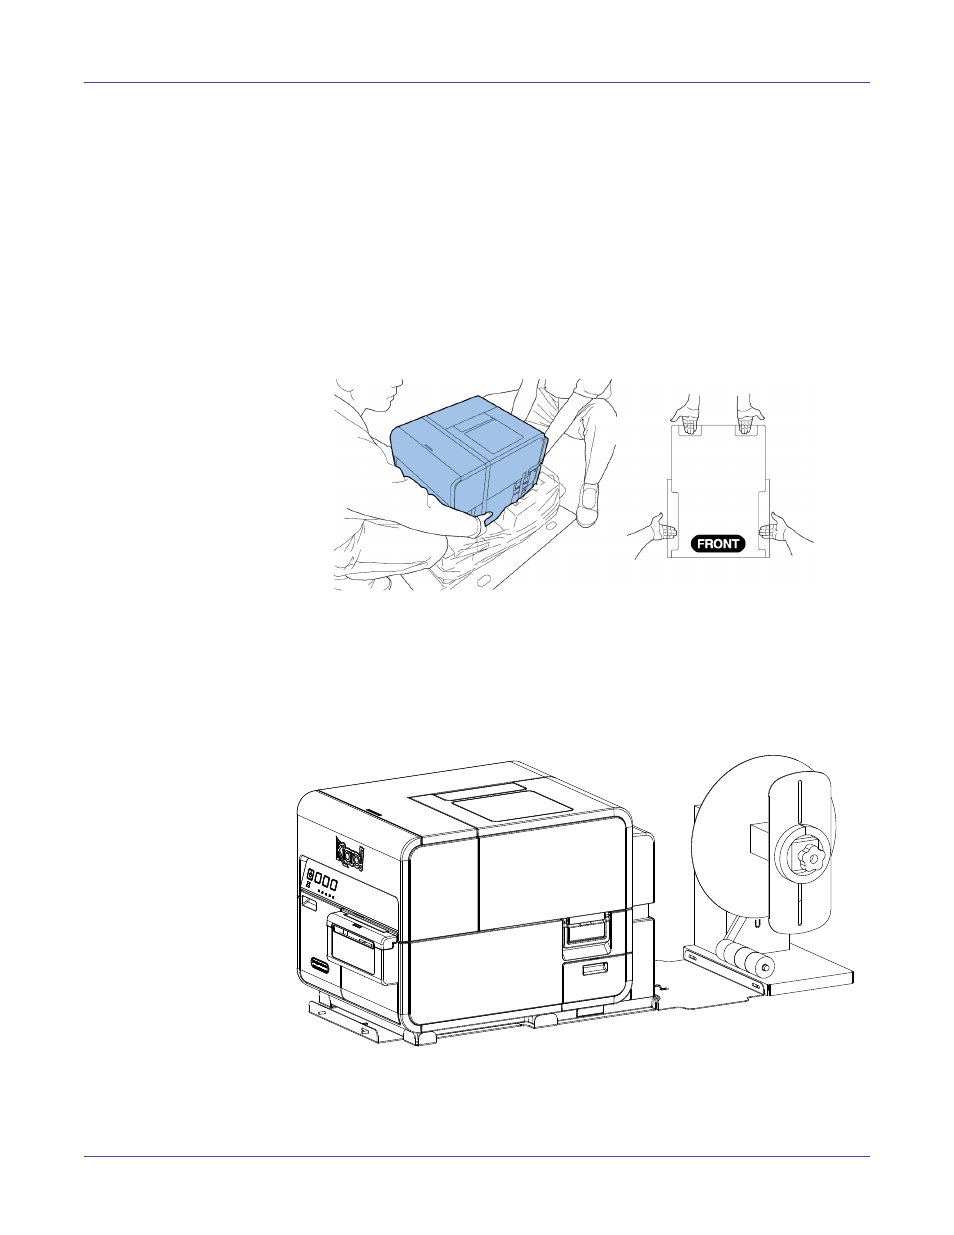
Holding the handles at the bottom of the printer, lift the printer and then place it
on the connected R and U brackets. Lift from the illustrated points. Do not hold the
front side of the printer. Ensure the printer remains level as you move it.
Note: The printer weighs about 53 pounds (24 kilograms). Two persons are required to lift
the printer. Two persons standing at the front and back of the printer respectively must lift
the printer by holding it with their hands under the bottom handles (two at the front, one
at the left, and one at the right). Attempting to lift the printer in an improper position can
result in the printer falling or injury.
Ensure the printer sits level on the alignment brackets as illustrated below.
8
Plug the power jack into the power slot on the unwinder. Insert the power plug
into an AC power receptacle.