Dm-24 quick start guide – Teac DM-24 Quick Start User Manual
Page 6
1
Outputs
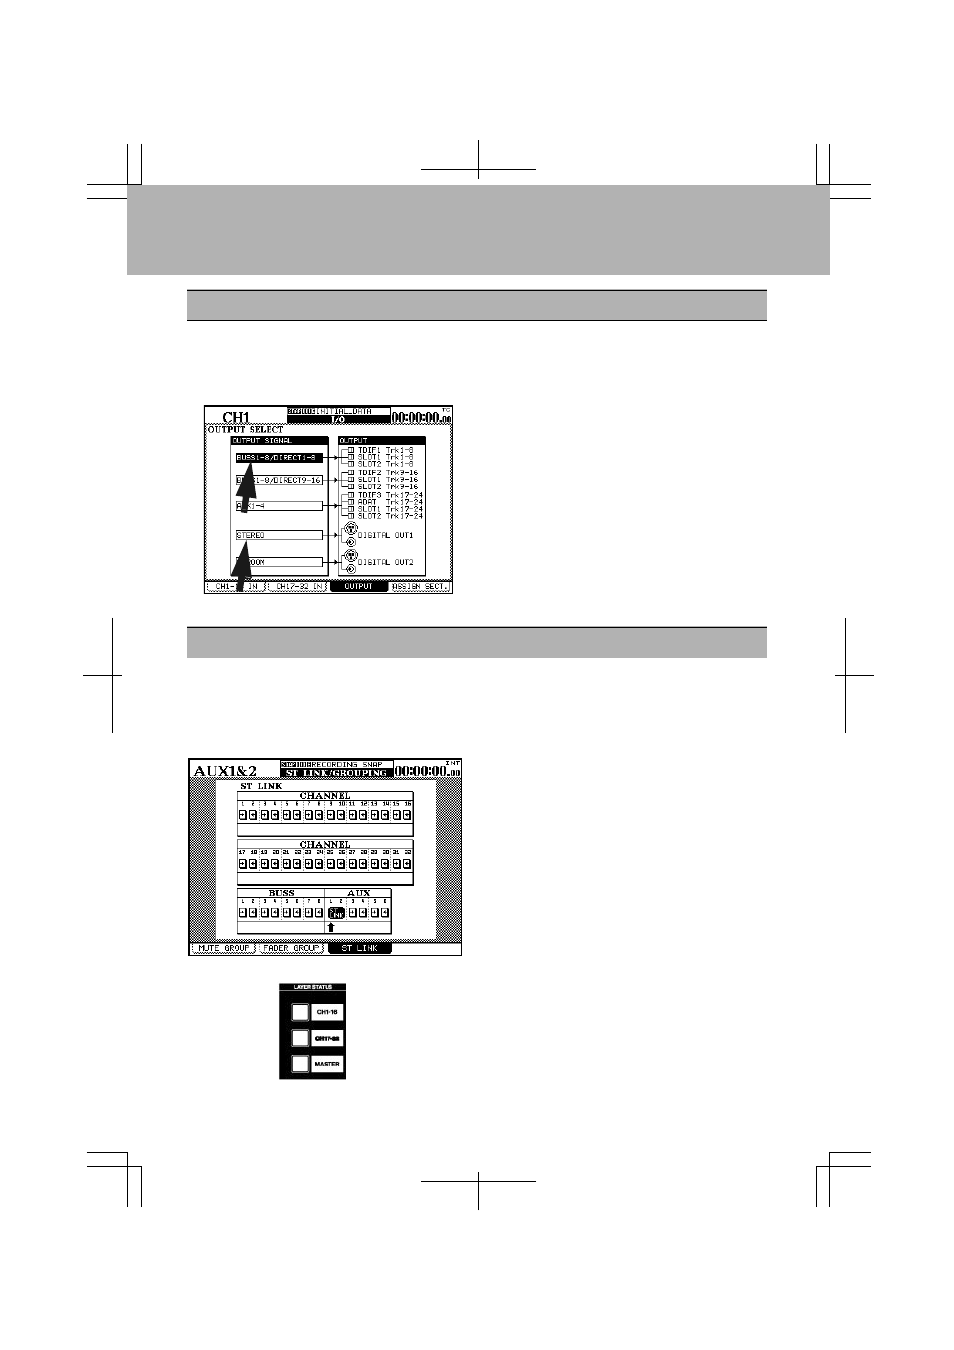
We also need to set up the outputs properly for our needs. We need to make sure Direct
outs 1-8 are going to TDIF 1, Direct outs 9-16 are going to TDIF 2 and Buss 1-8 is going
to TDIF 3. While we're here we'll also assign the Stereo buss to Digital Out 1.
With the SHIFT key indicator lit, press the
I/O key followed by soft key #3. Use the
cursor keys to highlight the first Output
Signal field. Use the data dial to scroll to
BUSS 1-8/DIRECT 1-8 and press
ENTER. Use the same technic to change
the next field to BUSS 1-8/DIRECT 9-16.
The next field should be BUSS 1-
8/DIRECT 1-8. Set the fourth field to
STEREO.
6
DM-24 Quick Start Guide
Tape returns
1
With the SHIFT indicator lit, press the
LINK/GRP key. Press the soft key
under ST LINK. Use the cursor keys
to navigate the arrow under AUX 1 and
press ENTER. AUX 1-2 will now show
ST LINK.
2
Press the SHIFT key again so the indicator
goes out. Press the AUX 1-2 key. Press
the soft key below SOURCE. Use the
cursor keys to highlight the SETUP
section of the display. Turn the first
POD knob to change setting to RETURN.
Turn the second POD knob to change the
setting to ALL. Press ENTER. A pop up
screen will ask you to confirm by pressing
ENTER again. Do it. You'll notice that the
first 16 channels are now labeled RETURN.
When recording on tracks 1-16 AUX 1-2 are used as the tape return path. That being
the case there are a few settings you will need to be aware of. This section will cover
those settings. Tape returns for tracks 17-24 are different and will be discussed on
another page.