Changing the chips on the vm-3, Inside the vm-3 – VMC VM-3 User Manual
Page 21
VM-3 • Page 19
Remote Video In
V
To Edit Monitor
No Edit
Screen Presentation
In Out
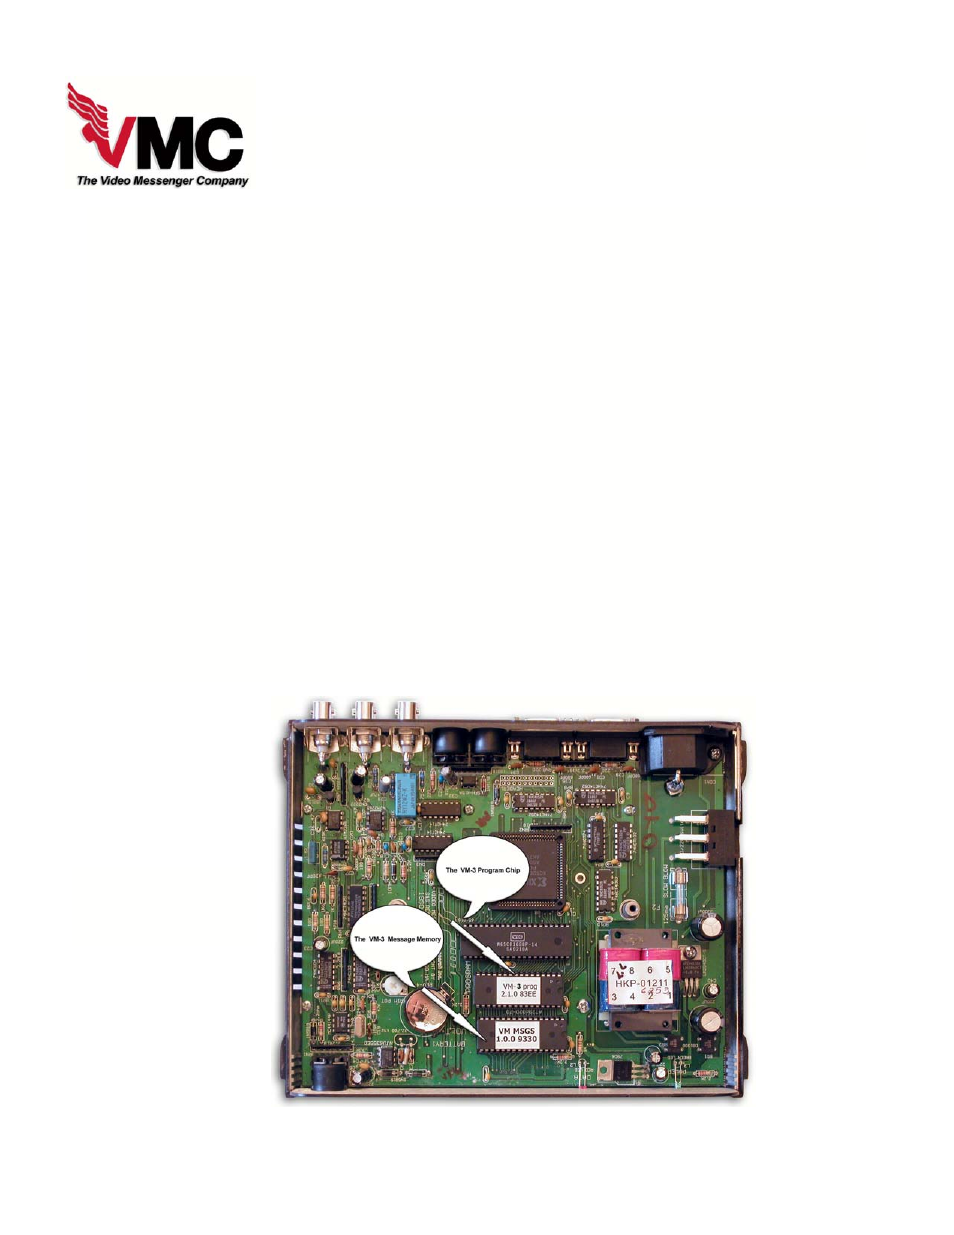
There are two flash memory chips in the VM-3. One, the Program Chip
,
controls the features
and functions of the unit. The other flash, Memory Chip stores your messages.
Occassionally, VMC issues a program update to improve features and make the unit easier
to use. As a result, you may be asked from time to time by the Video Messenger Company
to relay what version of the Program is installed in your VM-3. You can find the software
version # at the bottom of the Setup Menu.
To replace the battery, follow the steps below:
1. Unplug the power to the VM-3.
2. Remove two screws on the top of the unit.
3. Pull the top panel off.
4. Locate the VM-3 PROGRAM CHIP as shown in the image below.
5. Carefully pry the VM-3 PROGRAM CHIP out of the socket with the flat edge
of a small screwdriver.
6. Insert the new VM-3 PROGRAM CHIP into the socket making sure that the
notch is facing right and all pins line up correctly.
7. Press firmly to seat the FLASH PROGRAM CHIP. Make sure there are no bent pins.
8. Re-assemble the top panel.
9. Replace the two screws, being careful not to over-tighten them.
10. Plug the VM-3 into an outlet.
Changing the Chips on the VM-3
Inside the
VM-3