Wcc iii - mcd installation guide – WattMaster WCC III part 13 User Manual
Page 27
13. WCC III - MCD INSTALLATION GUIDE
WCC III Technical Guide
13A-25
WCC III - MCD Linux Base System Installation
WCCIII – MCD Linux Base System
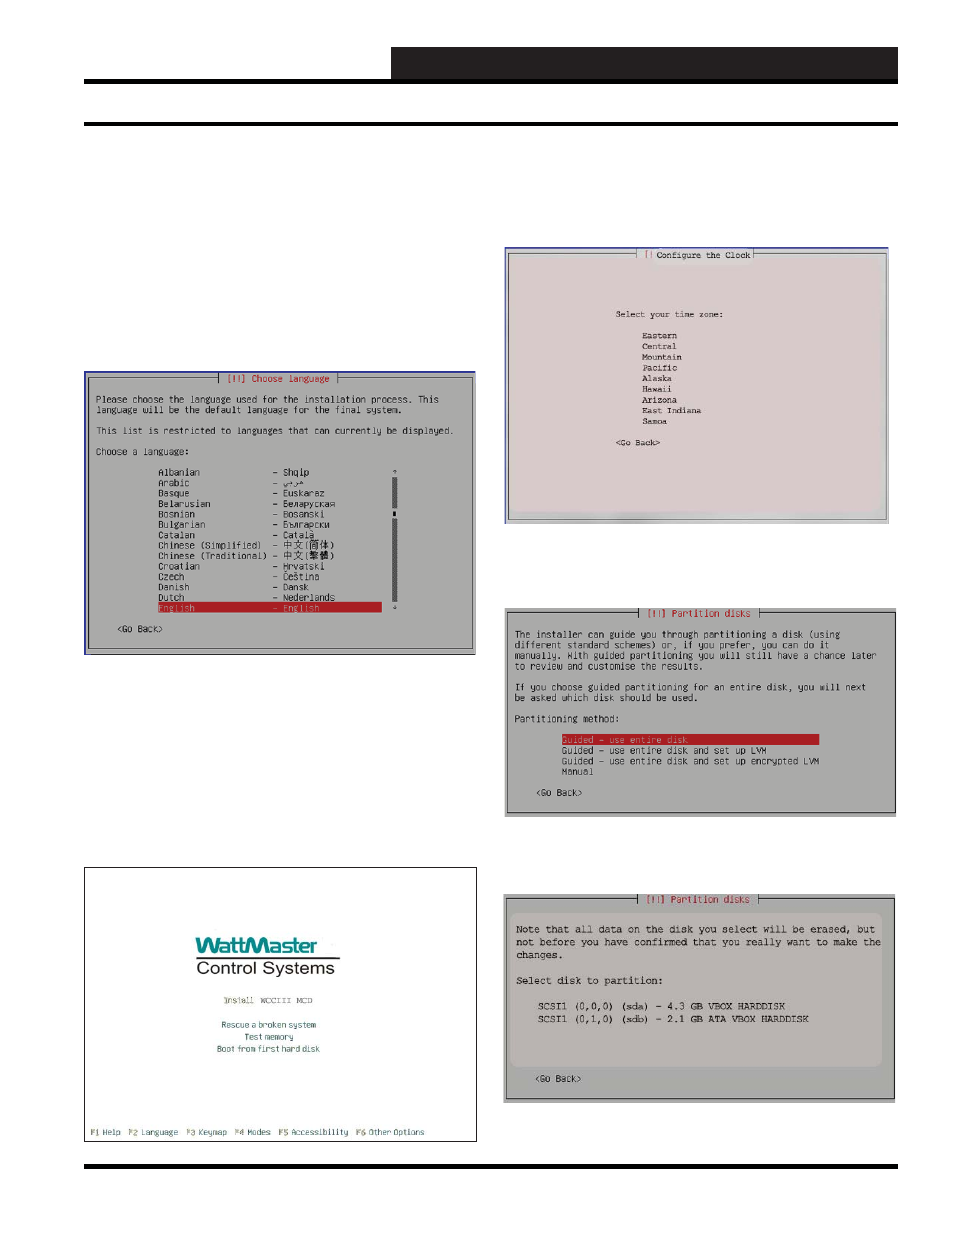
Install (SS5019)
Install the Software
Step 1:
Insert the WCCIII – MCD Ubuntu install CD (WM part
# DM1WC014-XX ) into your external USB CDROM drive and
boot from it. (BIOs must be set to boot from USB device.)
Step 2:
Select “English.”
Step 3:
The main WCC III MCD Installation Screen will display
and you will have the following options—Install WCCIII MCD,
Rescue a broken system, Test memory, and Boot from fi rst hard
drive.
Normally, on a new installation, you would select Install WCCIII
MCD and proceed through the rest of the installation software.
This option will install all of the necessary software onto the WCC
III MCD’s solid state hard drive.
Step 4:
You need to determine the end jobsite location where
the WCC III -MCD is going to be shipped to. For the WCC
III - MCD, it is usually one of fi ve selections—Eastern, Central,
Mountain, Pacifi c, or Arizona.
Step 5:
Now you need to partition your solid state hard disk.
You want to create one big partition (with the mount point /), so
select Guided - use entire disk.
Step 6:
Select the disk to partition. You should select the SCSII
(0,0,0) sda - 8.0GB ATA Transcend (image may be different, but
select sda).