Wcc iii - mcd installation guide, Wall mounting of the wcc iii – mcd, Wcc iii - mcd internet access – WattMaster WCC III part 13 User Manual
Page 6
WCC III Technical Guide
13A-4
13. WCC III - MCD INSTALLATION GUIDE
In a typical WCC III - MCD networking setup, internet access
is through a DSL or Cable modem. This modem may then be
connected to a router with a built in switch, (or typically the router
with switch is also built-in to the modem) which is then connected
to the internal LAN of networked computers by Ethernet cabling.
The NAT enabled router is the only device that the Internet sees
as it holds the public IP address. On the other hand, the WCC III
– MCD, located behind the NAT enabled router, is invisible to the
Internet as it holds a local IP address on the NAT enabled router.
Port forwarding is necessary in the NAT enabled router because
computers that are running the WCC III program will send
information that is directed to the public IP address and the NAT
enabled router needs to know where to send and then redirect that
information to the WCC III – MCD.
Supported Networks
Only IP-based networks are currently supported by the WCC
III system. The slower the network, the slower the data returned
from the WCC III - MCD will be displayed, and the faster speed
is always better.
Also, network “hub” devices are not recommended because “hub”
devices increase the chances of dropped data packets. A 10/100
base T network switch is the recommended connection to the
WCC III - MCD device.
Benefi ts of Using a Separate DSL /
Cable Modem Internet connection for
the WCC III-MCD
1. It provides a layer of network isolation. A connection to the
building’s internal computer network may not be desirable to the IT
department. If the WCC III – MCD is connected to the building’s
internal computer network an additional fi rewall into the building’s
internal computer network may be required.
2. A dedicated high speed internet connection is a faster connection.
WCC III displayed data will be displayed quicker and updated
faster.
3. Network outages should be less frequent, due to the fact that
there is no overhead of a pre-existing internal computer network.
A pre-existing internal computer network will always require
periodic “downing of the network servers” to do maintenance
work to the existing computer network regardless of having the
WCC III-MCD connected to the pre-existing internal computer
network.
4. The need for having an onsite IT person to setup, and then
administer the WCC III-MCD will be reduced.
5. Setup and maintenance of e-mail accounts would be easier,
because they would be automatically provided by the Internet
Service Provider.
Wall Mounting of the WCC III – MCD
It is strongly suggested that the WCC III – MCD is mounted on the
wall. General guidelines are as follows:
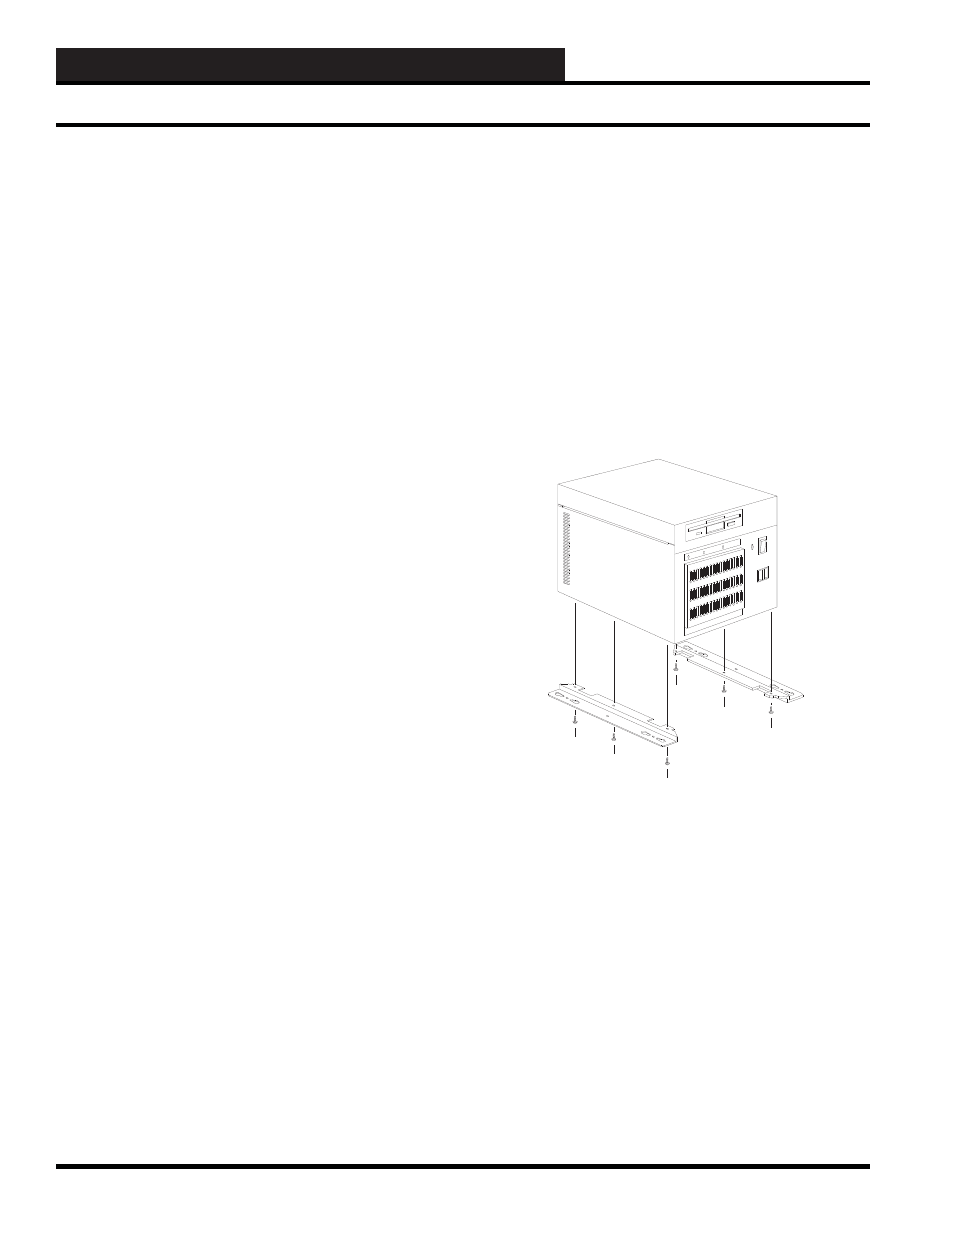
Always install the supplied six screws for the two supplied wall
mounting brackets for the WCC III – MCD Computer as shown
in Figure 2. Be sure to tighten the six screws so that they do not
loosen over time.
Figure 2: Installing the six screws for the two wall
mounting brackets of the WCC III – MCD Computer
Do not mount the WCC III – MCD computer straight into the
drywall. The use of a ¾-inch plywood “Backer Plate Board” is
required. You may want to paint this plywood “Backer Plate
Board” to match the color of the wall before mounting to the wall.
See Figure 3 for further application.
Backer Plate Mounting Notes:
Use correct type of wall mounting anchors for mounting on a
concrete wall for the mounting of the “Backer Plate Board” if and
when mounting the Backer Plate Board to a concrete wall. Use
at least 2-inch dry wall type screws if mounting the Backer Plate
Board to a “Dry-Wall” type wall. Mount the “Backer Plate Board”
so that the screws that are holding the “Backer Plate Board” are on
the 16-inch centers of the wall studs where applicable.
WCC III - MCD Internet Access