Optional) wire the click 203 – Wavetronix Click 201 (1 amp AC to DC converter) (CLK-201) - Quick-reference Guide User Manual
Page 4
WX-500-0174
© 2014 Wavetronix LLC. All rights reserved. Protected by US Pat. Nos. 6,556,916; 6,693,557; 7,426,450; 7,427,930; 7,573,400; 7,889,097; 7,889,098; 7,924,170; 7,991,542; 8,248,272;
8,665,113; and Cdn. Pat. Nos. 2,461,411; 2,434,756; 2,512,689; and Euro. Pat. Nos. 1435036; 1438702; 1611458. Other US and international patents pending. Wavetronix, SmartSensor, Click,
Command and all associated logos are trademarks of Wavetronix LLC. All other product or brand names as they appear are trademarks or registered trademarks of their respective hold-
ers. Product specifications are subject to change without notice. This material is provided for informational purposes only; Wavetronix assumes no liability related to its use.
7
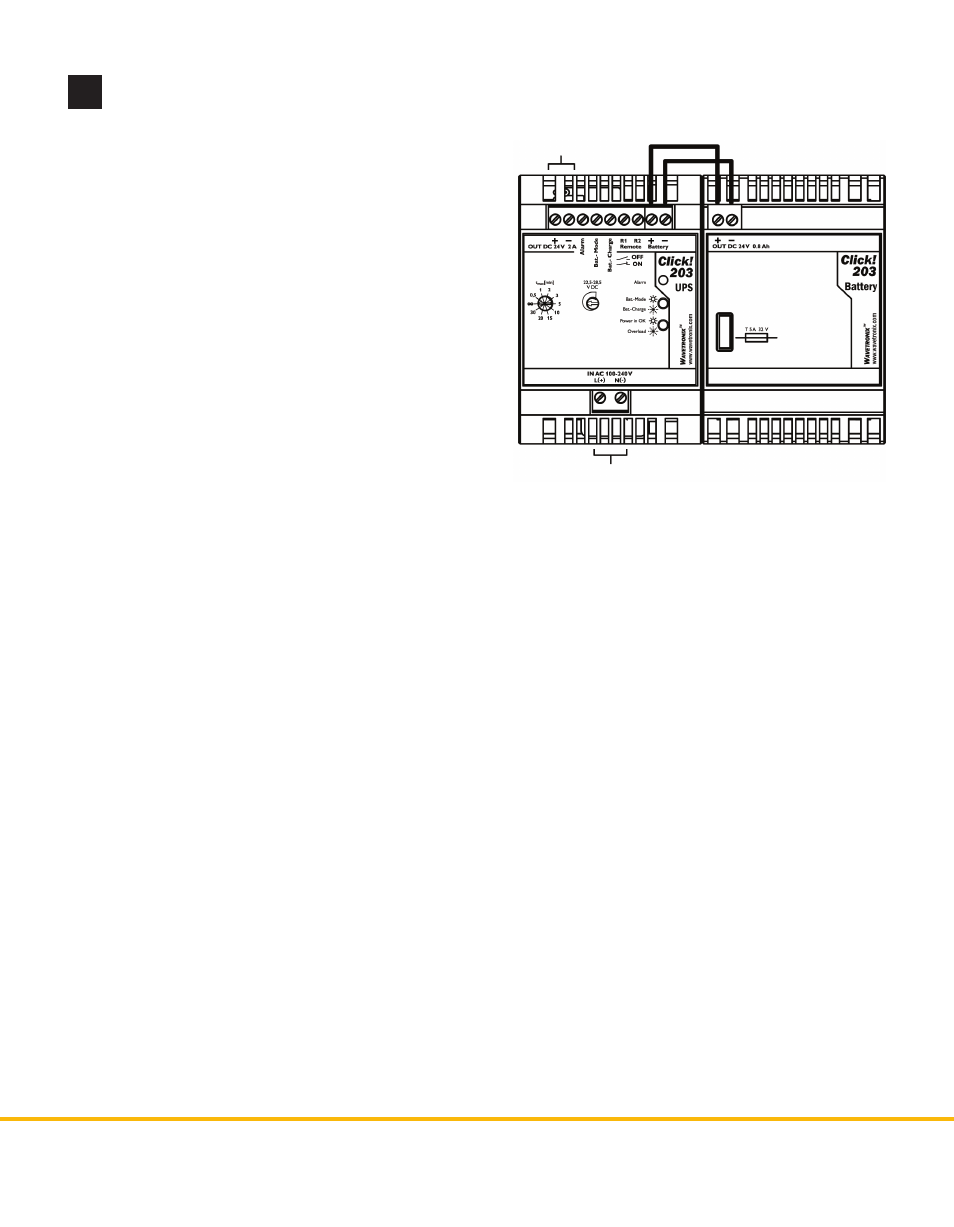
(Optional) Wire the Click 203
If you are using the Click 203 UPS and battery module,
follow the steps below to correctly wire it:
1 Wire AC power into the UPS module by connecting
the AC line (black wire) to the L (+) terminal.
2 Connect the AC neutral (white wire) to the N (-)
terminal.
3 Wire the supplied red wire from the + Battery
terminal on the UPS to the + OUT terminal on the
battery.
4 Wire the supplied black wire from the - Battery
terminal to the - DC terminal on the battery.
5 DC power can be wired out of the UPS module
by connecting to the + and - OUT DC 24V 2A
terminals.
6 Short R1 to R2. If you don’t, the UPS will not switch
over to the battery when the power goes out.
DC Out
AC In