Westermo FD-20 User Manual
Page 20
20
6630-2220
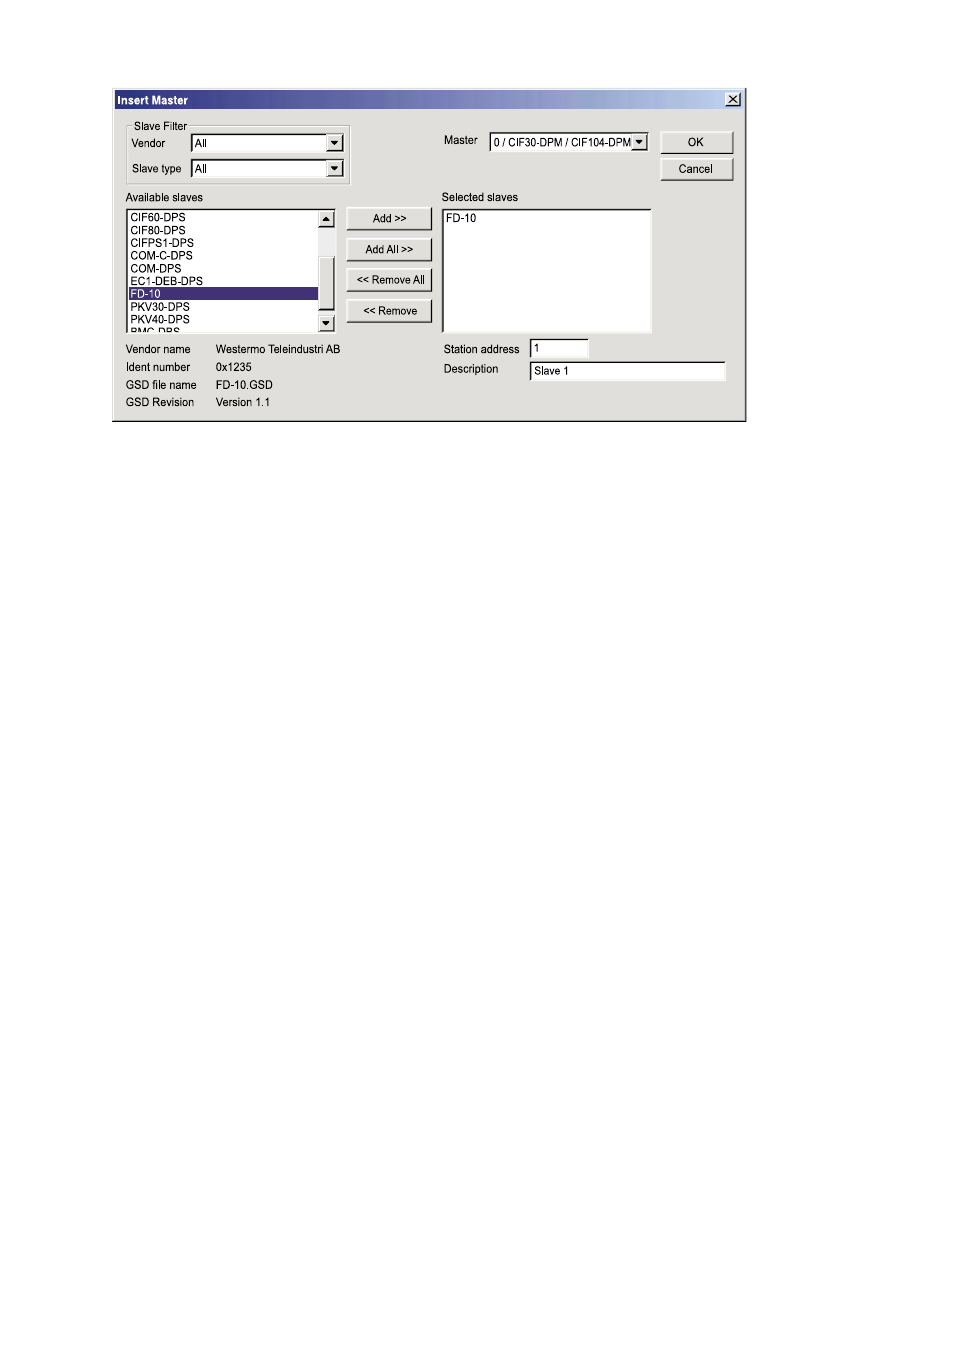
The Available slaves list on the left displays all the slave devices whose GSD files have
been loaded into the GSD directory. A filter can be used to limit the selection list to
slave type and vendor (manufacturer).The slave can be added to the right-hand list with a
double mouse click or with the Add button. All devices in the right-hand list are assigned
to the master shown in the window above the list. If the slaves are selected individually,
then each slave can be allocated a Station address as well as a name in the Description
field. For every slave entered in the right-hand list, the station address count is automati-
cally incremented by one but can be overwritten by the user in the Station address field.
6.4.2.2.7 PROFIBUS DP Slave configuration
Double click the PROFIBUS DP slave device symbol or click the symbol with the left
mouse button and then choose the Settings > Slave Configuration, to open the
slave configuration window.The slave-specific configuration is carried out in this window.
Here, the modules and their addresses are allocated into the process data memory
of the master.
Note 1: The offset addresses refer to the addressing of the data in the Master!
The address information does not refer to the addressing of the data in
the Slave! The Slave organises its own data addressing.
The selection list (upper list) shows all the possible slave modules. In the case of a simple
slave, one module is shown and this is automatically copied into the configuration list
(lower list). In the case of a modular slave, the user must select the required modules and
transfer these by means of a double click or transfer it using the Append Module
button into the configuration list (lower list).
For configuration of slave modules (selection of modules), proceed as follows:
… Transfer all the required modules from the selection list (upper list) into the
configuration list (lower list) by a double click or using the Append Module button.
Click on OK when configuration of this slave is complete.
Figure 9: Insert slave