Installing the rack mounts – Grass Valley PFR 500/E Dec 12 2002 User Manual
Page 29
Installing the rack mounts
20 September 2002
PFR 500/E Instruction Manual
29
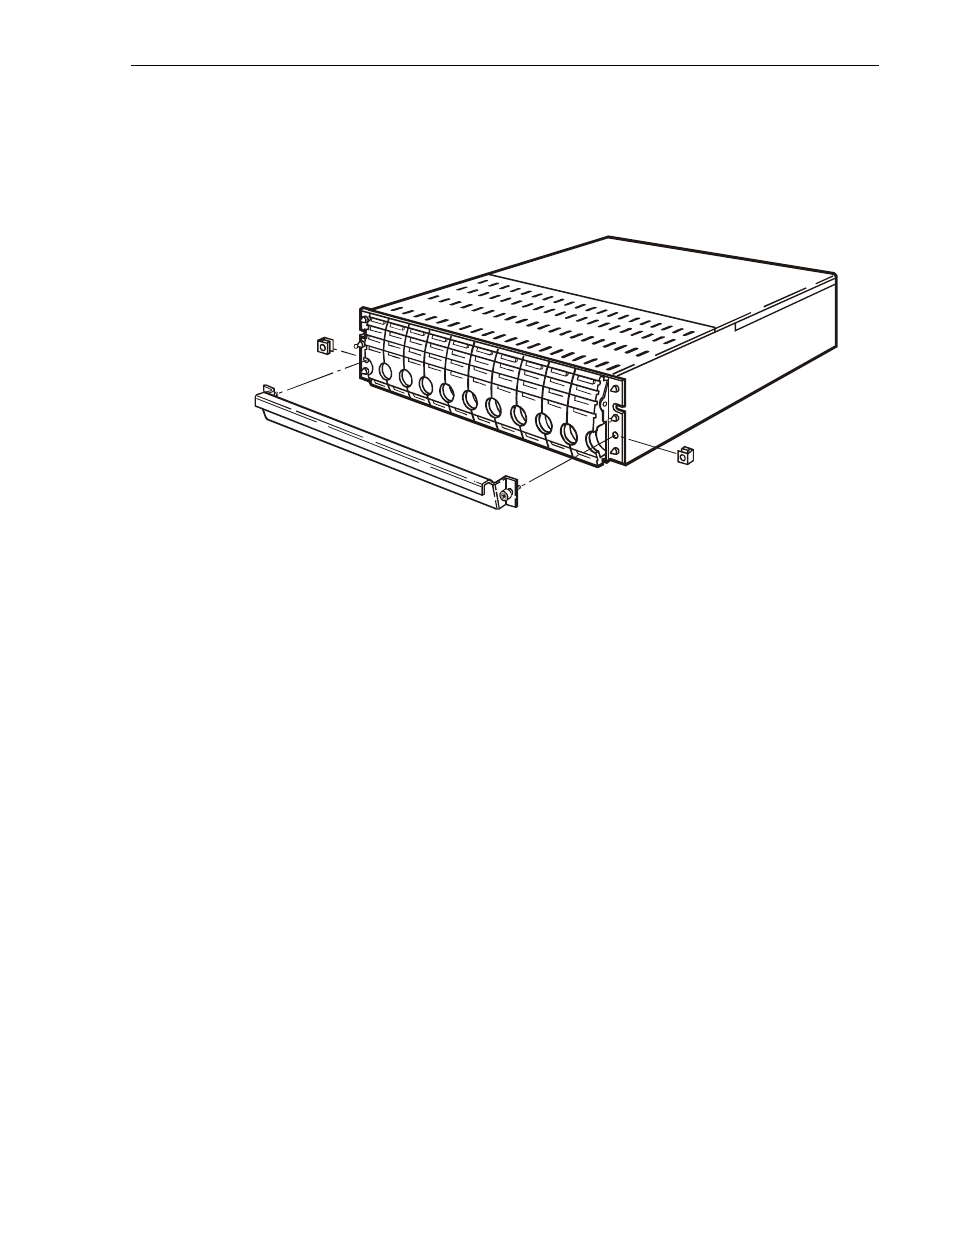
You can either remove the drive support bracket, as shown in the following figure so that
you can hot-swap drives, or you can leave the bracket in place for greater drive stability.
In either case, keep the bracket and retaining screws in case you have to ship the chassis
in the future.
Installing the rack mounts
To install the PFR500/E rack mounts:
1. Loosely fasten the left stationary chassis mount to the left chassis slide rail with the
locking nuts.
2. Adjust the length of the outside edges of the chassis mount assembly to fit between
the front and back channel mounts. Secure these two pieces together. Pull chassis
mount assembly away from channel mounts.
3. Place cage nuts around the top and bottom two holes on the front of the chassis
mount assembly, such that the nuts are inside the front and the back of the chassis
mount assembly.
4. Place one cage nut on the bottom hole, and one cage nut on the second hole from
the top on the back, such that the nuts are inside the front and the back of the chassis
mount assembly.
5. Slide the chassis mount assembly between the left front and back channel mounts.
Secure the screws through the channel mounts into the cage nuts.
2781