A2 installing a remote control – Magnum Energy Mini Magnum Panel (MMP Series) User Manual
Page 59
©
2013 Magnum Energy, Inc.
Page 50
Appendix A - Optional Equipment and Accessories
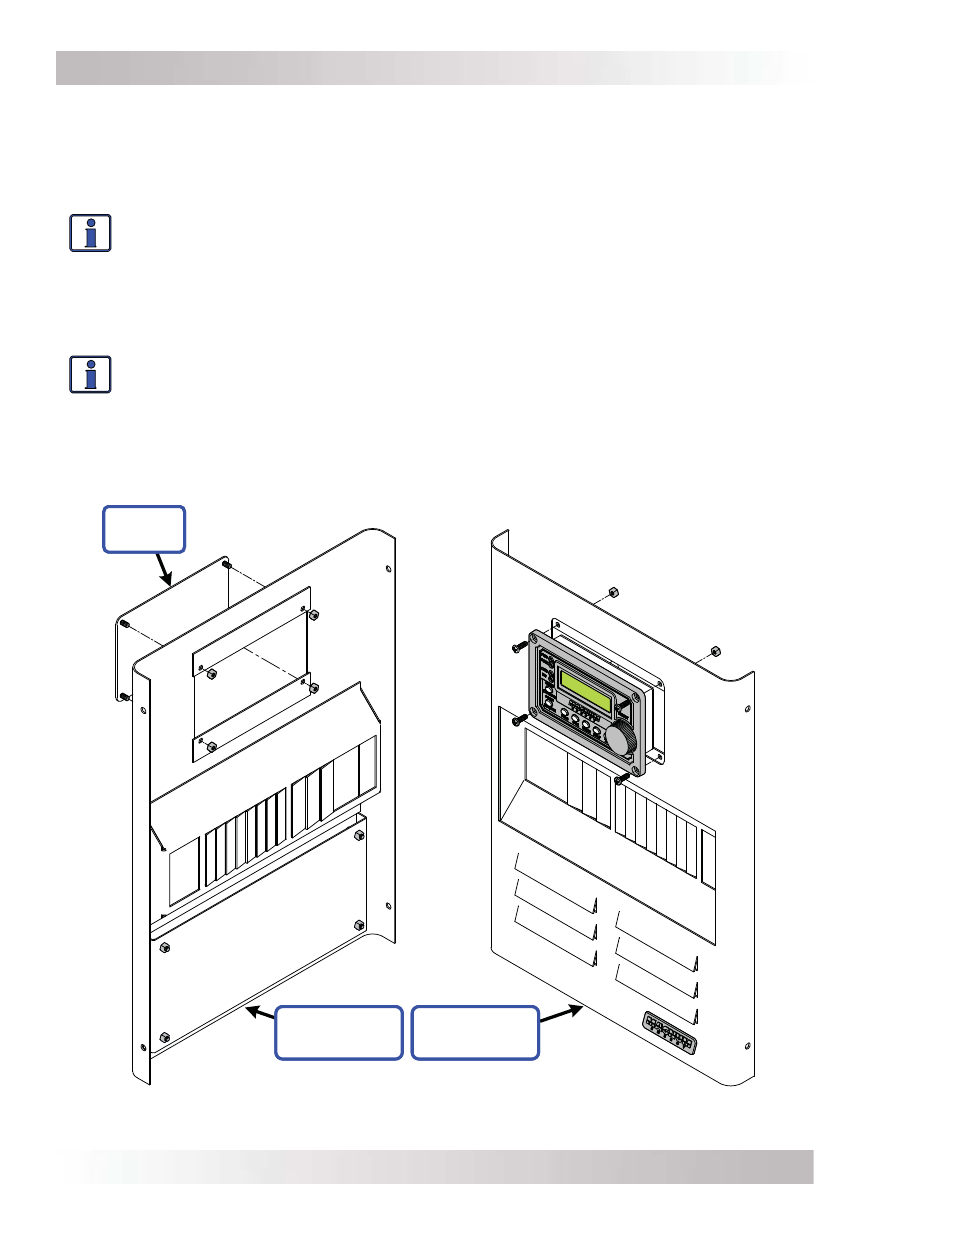
Figure A2-1, Installing a Remote Control on the MMP Enclosure
A2 Installing a Remote Control
Complete the steps below to install the ME-RC or ME-ARC remote control on the MMP enclosure;
refer to Figure A2-1 for assistance.
1. Unscrew the blank plate from the front cover, and remove the four 8-32 x 1/2 Phillips drive,
black colored screws taped to the back of this blank plate.
Info: The blank plate is attached to the front cover using #8-32 Hex nuts. Use a 11/32”
socket or wrench to remove/reattach these nuts.
2. Use these four screws and the four nuts that were used to hold the blank plate to attach the
remote control to the front cover.
3. Run the yellow colored remote cable that is provided between the remote and the Magnum
inverter/charger.
Info: The remote cable is a 4-wire, twisted-pair, telephony standard with 300-volt rated
insulation, and uses RJ14 (m) connectors on each end (see Figure 2-22). A standard
telephone cable would not be code compliant and should not be used.
4. Connect one end of the remote cable into the RJ14 “REMOTE” port (has blue label) on the
inverter/charger, and the other end into the RJ14 jack on the backside of the remote.
B
LANK
P
LATE
F
RONT
C
OVER
(
REAR
VIEW
)
F
RONT
C
OVER
(
FRONT
VIEW
)