Fig. 3, Operation 5. maintenance – Sealey TA060 User Manual
Page 2
4. oPerAtIon
5. mAIntenAnCe
Original Language Version
tA060 Issue: 1 - 27/05/11
NOTE: It is our policy to continually improve products and as such we reserve the right to alter data, specifications and component parts without prior notice.
ImPortAnt: no liability is accepted for incorrect use of this product.
WArrAntY: Guarantee is 12 months from purchase date, proof of which will be required for any claim.
InFormAtIon: for a copy of our latest catalogue and promotions call us on 01284 757525 and leave your full name and address, including postcode.
sole uK distributor, sealey Group,
Kempson Way, suffolk Business Park
,
Bury st. Edmunds, suffolk,
IP32 7Ar
01284 757500
01284 703534
www.sealey.co.uk
Web
3.5
reC reCord FunCtIon.
3.5.1 to record readings, firstly press the 'HoLD' button to freeze the display.
then press the LEVEL/rEc button to enter the reading into memory.
'rEc' will appear on the display indicating that the reading has been
saved. Press the 'HoLD' button again to return to live monitoring.
3.5.2
data reading Function
3.5.3 to read the recorded data it will first be necessary to power down the
meter by holding down the on/off button as described in section 3.1.4.
3.5.4 now hold down the LEVEL/rEc button and press the on/off button
once. When the word
'dAtA' appears on the screen, let go of the
LEVEL/rEc button and the first stored reading will appear on the
screen. up to 50 readings can be stored. repeatedly press the
LEVEL/rEc button to step through the readings. Each reading is
numbered 1 to 50 as shown by the two small digits at the top right hand
of the main display. see fig.2-B. Each reading has a date and time
associated with it. Press the HoLD button once to see the date
associated with the recording. Press the HoLD button again to
see the associated time. A third press of the button returns the display
to the reading.
note: the date and time need to be set up, as
described in section 3.7. Press the f/s button (also marked EXIt to
return to live monitoring.
3.6
mAX/mIn Button: mAXImum And mInImum Hold. (fig.1-5)
3.6.1 the MAX/MIn button can be pressed repeatedly to cycle through
mX,
mn and off. select the required mode. When mX appears under the
main readout the maximum sound level will be captured and held by
the meter until a higher sound level is captured. When
mn appears
under the main readout the minimum sound level will be captured and
held by the meter until a lower sound level is captured.
3.7.
settInG tHe tIme And dAte.
3.7.1. to set the date and time, begin with the meter in the off condition. to
enter the sEt uP mode, hold down the A/c button and press the
on-off button until
'set' appears on the screen. release both buttons.
3.7.2
Current date set: the currently set date will
appear on the screen in the format shown to the
right.
day/month/Year. this screen cannot be
edited.
3.7.3
Current time set: Press the A/c button again to
see the currently set time in the format shown to
the right.
Hours/minutes/seconds. this screen
cannot be edited.
3.7.4
to edit minutes: Pressing the A/c button again
you enter 'edit minutes' mode. use the Level/rec
button to advance the number. use the Max/Min
button to decrease the number.
3.7.5
to edit Hours: Pressing the A/c button again you
enter 'edit hours' mode. use the Level/rec button
to advance the number. use the Max/Min button to
decrease the number.
3.7.6
to edit date: Pressing the A/c button again you
enter 'edit date' mode. use the Level/rec button
to advance the number. use the Max/Min button to
decrease the number.
3.7.7
to edit month: Pressing the A/c button again
you enter 'edit month' mode. use the Level/rec
button to advance the number. use the Max/Min
button to decrease the number.
3.7.8
to edit Year: Pressing the A/c button again you
enter 'edit year' mode. use the Level/rec button
to advance the number. use the Max/Min button to
decrease the number.
3.7.9
to exit set uP mode and save your settings
press Hold once.
3.7.10 If you continue to press the A/c button in edit mode
the initialization/reset screen appears. If you now
press the A/c button again your personal settings
will be lost and the screen reverts to the original
factory settings.
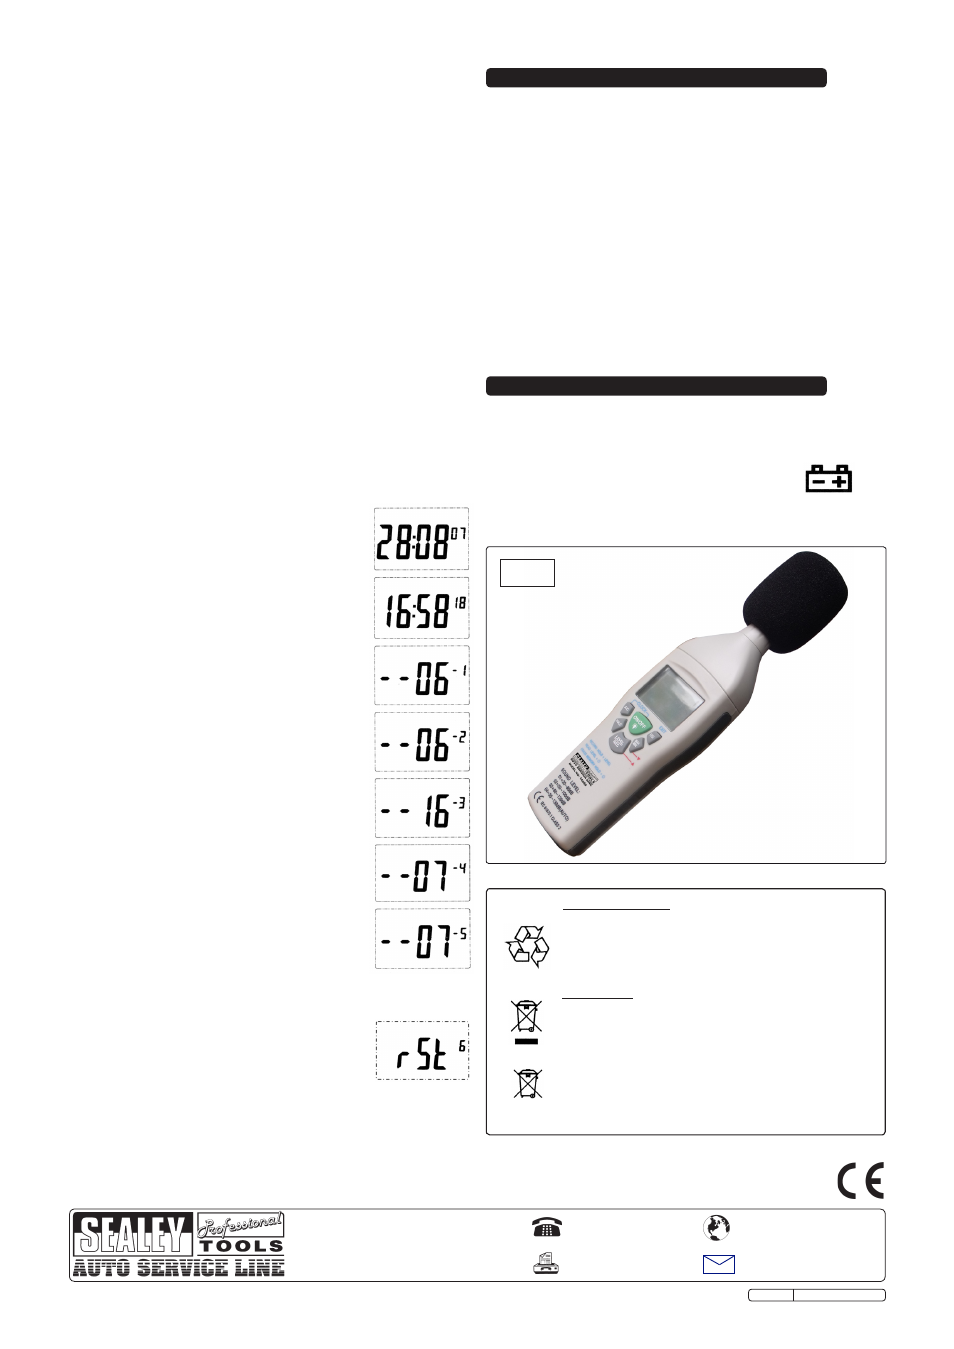
WArnInG: In stong wind conditions it is essential that the wind
muffler is used to avoid picking up unnecessary background
noise, see fig.3 below.
4.1
switch the meter on by pressing the on/off button.
4.2
Press the LEVEL/rEc button up to four times to cycle through to the
best level for the measurement task in hand. Keep an eye on the
oVEr and unDEr indicators at the top of the LcD display. select a
level where these indicators are off.
4.3
using the A/c button select 'dBA' for recording general sound levels
in relation to human hearing and 'dBc' for measuring the sound level of
general acoustic material
4.4
using the f/s button select either fAst sampling for instant sound and
sLoW sampling for average sound level.
4.5
using the MAX/MIn button select whether you require to monitor the
maximum sound level predominant at the time of measuring or the
minimum sound level.
4.6
Begin measuring sound levels by either using the unit held in your hand
or mount it on a tripod. the meter should be 1 to 1.5 metres away from
the sound source.
4.7
record sound levels as required as described in section 3.5.2.
fig. 3
5.1
Do not store or operate the meter at high temperature or in conditions
of high humidity.
5.2
If the meter is not to be used for long periods of time, remove the
battery to avoid harmful liquid leakage.
5.3
Keep microphone dry and avoid severe vibration.
5.4
When the battery symbol shows on the readout
replace the 9V battery (PP9).
5.5
CAlIBrAtIon. sealey are able to offer a chargeable calibration
service. contact your local sealey dealer or sealey direct for more
information.
Environmental Protection
recycle unwanted materials instead of disposing of them as
waste. All tools, accessories and packaging should be sorted,
taken to a recycle centre and disposed of in a manner which is compatible
with the environment. When the product is no longer required, it must be
disposed of in an environmentally protective way. contact your local solid
waste authority for recycling information.
Battery removal
remove the battery from the meter by removing the screw from
one end of the battery compartment cover on the back of the casing.
remove the cover. unclip the battery connector and lift out the battery.
Dispose of battery according to local authority guidelines.
WArnInG: Do not dispose of by fire. this could result in an explosion.
under the Waste Batteries and Accumulators regulations 2009,
Jack sealey Ltd are required to inform potential purchasers of products
containing batteries (as defined within these regulations), that they are
registered with Valpak’s registered compliance scheme. Jack sealey Ltd’s
Batteries Producer registration number (BPrn) is BPrn00705.