Adjusting the scanned image – Epson WorkForce DS-860 User Manual
Page 33
C
Click the
(Scan) icon.
D
Click Detailed Settings and display EPSON Scan.
E
Select Double-Sided from Document Source on the Main Settings tab.
F
Select the document size from Size.
G
Select Top&Bottom or Left&Right from Stitch Images, and then click OK.
H
Click Scan.
The scanned image is displayed in Document Capture Pro.
I
Check the scanned image, and then save it.
&
“Scanning Using Document Capture Pro” on page 27
steps 5 to 7
Note:
If the images are not stitched together in the intended direction, check Binding Position (for Double-Sided Scanning) on
the EPSON Scan Configuration screen.
Adjusting the Scanned Image
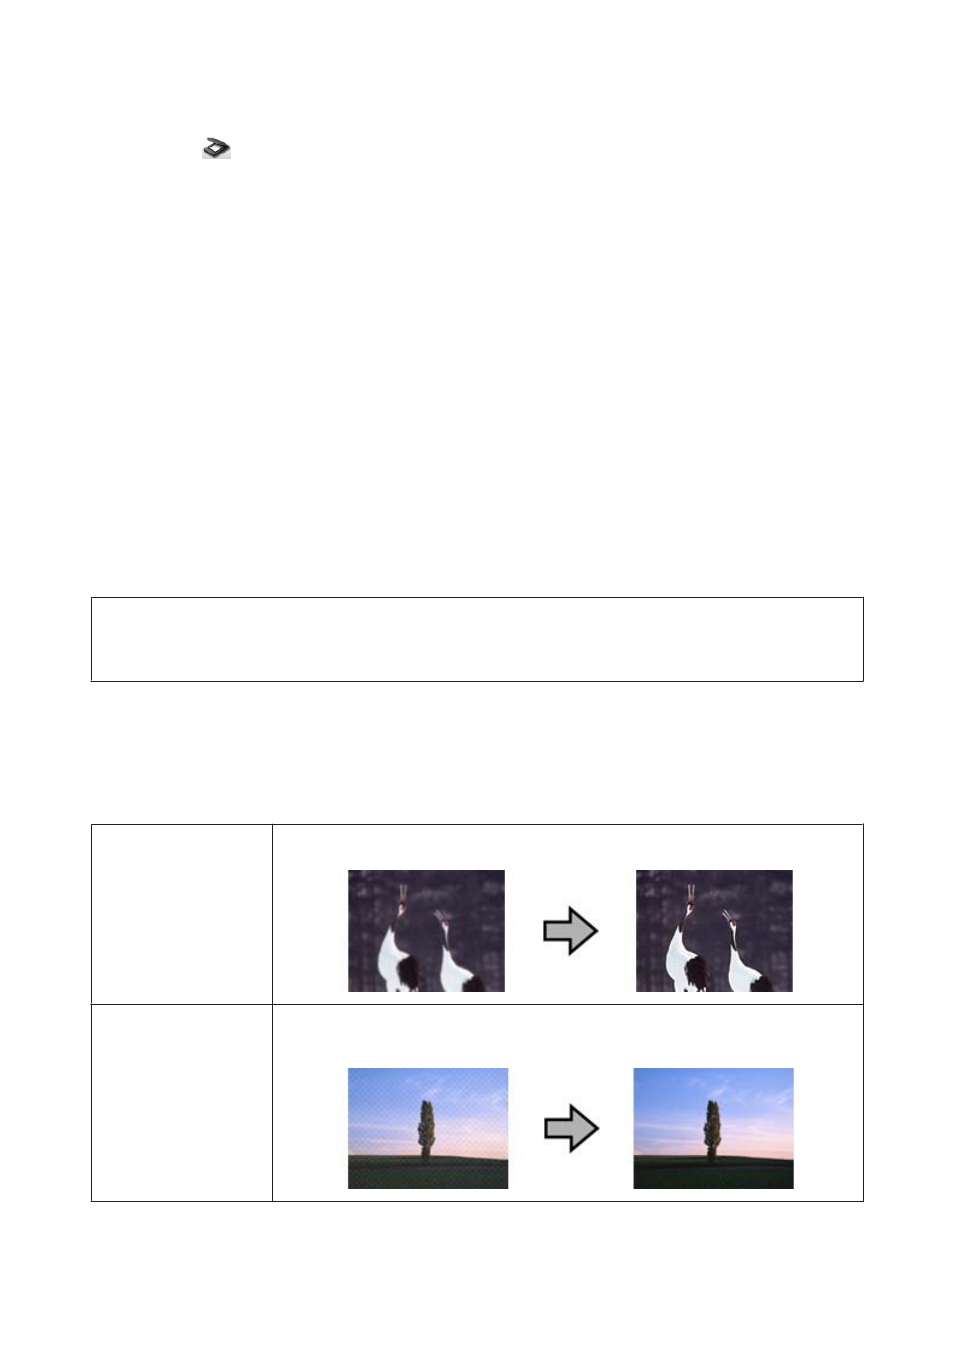
Epson Scan offers a variety of settings for improving color, sharpness, and other aspects affecting image quality.
Unsharp Mask
Sharpens the edges of image areas.
Descreening
A ripple or cross-hatch pattern (known as moiré) may appear in a scanned image of a printed
document.
DS-860 User’s Guide
Various Types of Scanning
33