Installation – Whelen 4EGRILP User Manual
Page 2
Page 2
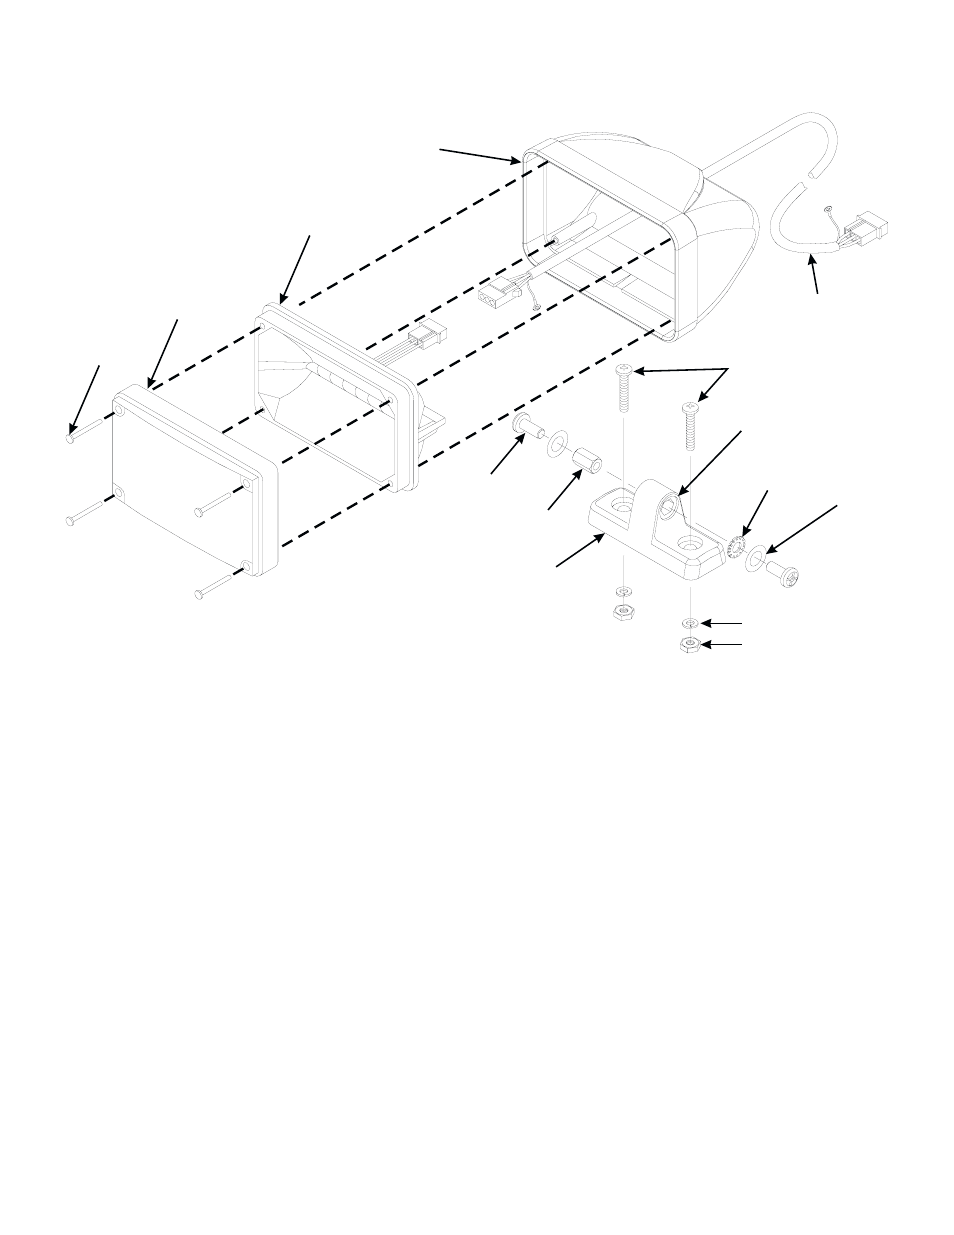
Lighthead
(shown for reference)
#6 - 1 1/4”
PPHSMS
1/4 - 20 x 5/8”
PPHMS
Standoff
20-2012120010
Flat Washer
Split Lock Washer
1/4 - 20 Hex Nut
5/16” External Tooth
Lock Washer
Recessed Area
1/4 - 20 x 1 1/4”
PPHMS
Base
06-161079-001 (Black)
06-161079-014 (Chrome)
Housing
11-483299-000 (Black)
11-483299-003 (Chrome)
Lighthead Cable
(shown for reference)
Lens
(shown for reference)
Installation
1.
Position the base on the desired mounting surface (see other page for mounting guidlines).
2.
Using the base as a template, mark the mounting surface with a suitable tool where the two mounting holes
are to be drilled. Remove the base and drill 2, appropriately sized clearance holes for the mounting bolts .
3.
Route the “socketed” end of your lighthead cable from your power supply to the lighthead mounting location.
Make sure that this cable is not connected to any power source!
4.
Locate the housing. Insert the cable wires into the lighthead housing through the opening in the rear of the
housing.
5.
Insert the “socketed” wire teminals into the proper connector using the information provided with the cable.
Plug this connector into the lighthead connector. Using the #6 - 20 x 1 1/4” sheet metal screws included with
your swivel mount kit, install the lighthead into the housing. Do not allow any excess cable to remain in the
housing cavity.
6.
Insert the standoff into the base as shown. Position the external tooth lock washer into the recessed side of
the base. Position the housing so that its mounting flanges straddle the base without disturbing the external
tooth lock washer. Install a flat washer onto both 1/4-20 x 5/8” machine screws. Thread each of these into
either end of the standoff until they lightly bottom out. Do not tighten these yet.
7.
Return the Lighthead/Housing/Base assembly to its mounting location and secure firmly as shown using the
supplied hardware. It will be necessary to rotate the housing so that its aim is perpendicular to the mounting
surface in order to install the mounting bolts into the base.
8.
With the base secured firmly to the mounting surface, aim the housing in the desired direction and firmly
tighten the hardware at the “swivel” point.
9.
Connect the lighthead cable to its power source and test for proper operation.