Whelen M2GROM User Manual
Automotive: lightheads
Page 1
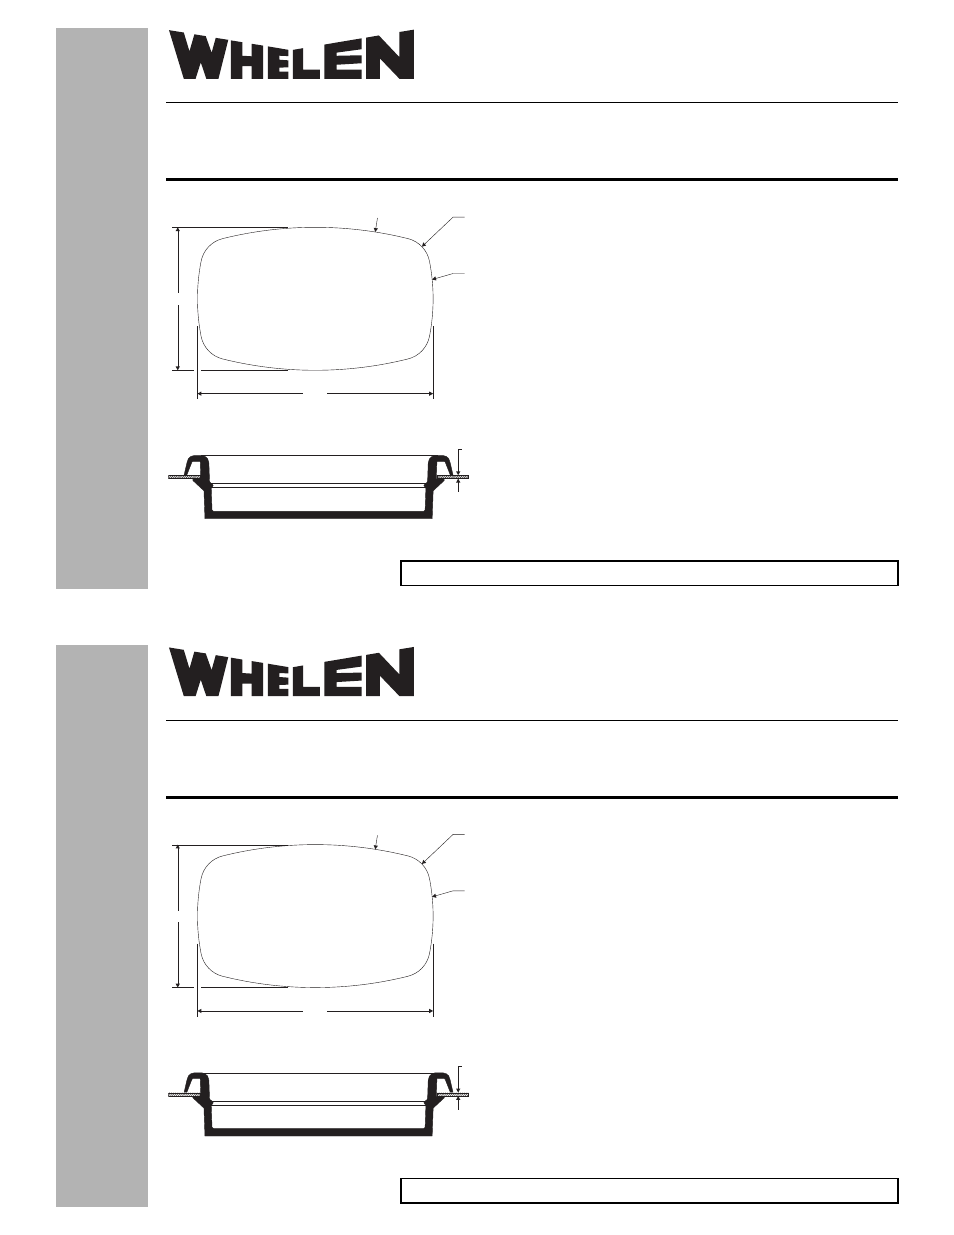
R 6.625 (TYP)
2 PLACES
R 3.375 (TYP)
2 PLACES
4.06
2.46
R .500 (TYP)
4 PLACES
Mounting Surface
(0.25” max.)
©2014 Whelen Engineering Company Inc.
Form No.14762 (020714)
Automotive:
Lightheads
Installation Guide:
M2 Lighthead Body Mount Grommet
®
ENGINEERING COMPANY INC.
51 Winthrop Road,
Chester, Connecticut 06412-0684
Phone: (860) 526-9504
Fax: (860) 526-4078
Internet: www.whelen.com
Sales e-mail: [email protected]
Canadian Sales e-mail: [email protected]
Customer Service e-mail: [email protected]
Mounting...
Position the lighthead grommet onto the proposed mounting location. Note that
the mounting surface must be perfectly flat and can NOT have a thickness greater
than 0.25 inches.
IMPORTANT! As mounting this product will require removing part of the
mounting surface, it is absolutely necessary to make sure that no other
vehicle components could be damaged by this process. Check both sides of
the mounting surface before starting. If damage is possible, select a
different location.
1.
Using the information provided, create an opening in the mounting surface
that precisely matches the dimensions shown. Thoroughly deburr the
edges of the opening before proceeding.
2.
Route the M2 wires through the body grommet. Complete the electrical
connections as outlined in the instructions included with your lighthead.
3.
Install the body grommet into the opening created in step 1. Make sure the
grommet fully engages the entire opening in mounting surface .
4.
Install the lighthead into the body grommet so that it is fully seated.
IMPORTANT! It is the responsibility of the installer to make sure that the
installation and operation of this product will not interfere with or
compromise the operation or efficiency of any vehicle equipment.
IMPORTANT! Before returning the vehicle to active service, visually confirm
the proper operation of this product, as well as all vehicle components/
equipment.
For warranty information regarding this product, visit www.whelen.com/warranty