Fig. 2, Fig. 1, Installation – Whelen RBKTHD9 User Manual
Page 2
Page 2
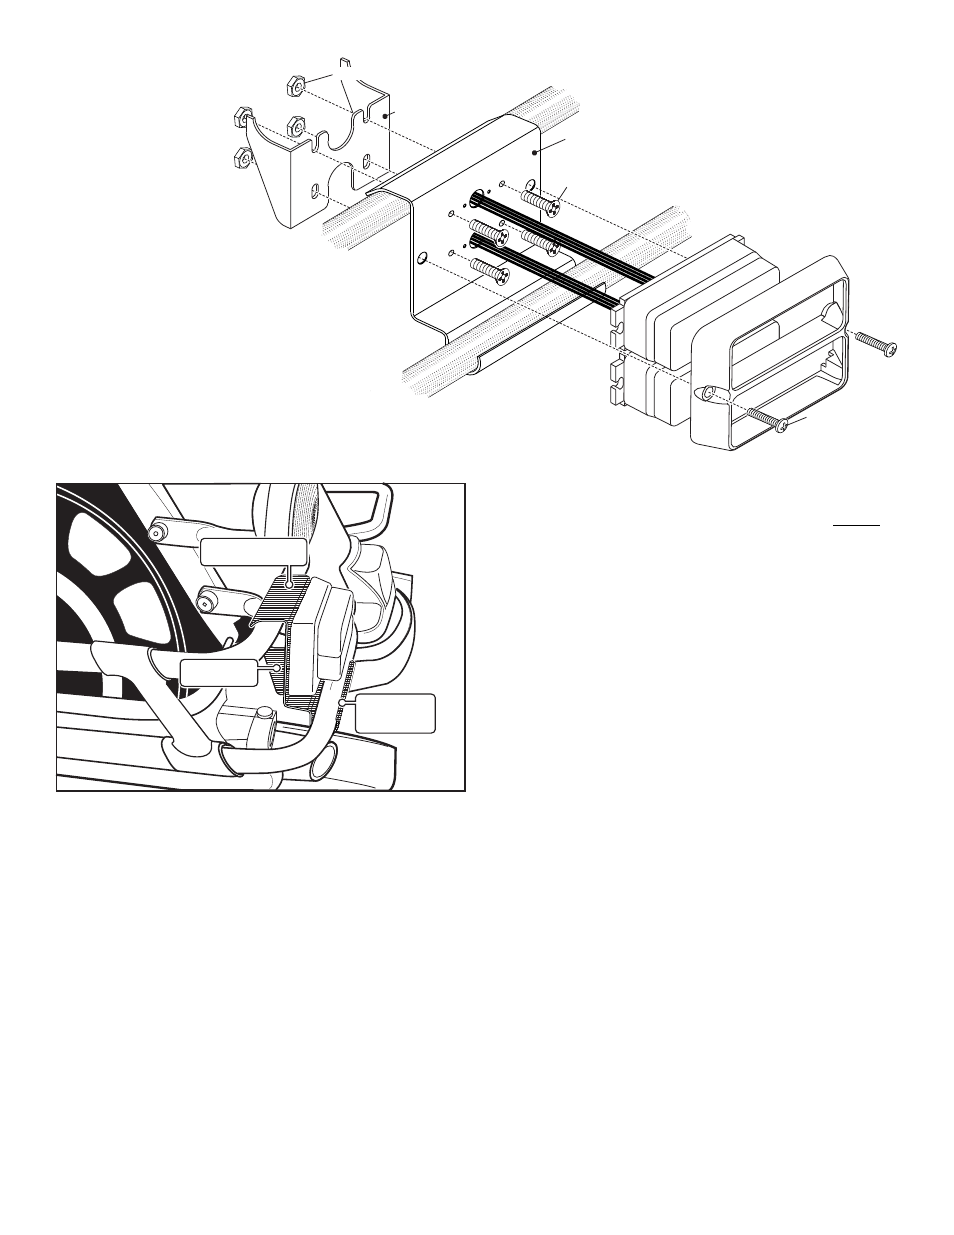
Fig. 2
Secure bracket
with clamp
Hook top of bracket
over upper bar
Hook bottom of
bracket under
lower crash bar
6-32 X 1/2" Phillips
Pan
(QTY 2)
Head Machine
Screw
MOUNTING CLAMP
REAR CRASH BAR CLAMP
6-32 X 15/16" Elastic Stop Nut (QTY 4)
Fig. 1
6-32 X 3/8 Phillips Flat
Head Machine Screw (QTY 4)
Installation:
This bracket mounts to
the rear crash bar of a
Harley-Davidson
motorcycle.
1. Secure the rear crash
bar clamp and
mounting clamp to the
rear motorcycle crash
bar using the supplied
mounting hardware and
tighten all hardware
firmly (Figs. 1 & 2).
2. Mount the lighthead and flange (customer
supplied) to the crash bar clamp while
threading the wires through the two wire holes
and firmly secure the lighthead to the bracket
using the mounting hardware supplied.
3. Extend the wires to your power source and
refer to the manual that comes with the
lighthead for connections.
WARNING! All customer supplied wires that connect to the
positive terminal of the battery must be sized to supply at
least 125% of the maximum operating current and FUSED at
the battery to carry that load. DO NOT USE CIRCUIT
BREAKERS WITH THIS PRODUCT!
IMPORTANT! It is the responsibility of the installation
technician to make sure that the installation and operation of
this product will not interfere with or compromise the
operation or efficiency of any vehicle equipment! Before
returning the vehicle to active service, visually confirm the
proper operation of this product, as well as all vehicle
components/equipment.