Mounting, Fig. 1 fig. 4 fig. 3 fig. 2 – Whelen M05ZB User Manual
Page 2
Page 2
Simultaneous
Simultaneous
3 Amp fuse
5 Amp fuse
(TIR3 models)
(LINZ6 models)
RED
BLACK
GREY
to +12VDC
to Ground
Sync
(+)
Battery
(-)
Long seal
starts here...
...and
ends here.
...wraps around the sides and top...
Short Seal
Here
Short Seal
Here
Outer Housing
Surface
Housing
Inner Housing
Surface
The inner gasket lip
should curl inwards
as shown.
Mounting
IMPORTANT! The lightbar should be located a
minimum of 16" from any radio antennas!
This product is designed to mount in the lowest, visible
section of the motorcycle windshield.
1.
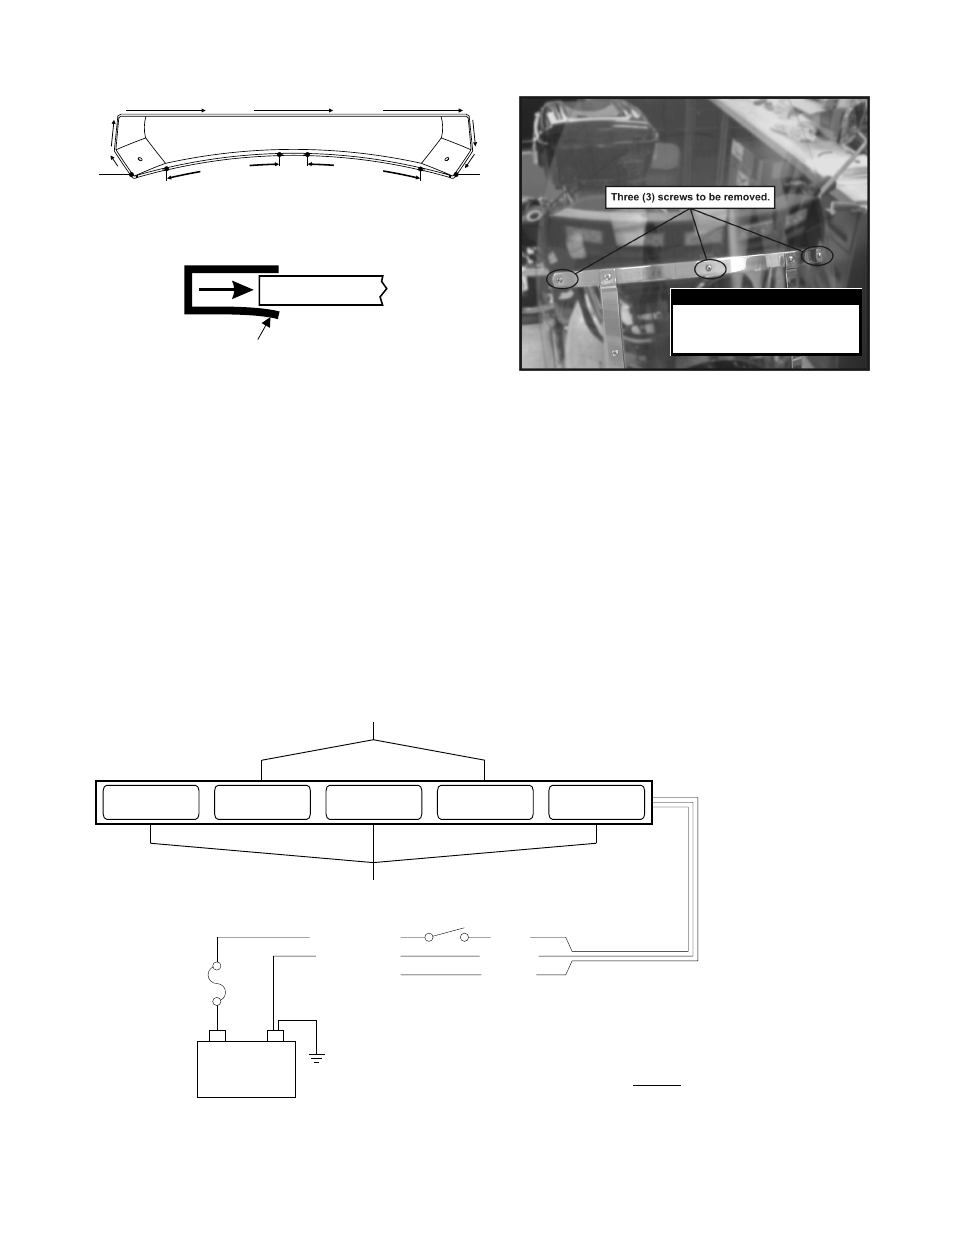
Install the 3 housing edge seals (1 long seal and 2
short seals) onto the lightbar as shown (Fig. 1). Make
sure that the seal is oriented so that the lip curls
inward (Fig 2).
2.
Remove the 3 screws shown from the upper section of
the windscreen (Fig. 3.).
CAUTION! DO NOT LOOK DIRECTLY AT
THESE LED’S WHILE THEY ARE ON.
MOMENTARY BLINDNESS AND/OR EYE
DAMAGE COULD RESULT!
IMPORTANT WARNING!
WARNING! All customer supplied
W
ires that connect to the positive
terminal of the battery must be sized to supply at least 125% of the
maximum operating current and FUSED at the battery to carry that
load. DO NOT USE CIRCUIT BREAKERS WITH THIS PRODUCT!
Fig. 1
Fig. 4
Fig. 3
Fig. 2
3.
Position the lightbar into its mounting position behind the
windscreen. When properly positioned, the holes in the
lightbar mounting tabs will be aligned with the vacant
holes through the windscreen.
4.
Using the mounting hardware included with the lightbar,
secure the lightbar to the windscreen assembly.
5.
Route the wires to their respective destinations (Fig. 4).
It is left to the installation technician's discretion to select
a path for these wires that will both protect them from
possible damage and not interfere with the operation of
any other vehicle components or equipment.
IMPORTANT! Before returning the vehicle to active
service, visually confirm the proper operation of this
product, as well as all vehicle components/equipment.