Introduction, Mounting the beta i, Operating the control head – Whelen BETA1 User Manual
Page 3: Fig. 1, Wiring for the control head, Read before installing, Power switch, Microphone, Airhorn override / manual siren switch
Page 3
READ BEFORE INSTALLING!!!
Do not install this product or route any wires in the
deployment area of your air bag. Equipment
mounted or located in the air bag deployment area
will damage or reduce the effectiveness of the air
bag or become a projectile that could cause
serious personal injury or death. Refer to your
vehicle owner's manual for the air bag deployment
area.
The User/Installer assumes full responsibility to
determine the proper mounting location, based on
providing ultimate safety to all passengers inside
the vehicle. Whelen Engineering Co. assumes no
liability or responsibility for determining individual
applications or exact installation location criteria.
Introduction...
This manual outlines the procedures necessary for the installa-
tion and operation of the BETA1™ Series Control Head. It is
essential to read through this manual carefully before beginning
the installation process.
Mounting the BETA I
TM
1.
Locate a suitable mounting location for the BETA1™ Series
control head. Be sure that the control head fits properly and
does not interfere with any dashboard components.
Connecting to your Horn Relay:
1.
Locate your vehicle’s horn relay. Now locate the wire that
connects the vehicle horn to the horn relay output and cut
this wire. (Fig. 2)
2.
Extend each end of the cut wire (using a minimum 16
gauge wire) to the control head.
3.
Connect the wire coming from the horn relay output to the
white wire of the 12 pin connector.
4.
Connect the wire coming from the horn to the gray wire of
the 12 pin connector.
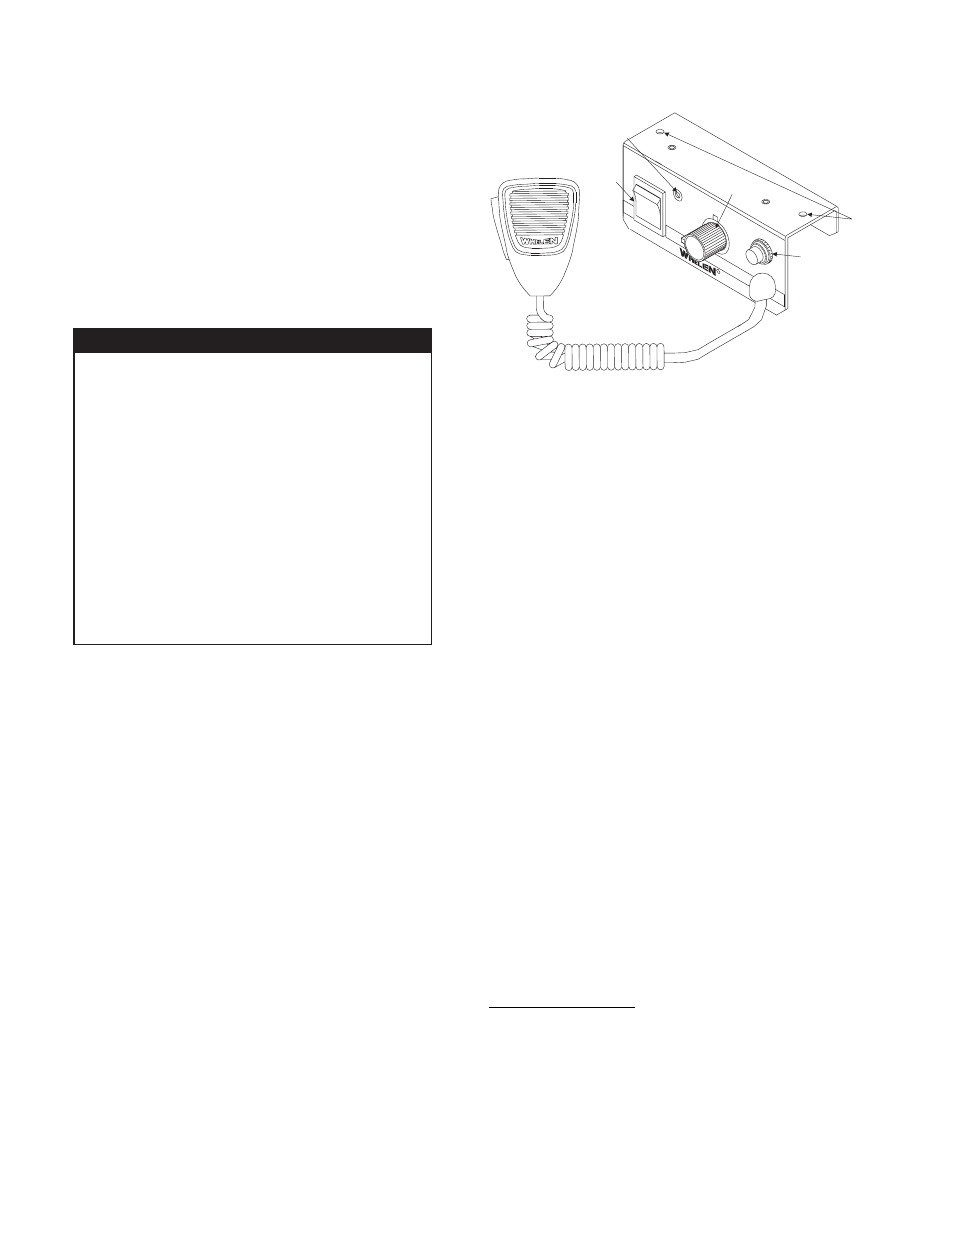
Operating the Control Head...
Power Switch
This switch has two positions: Down (BETA1 - Off) and Up
(BETA1 - On). When this switch is in the Off position, the BETA1
will not function. When the switch is in the On position the siren
is functional and may be activated at the operator’s discretion.
NOTE: If the BETA1
is connected to the vehicle’s horn ring
circuit, the vehicle horn is disabled when the BETA1 power
switch is in the ON position. The horn ring will now function as a
manual siren switch.
Microphone
Pressing the microphone button will allow you to broadcast
public address over the siren loudspeaker regardless of the
rotary switch position. NOTE: This will override all other siren
functions.
Airhorn Override / Manual Siren Switch
The airhorn override switch will activate the simulated airhorn
tone when pressed and will terminate upon release. Note: The
Airhorn will override all of the BETA1 control head functions
except the microphone.
POW
ER
ON
AIR
HOR
N
SER
IES
TM
R
BET
A
MIC
VOL
RAD
PA
MAN
HF
WA
IL
YELP
TO
NE3
Volumn
Control
Screw
Airhorn Override/
Manual Siren Switch
On / Off
Switch
Rotary
Switch
Mounting
Holes
Fig. 1
2.
Position the control head on the proposed mounting
location. Using a pencil or other suitable tool, scribe the
mounting surface where the holes are to be drilled. (Fig. 1)
CAUTION! As mounting the BETA1™ will require drilling, it
is absolutely necessary to make sure that no vehicle
components could be damaged by the mounting process.
Check both sides of the mounting surface before starting
and if damage is possible, select a different mounting
location.
3.
Drill the 2 mounting screw holes.
4.
Position the control head onto the mounting surface. Using
the sheet metal screws, secure the control head to the
mounting surface.
Wiring for the Control Head...
To hook up the BETA I
TM
control head simply plug the 17 ft.
cable (supplied) into the control head then route the other end
of the cable to the amplifier. (Fig. 2)