Caution – Whelen SAK17 User Manual
Page 2
Page 2
1/4 X 1"
PPHSMS
1/4"
INTERNAL
TOOTH
LOCK-
WASHER
SA314
Mounting
Speaker to
Bracket
IMPORTANT: For drainage purposes, the speaker must be
oriented so the wire passage hole (which is also the drain hole)
is in the “6 o’clock” position (closest to the road). Improper
mounting will result in premature driver failure and void the
product warranty.
1/4 - 20 X 1-1/4"
HEX HEAD SS
SA315
wire passage
/drain hole
wire passage
/drain hole
1/4" SPLIT
LOCK WASHER
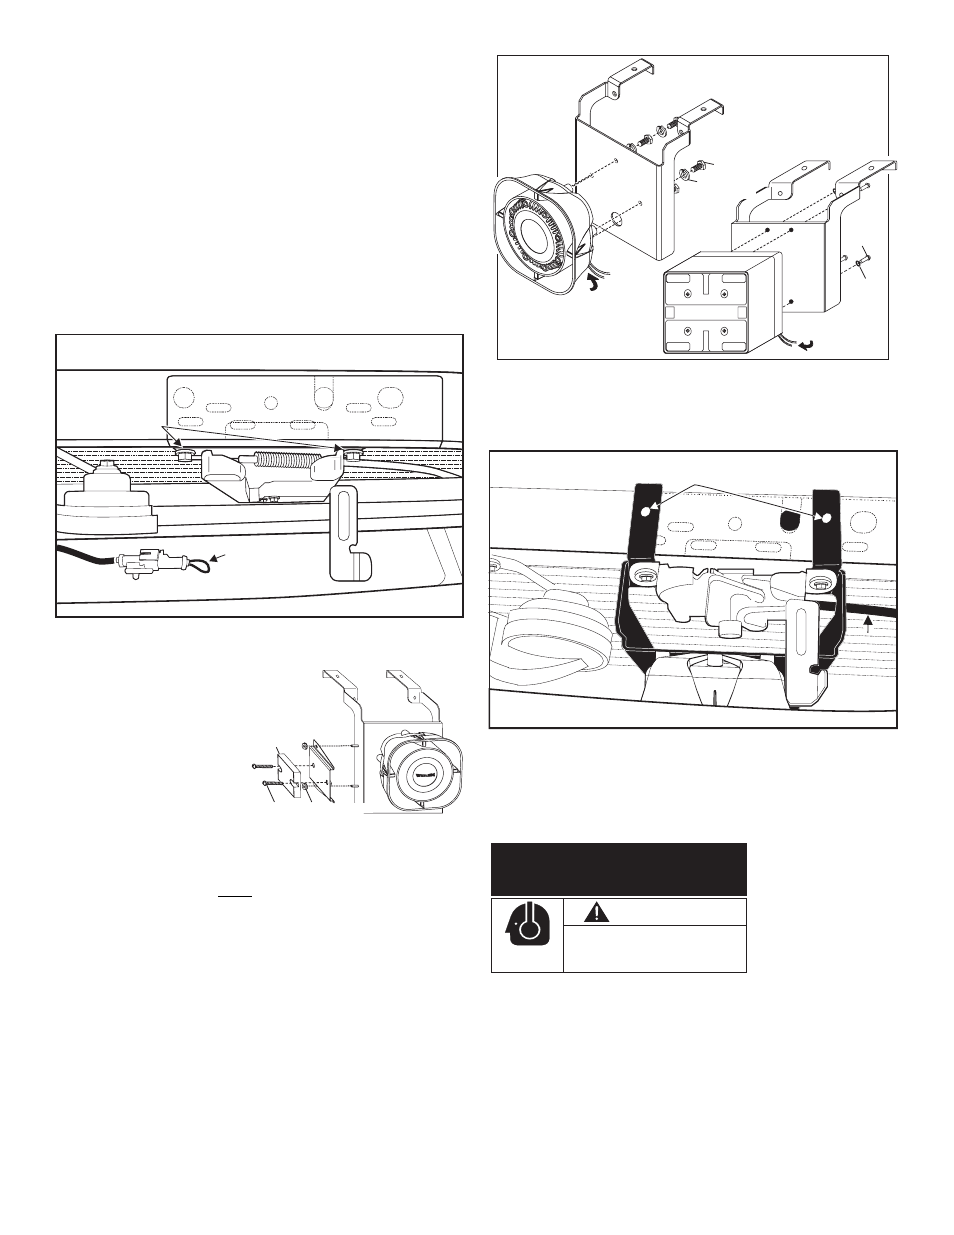
FIG. 3
Optional
mounting holes
Hood
release
cable
Hood
release
cable
Hood
release
cable
FIG. 1
Remove 2 screws
holding hood latch
mechanism onto
vehicle.
Unplug headlight
flasher connector
from vehicle.
SA-314 / SA315 Installation:
The SA314 and SA315 mount the same except for mounting the
speaker to the bracket.
1. Unplug the vehicle headlight flasher’s connector and remove it
from its mounting tab for connection to the Whelen® headlight
flasher to be installed (Fig. 1).
2. Wire the Whelen flasher to the vehicle following the flashers
instructions, then attach it to the speaker bracket (Fig. 2).
3. Mount the speaker to the bracket using the mounting hardware
supplied with the bracket.
4. Remove the 2 bolts holding the bottom hood latch to the vehicle
then remove the bottom hood latch and set it aside (do not
disconnect the cable) (Fig. 1).
5. Place the bracket (with speaker) onto the mounting area and line
the bracket mounting holes up with the hood latch mounting
holes. The hood release
cable runs below the
bracket (Fig. 3). The top of
the bracket hooks over the
frame to add to stability.
6. Reattach the hood latch
over the speaker bracket,
using the original bolts
from the hood latch. You
will notice that there are 2
holes in the top of the
bracket (Fig. 3). You may
add self-tapping screws (supplied) here as an extra precaution.
IMPORTANT: Position the hood latch so that when you reattach
the bolts, they are in the exact same spot they were before you
took them off. Go by the round wear marks that each bolt leaves
in the hood latch. This will insure that the hood latch is in the
same position as before and that the hood will close properly.
Caution: Using a torque wrench, retighten the hood latch bolts to
9 Ft./Lbs.
7. Extend the WHITE (positive) and BLACK (negative) speaker
wires to your siren amplifier and connect them as shown in the
amplifier’s instructions.
IMPORTANT! It is the responsibility of the installation technician
to make sure that the installation and operation of this product
will not interfere with
or compromise the
operation or efficiency
of any vehicle
equipment!
FIG. 2
8-32 X 1/2
PPHMS SS
FLASHER
10-24 CAD PLATED
WIZ NUT
CAUTION
Loud siren noise can cause
hearing damage and/or loss.
Refer to OSHA Section 1910.95 prior
to putting ANY siren into service!
Wear
Protection!
ACTIVATION OF THIS
SIREN MAY DAMAGE
UNPROTECTED EARS!