Whelen TANBKT1 User Manual
Page 2
Page 2
3.
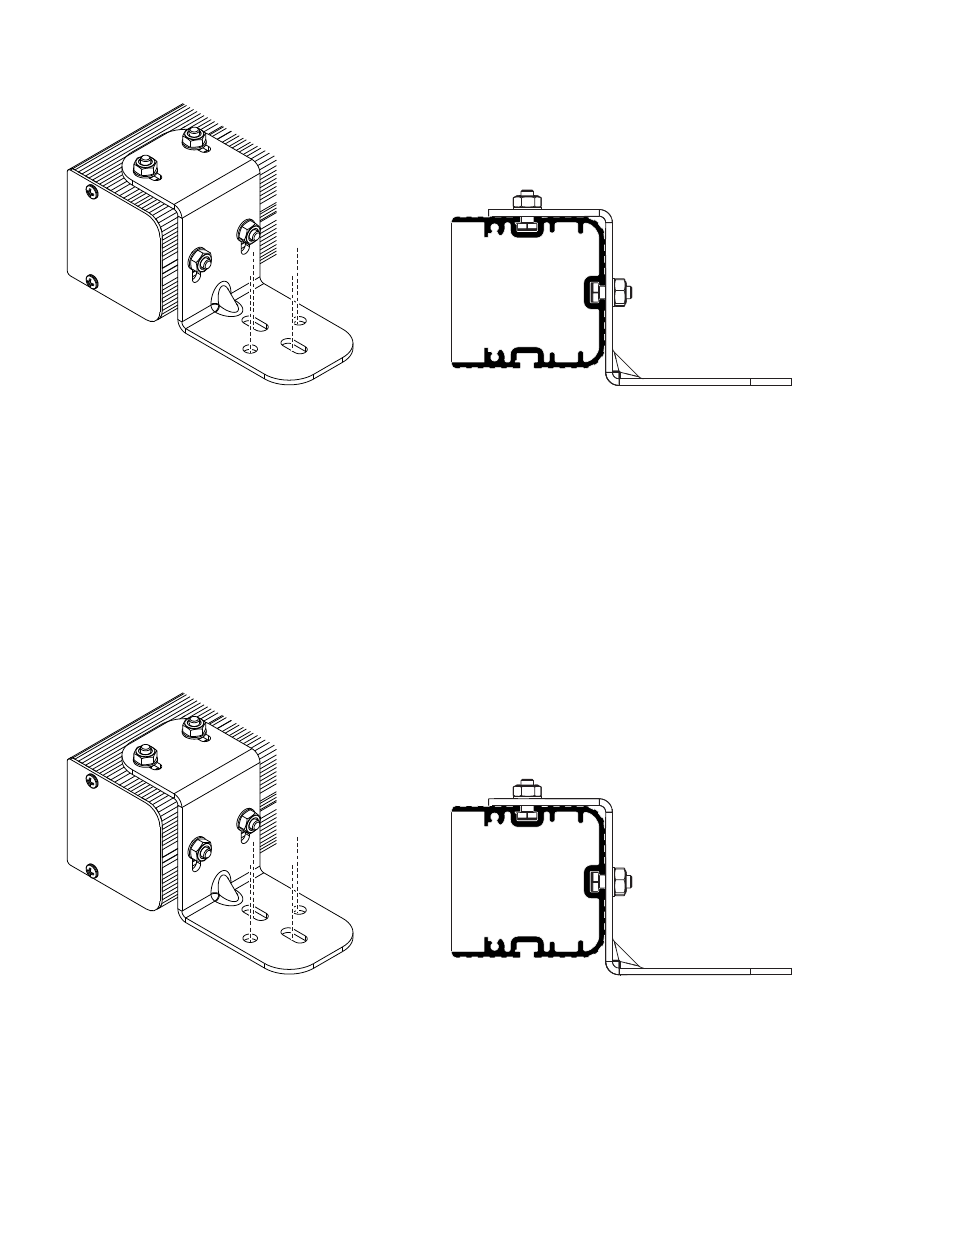
NOTE: The bracket is shown here mounted toward the outside of the extrusion as one
example. Brackets can be positioned at any location along the length of the extrusion
for different applications.
Mount the bracket(s) to the vehicle using customer supplied hardware.
IMPORTANT! It is the responsibility of the installation technician to make sure that the installation and operation of this
product will not interfere with or compromise the operation or efficiency of any vehicle equipment!
IMPORTANT! Permanent mounting of this product will require drilling. It is absolutely necessary to make sure that no
other vehicle components could be damaged by this process. Check both sides of the mounting surface before starting.
If damage is likely, select a different mounting location.
IMPORTANT! Before returning this vehicle to active service, visually confirm the proper operation of this product, as well
as all vehicle components/equipment.
SIDE VIEW
3.
NOTE: The bracket is shown here mounted toward the outside of the extrusion as one
example. Brackets can be positioned at any location along the length of the extrusion
for different applications.
Mount the bracket(s) to the vehicle using customer supplied hardware.
IMPORTANT! It is the responsibility of the installation technician to make sure that the installation and operation of this
product will not interfere with or compromise the operation or efficiency of any vehicle equipment!
IMPORTANT! Permanent mounting of this product will require drilling. It is absolutely necessary to make sure that no
other vehicle components could be damaged by this process. Check both sides of the mounting surface before starting.
If damage is likely, select a different mounting location.
IMPORTANT! Before returning this vehicle to active service, visually confirm the proper operation of this product, as well
as all vehicle components/equipment.
SIDE VIEW