5" mounting foot, Page 3 – Whelen JV8AAAA User Manual
Page 3
Page 3
Locking
Plate
Mounting
Foot
Mounting
Foot
Nut
Mounting
Pad
Adjustment
screws
Lock
Washer
Anchor
Plate
Tinnerman
Nut
Tinnerman
Nut
Anchor
Plate
Locking
Plate
Mounting
Strap
Mounting
Screw
Adjustable Mounting Foot / Model MKAJ
Standard Mounting Foot / Model MKEZ
Tighten
screw
s
with
torque
wrench
set
at 35
to 40
in/lbs
MOUNTING FOOT
TINNERMAN
NUT
FOOT
ANCHOR
PLATE
SET
SCREW
Plate slides into
lightbar extrusion
5" Mounting Foot
NUT
BOLT
SPLIT LOCK
WASHER
METAL SCREW
NOTE: The mounting straps are made to fit the contours of individual
vehicles. The strap
may look different.
shown here is for example only. The strap
for your vehicle
NOTE:
NOTE:
STRAP
S H E E T
M E T A L
SCREWS
EXTENSION
VEHICLE ROOF
Mounting
Strap
Mounting
Screw
Tension
Bolt
Tension
Bolt
Model
MKAJ
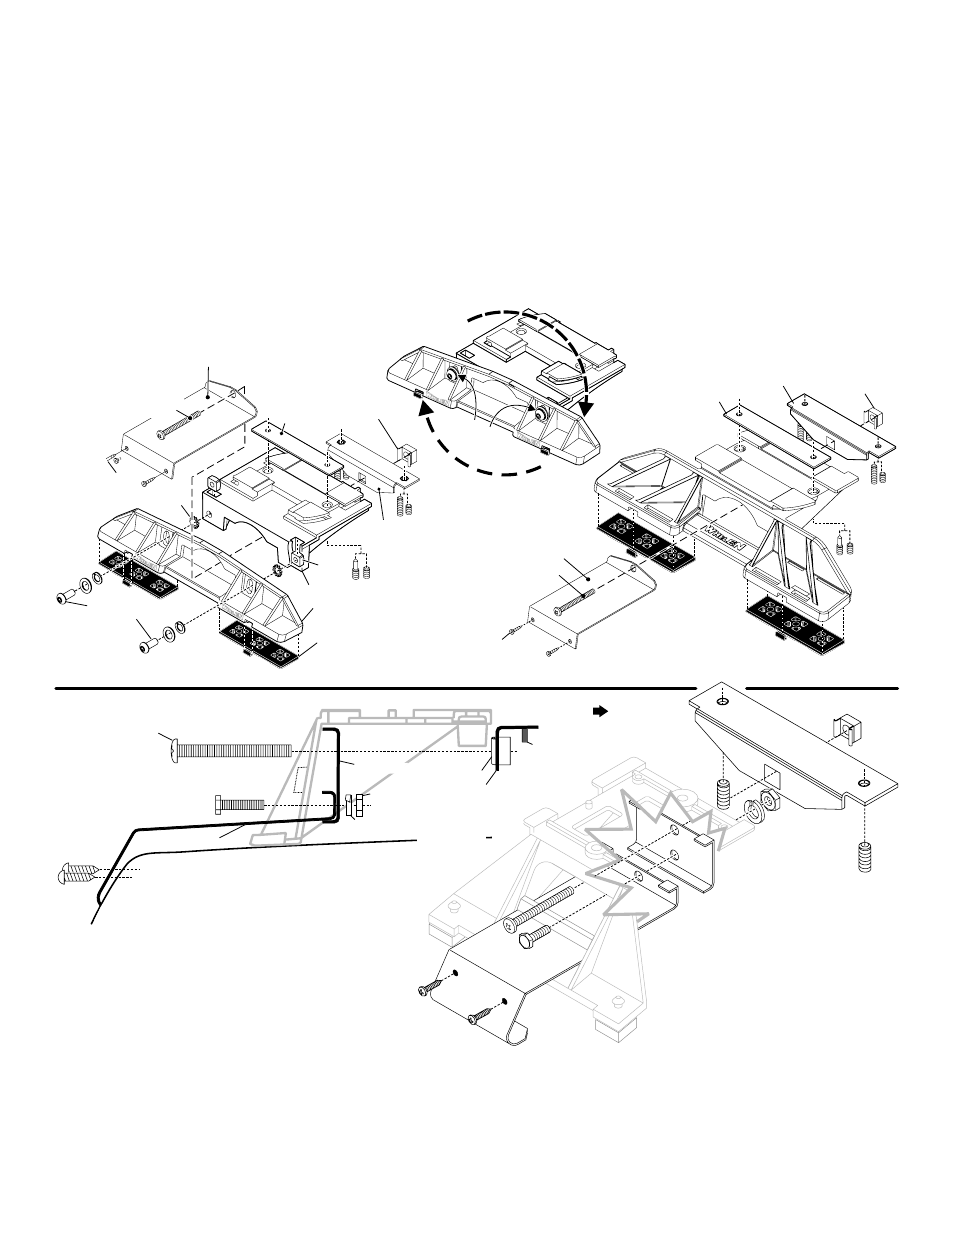
Installation: If your lightbar has a 5” mounting foot, it will
assemble differently than the standard mounting foot. It also
uses an extension to compensate for the extra height. Follow
these illustrations for assembly. Mounting to the lightbar is the
same.
7. Return the lightbar to an upside-down position. Slide each anchor plate
outwards until it is fully engaged with its corresponding mounting foot.
With the mounting foot and anchor plate in their proper positions firmly
tighten all of the set screws (2 or 4 per side). Flip the lightbar right side-
up and return it to its mounting position.
8. Open both drivers side doors. In the area directly below the mounting
foot, carefully pull the drivers side weather-strip away from the vehicle.
Remove enough so that the area where the mounting strap will be
secured to the vehicle is exposed. Repeat for passenger side.
9. Insert the mounting strap through the mounting foot. Be sure that the
strap fits flush against the area where it will be secured onto the vehicle.
Insert the tension bolt through the mounting strap and into the anchor
plate and secure it with the tinnerman nut. Tighten slightly with a long
shafted, Phillips screwdriver. Repeat procedure for passenger side.
10. If your mounting strap has mounting holes in the end, use these holes
as a template to drill holes through the strap and into the vehicle and
secure it with sheet metal screws. Repeat passenger side.
11.Firmly tighten the tension bolts to secure the lightbar to the vehicle.
NOTE: Model MKAJ is an adjustable mounting foot. On this model
you may loosen the screws on the rear of the foot and adjust the
angle of the lightbar. This feature can be used if the angle of the roof
is not level with the road.
IMPORTANT: To adjust the leveling screws you must use a torque
wrench set at 35 to 40 in./lbs.