4 optional - din-rail mounting – PLANET VF-102-KIT User Manual
Page 14
14
Step 3: Attach a rack-mount bracket to each side of the
Converter Chassis with supplied screws attached to the
package.
Step 4: After the brackets are attached to the Converter
Chassis, use suitable screws to securely attach the
brackets to the rack.
Step 5: Proceed with the steps 4 and steps 5 of session 3.2
Stand-alone Installation to connect the video and
fiber cabling and supply power to your Converter
Chassis.
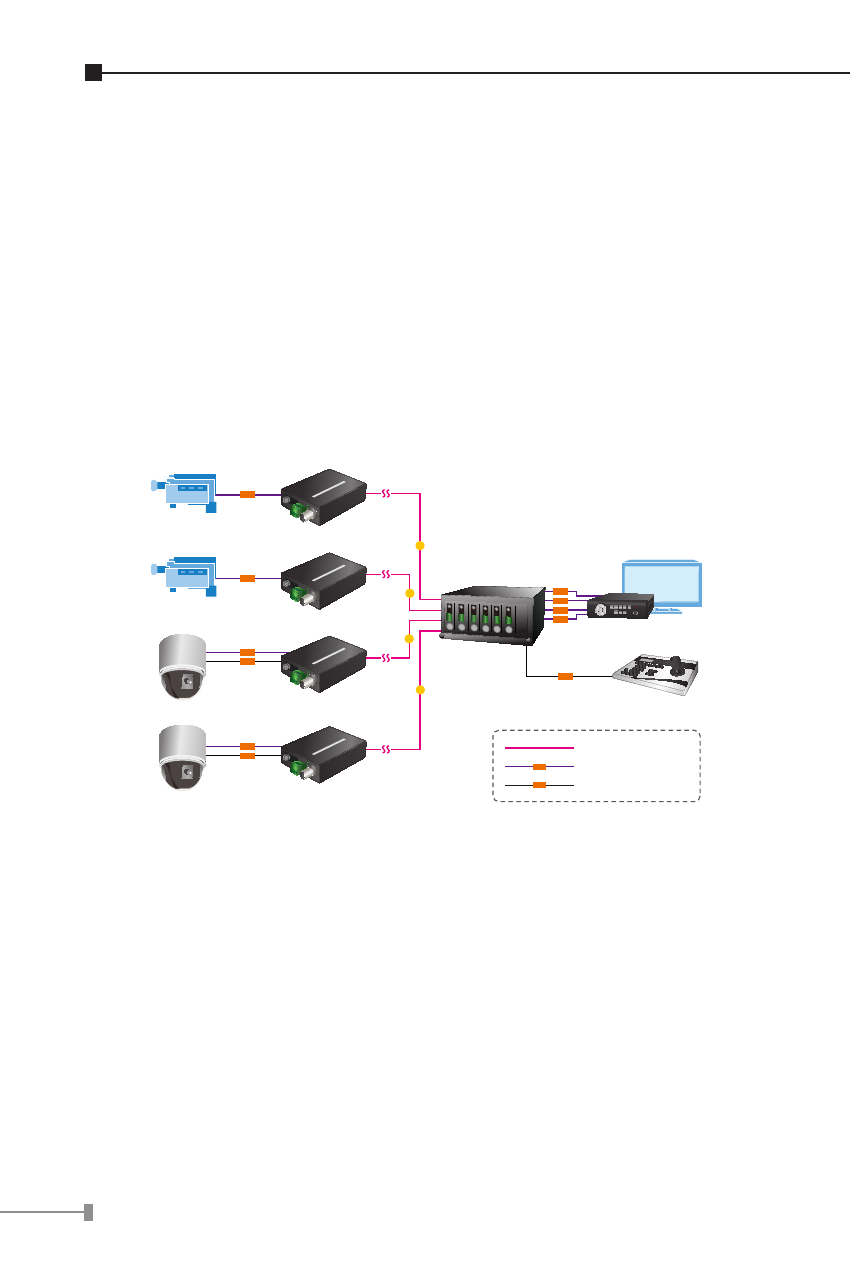
Control Keyboard
|O|O|
VF-102-T
VF-102-T
VF-102-T
VF-102-T
VF-102-R
DVR / Monitor
Media Converter Chassis
Camera
Camera
Speed Dome
Speed Dome
100
100
100
100
A/V
A/V
A/V
A/V
|O|O|
|O|O|
A/V
A/V
A/V
A/V
Coax
Coax
Coax
Coax
Coax
Fiber-optic
Audio Line / Video Line
A/V
Serial Line (RS-485)
|O|O|
3.4 Optional - DIN-Rail mounting
There are two DIN-Rail holes on the left side of the VF-102-T/
VF-102R that allows the converter can be easily installed with
DIN-Rail mounting. The PLANET optional DIN-Rail mounting Kit
– RKE-DIN can be order separately. When need to replace the
wall mount application with DIN-Rail application on the VF-102-T
/ VF-102-R, please refer to following figures to screw the DIN-
Rail on the converter. To hang the VF-102-T / VF-102-R, follow
the below steps: