PLANET NVR-400 User Manual
Package contents, Physical installation, Front panel description
– 1 –
– 2 –
– 3 –
– 4 –
1. Package Contents
n 1 x NVR-400
n 1 x Power Cord
n 1 x Power Adapter
n 1 x RJ-45 Cable
n 4 x Rubber Pad
n 4 x Screw
n 1 x User’s Manual CD-ROM
n 1 x Quick Installation Guide
Note
If any of above items are missed or damaged,
please contact your local dealer for support.
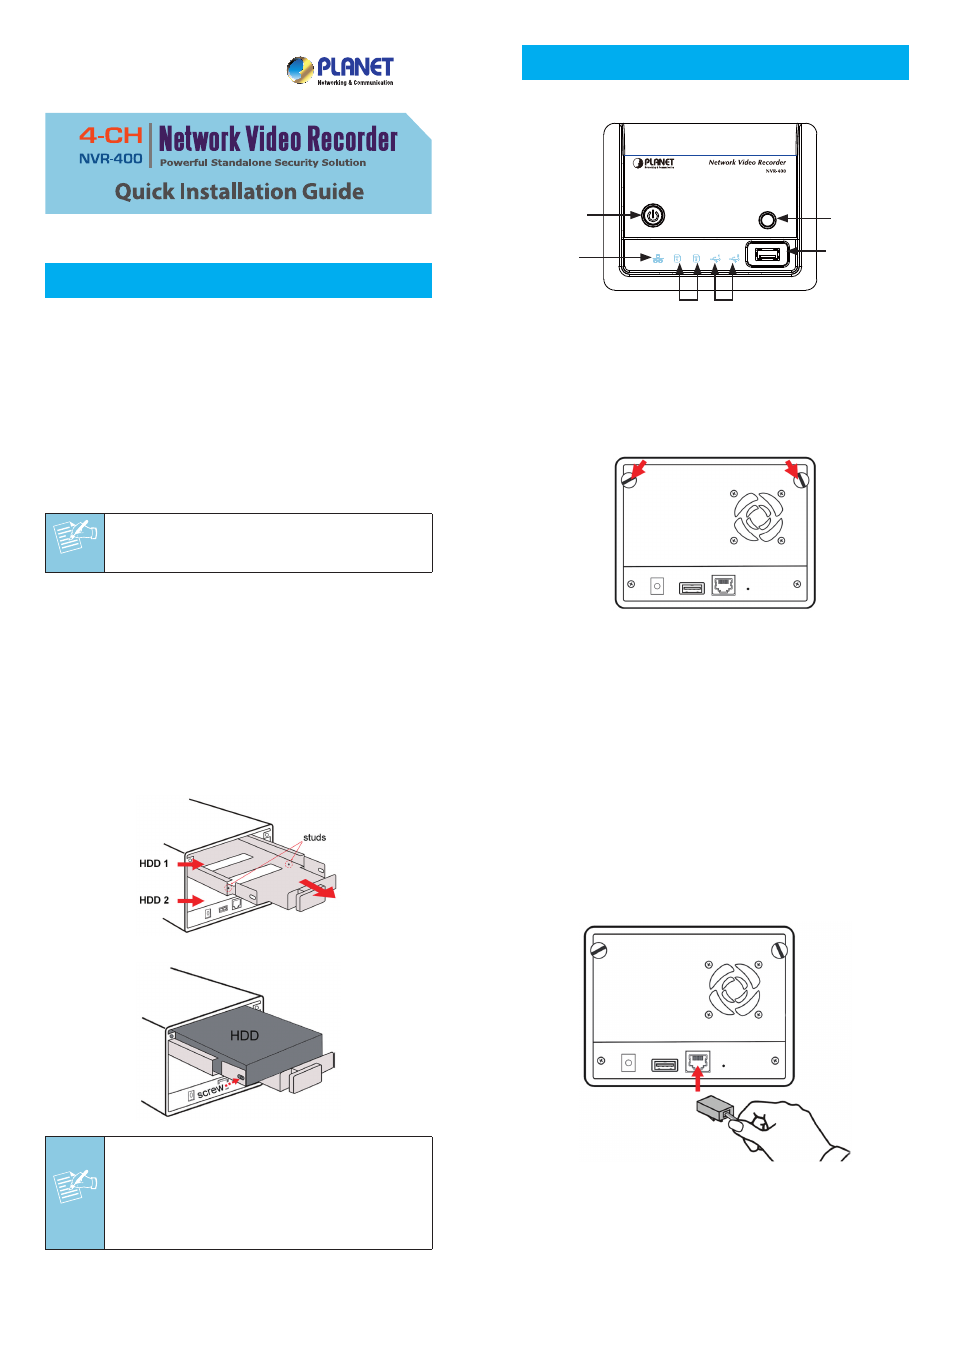
3. Pull the disk tray out until it jammed in the rack.
4. Place the hard disk drive on the tray, and then secured
the screws on both side.
Note
While placing the hard disk drive onto the
tray, align the screw holes on the bottom of
hard disk drive with the studs on the base of
tray. The two studs are designed to ensure the
hard disk drive will be installed on the bracket
securely.
2. Physical Installation
Front Panel Description
Power
Button
LAN
LED
HDD
LED
USB
LED
USB
Port 1
USB
Unmount
Button
Installing the Hard Disk Drive
1. Disconnect the power cable of the device.
2. Remove two screws on the rear panel, and then remove
the rear panel.
5. Push the tray into the disk bay all the way until it
connects the device.
6. Replace the rear panel and secure two screws.
Connecting the Network
Plug an Ethernet cable to the LAN connector located on the
device’s rear panel, and then connect it to the network or
directly to a computer for configuration.