Creating a normal voice, Assign waves to that element – Yamaha Expansion Manager User Manual
Page 16
Creating Your Own Original Voices
16
Creating a Normal Voice
This section describes in detail the procedure for Step 5 on
when you are creating an original Normal Voice. This
involves assigning Wave files to each of the Elements that make up the Voice. You can either start from an empty Normal Voice
or modify an existing one by adding Waves and/or changing its settings.
1.
Open the Element window by clicking the button for the Element to which you
wish to assign Waves.
2.
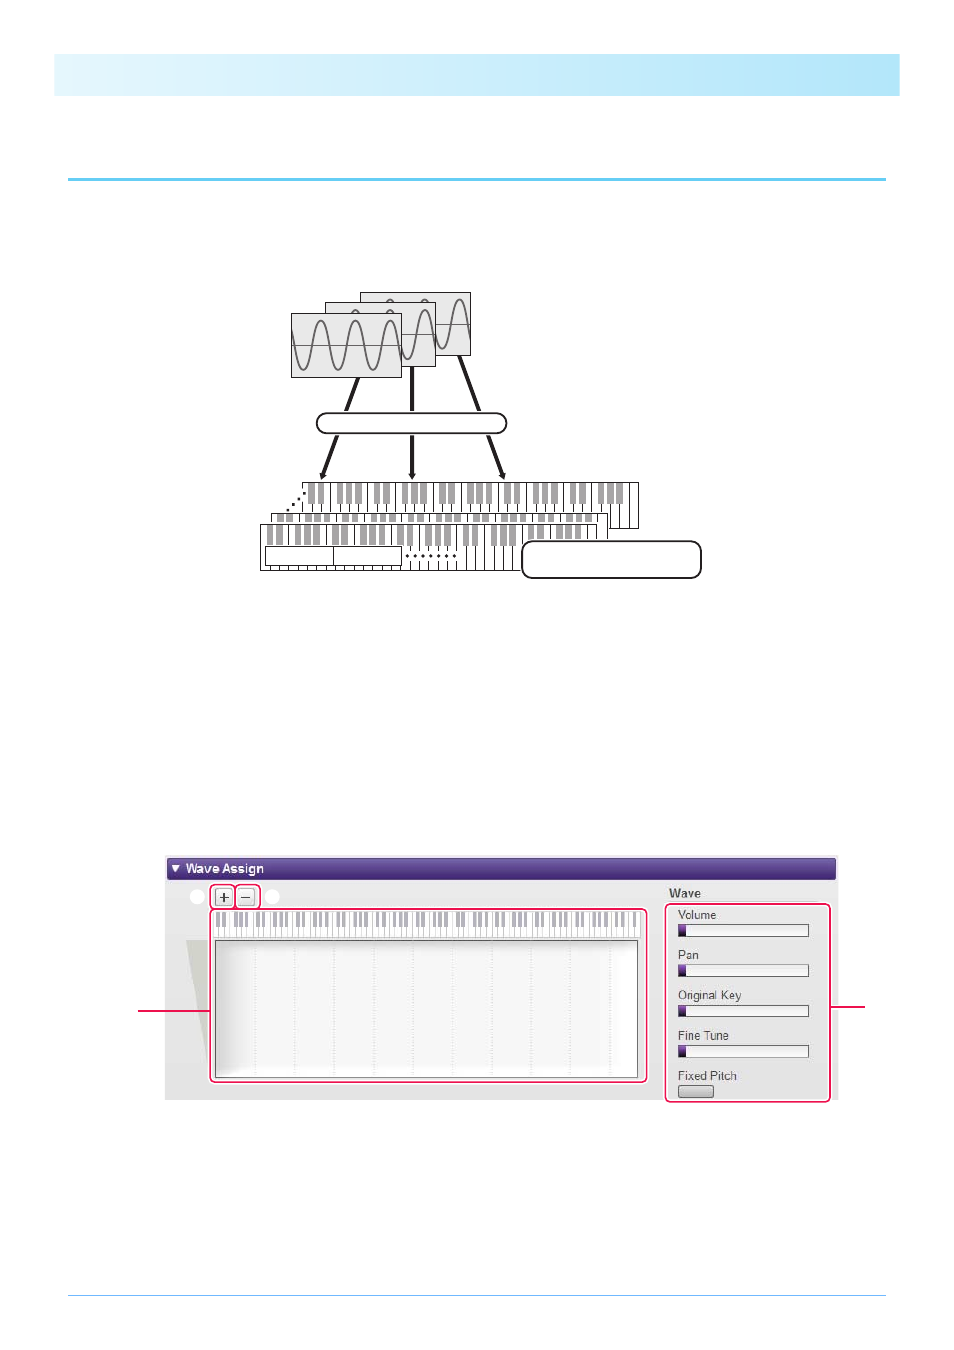
Assign Waves to that Element.
2-1.
Click the Add Wave button q in the Wave Assign menu.
2-2.
When the file selection dialog is displayed, select the Wave file(s) you wish to add.
When a file is added in this way, a rectangle showing the Wave’s playing zone will be displayed in the Wave Map-
ping area e. To delete a Wave file, click its playing zone and then the Delete Wave button w. Double-clicking a
playing zone opens a file selection dialog, allowing you to select a new Wave file to replace the current one.
2-3.
If necessary, drag the playing zone in the Wave Mapping area e to adjust the ranges of note numbers and veloci-
ties to which it will respond when the keyboard is played. Specifically, the range of note numbers is set by drag-
NOTE
Depending on the instrument to which the Pack is to be installed, the length of Waves that can be played back may be limited.
Element 8
Wave files (WAV or AIFF)
Assign to Element(s)
Element 1
Wave 1
Wave 2
Edit each Element and
entire Voice
Element 2
e
q
w
r