Soldering appendix – Erica Synths EDU DIY Mixer Eurorack Module Kit User Manual
Page 46
46
SOLDERING APPENDIX
Heat part and
pad 2 - 3 sec
Add
solder
Continue
heating 1 -2 sec.
Let cool
Perfect
Too much
solder
Not enough
solder
Short
Too much
heat
Cold
joint
1
2
3
4
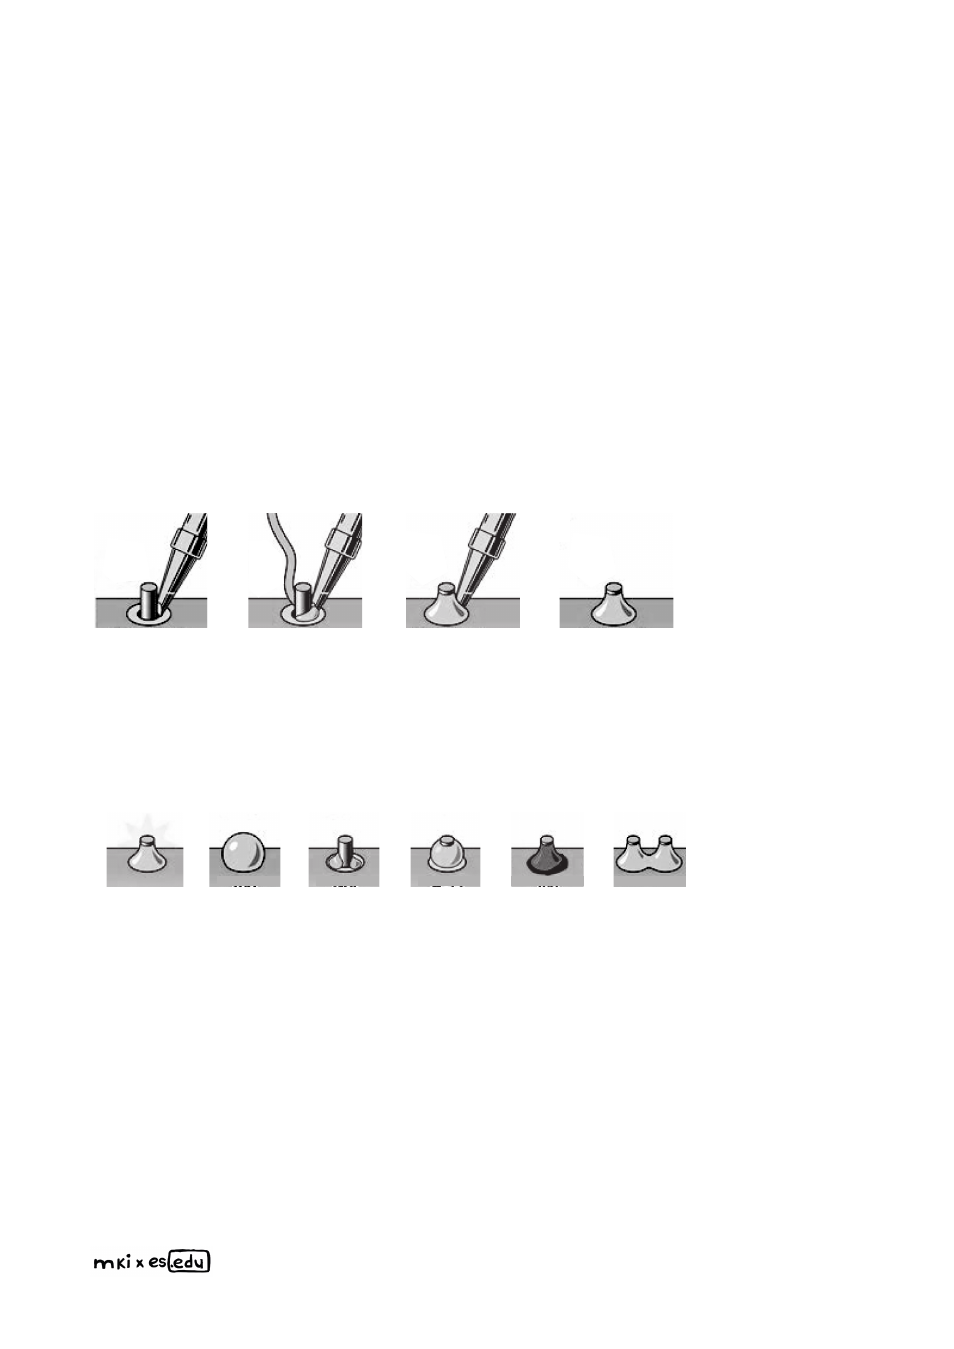
If you’ve never soldered before – or if your skills have become rusty – it’s probably wise
to check out some THT (through-hole technology) soldering tutorials on YouTube.
The main thing you have to remember while soldering is that melted solder will flow
towards higher temperature areas. So you need to make sure you apply equal heat to
the component you are soldering and the solder pad on the PCB. The pad will typically
absorb more heat (especially ground-connected pads which have more thermal mass),
so keep your soldering iron closer to the pad on the PCB. It’s critically important to dial
in the right temperature on your soldering station. I found that about 320 °C is the opti-
mal temperature for most of parts, while for larger elements like potentiometers and
sockets, you may want to increase that temperature to 370 °C.
Here’s the recommended soldering sequence:
After you have completed soldering, inspect the solder joint: