Configuring your wireless connection – ARRIS TG2472G-NA User Guide User Manual
Page 26
Chapter 5: Installing and Connecting your Telephony Gateway
3. Connect one end of the Ethernet cable to any Ethernet port on the back of the
Telephony Gateway, (5) and the other end to the Ethernet port on a computer, hub, or
broadband router.
Note: If you are connecting to a computer, use the Ethernet cable included in the
Telephony Gateway package.
4. Connect one end of the telephone cable to the telephone port on the back of the
Telephony Gateway (3 or 4). Connect the other end to the telephone.
Configuring Your Wireless Connection
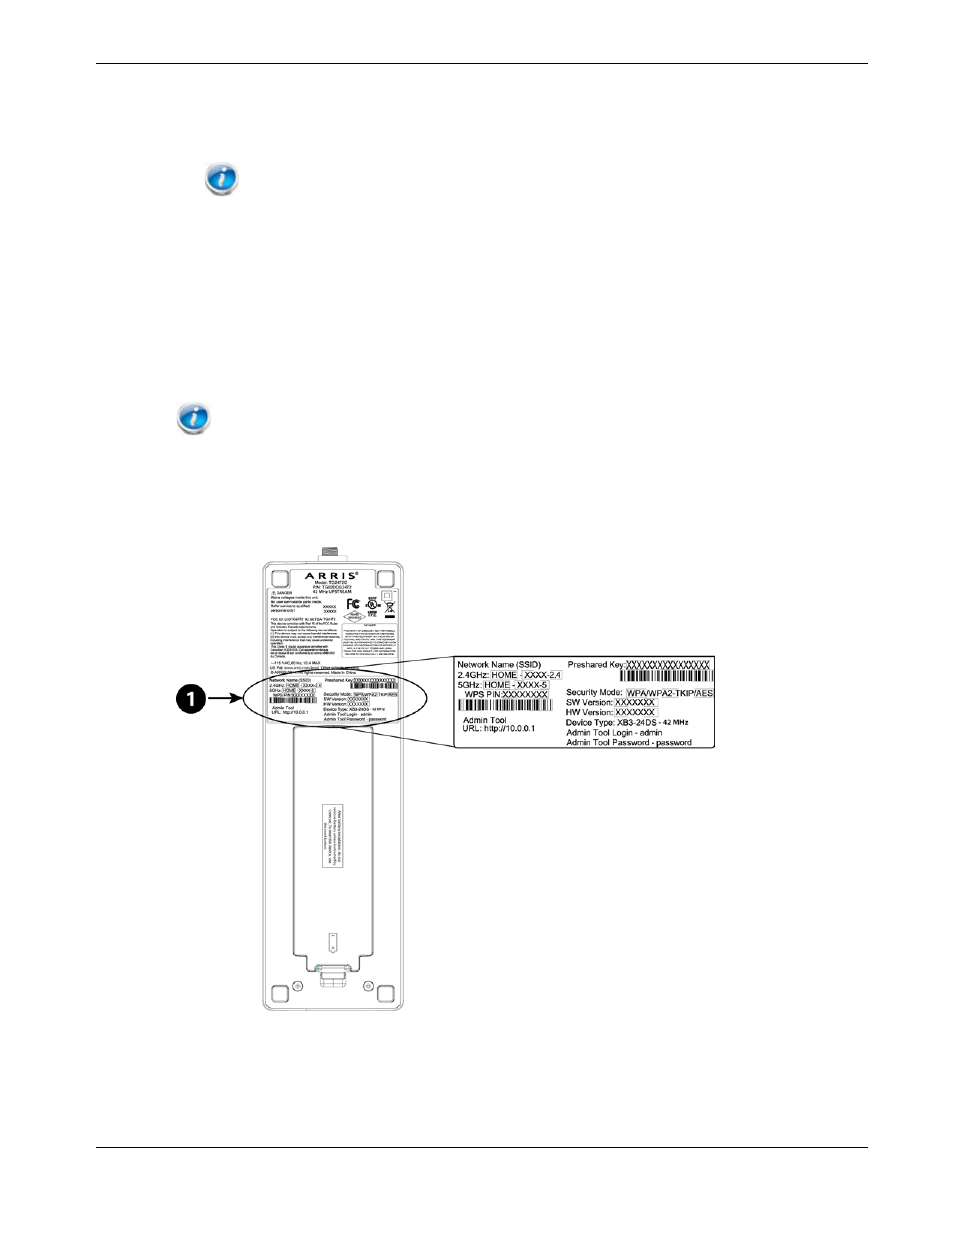
The TG2472 ships with wireless LAN security set by default. See the security label on your
product for the factory security settings.
Note: You must set up your computer and other client devices to work with the security
settings on the TG2472. Refer to the documentation for your client device for instructions on setting
security. On most computer systems you only need to select the network name (SSID) device and
enter the encryption key. If your computer or client device supports Wi-Fi Alliance WPS (Wireless
Protected Setup), activate WPS on your computer or client device and the TG2472 simultaneously to
easily set up your system security.
1. Security Label
If you need to modify the Telephony Gateway’s default wireless security settings, or if you
want to configure any other wireless LAN settings, refer to the following instructions.
Release 24 STANDARD 1.1 January 2015
Touchstone TG2472 Telephony Gateway User Guide 26