Remote link ii technical guide – Auto-Zone Control Systems Remote Link II Technical Guide, Installation Instructions for the Remote Link II Modem (Version 01C) User Manual
Page 12
Remote Link II Technical Guide
12
Operator Interface
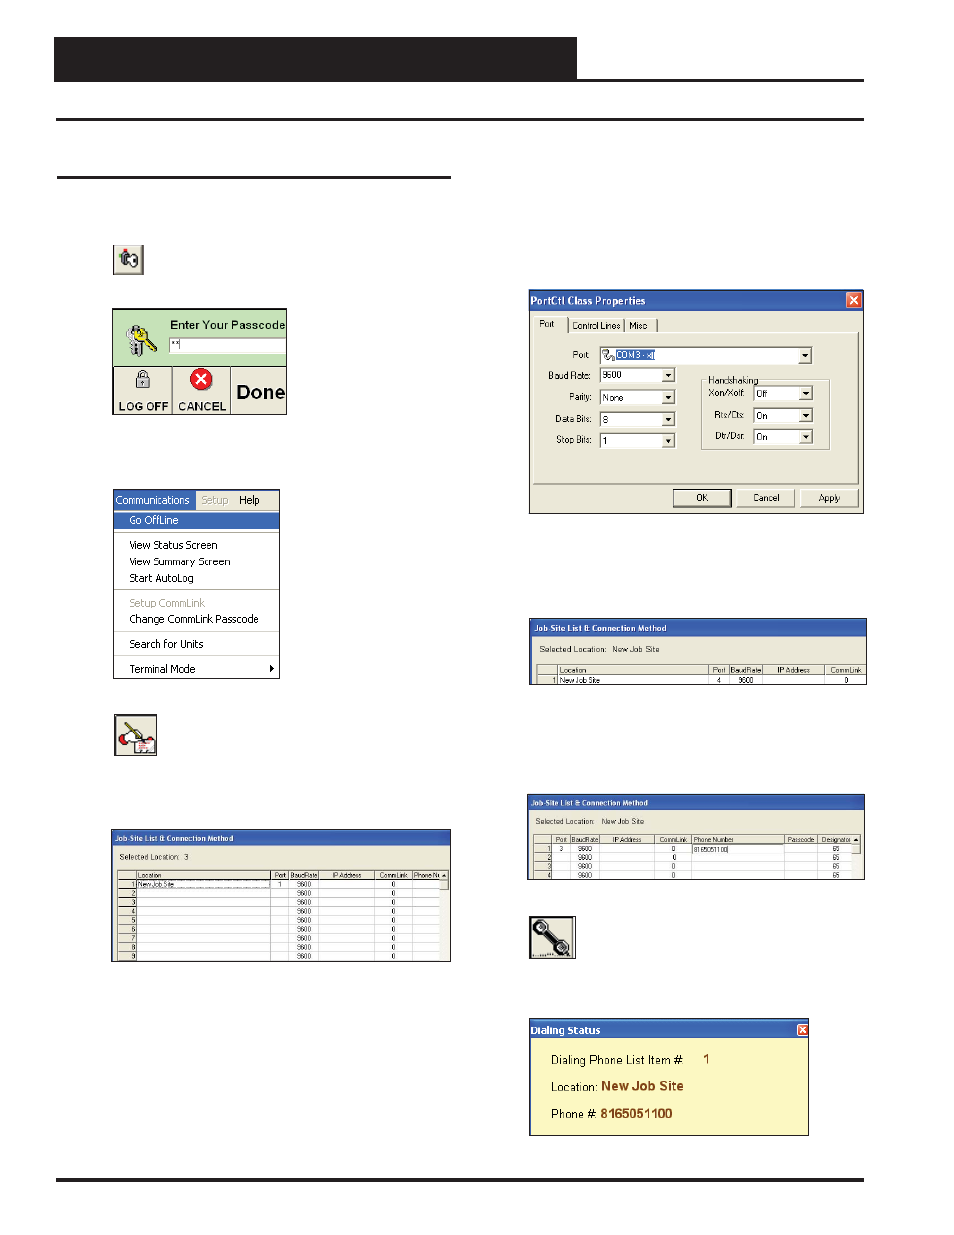
Prism Setup Instructions for Remote Dial-Out
Prism Setup for Remote Dial-Out
1. Open your Prism software.
2.
Click on the
<Key>
button and type in your
level 3 passcode (default “sm”).
Click
<Done>
.
3. If Prism is online, click
<Communications>
and
then click
<Go Offl ine>
.
4.
Click on the
<Edit Jobsite>
button to enter
jobsite information.
5. Click on an empty location. Type in a job name and
press
<Enter>
.
6. Double-click in the Port location on the same line as
the job name. The PortCtl Class Properties Window
will pop up.
7. Click on the down arrow on the Port pull down box
and select the COM port that the Remote Link II is
using. If using a USB connection, this port number is
the one you should have found in the Device Man-
ager. If using a serial connection, the COM port will
be COM1 or COM2. Click
<Apply>
and then click
<OK>
.
8. In the Job Site Window’s CommLink fi eld, type in
the number “1” if the CommLink is a single loop
CommLink; otherwise, leave the default “0” for
multiple loop. Press
<Enter>
.
9. In the Job Site Window’s Phone Number fi eld, type in
the phone number of the remote job you want to
connect to and press
<Enter>
. Click
<Done>
. The
Job Site Window will close.
10.
Click on the
<Dial-Out>
button, located at
the top of the Prism Screen, to begin
dialing. The Dialing Status Window should
appear. Verify that you are calling the correct
jobsite.