Finalizing the installation, For qualified installers only) – Avalon Firestyles 864 TRV GS2 Installation User Manual
Page 61
Finalizing the Installation
(for qualified installers only)
61
Travis Industries
4140611
100-01385
4
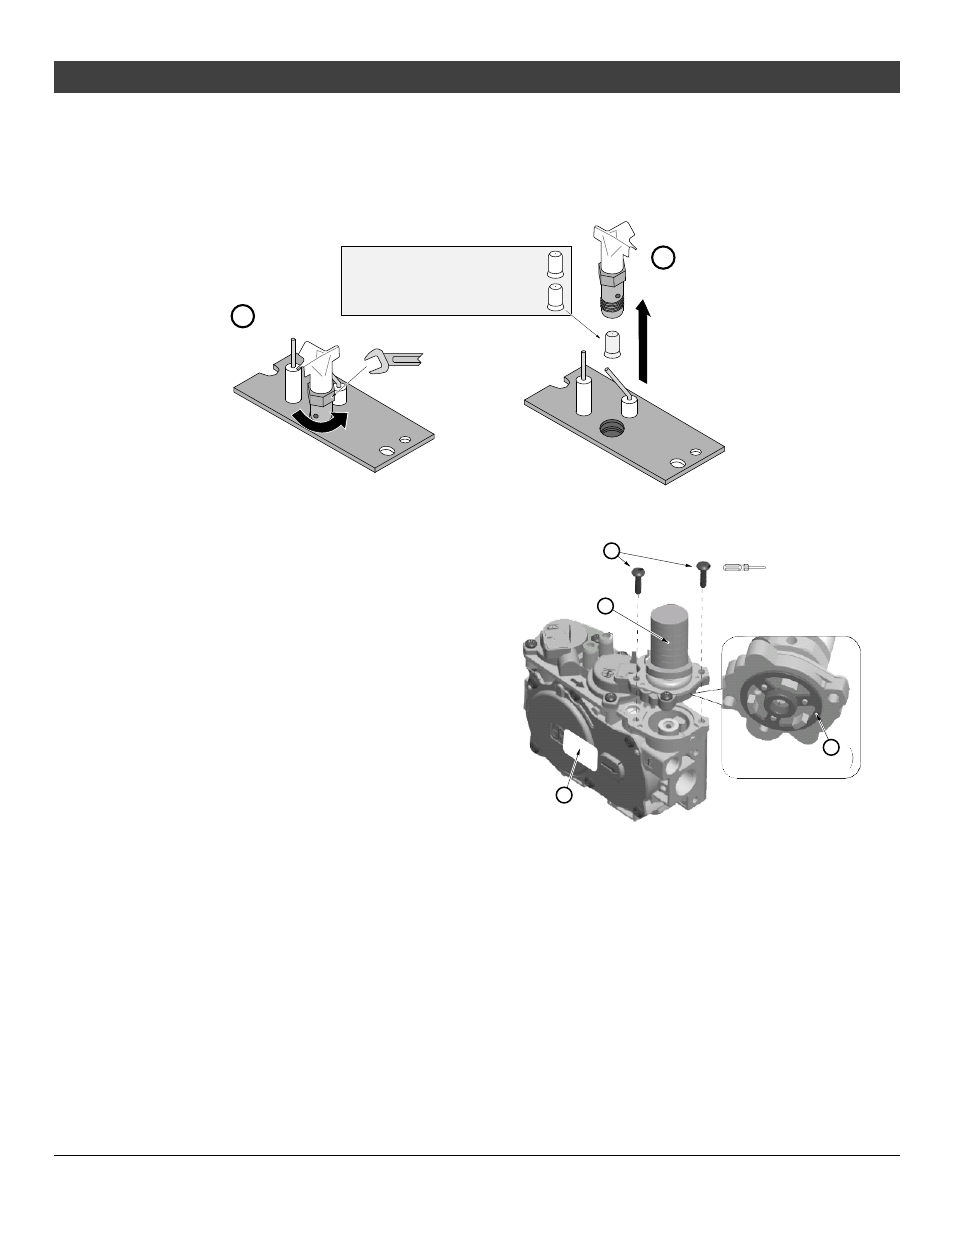
Install the LP pilot orifice following the instructions below.
(a) Use a 7/16” open-end wrench to remove the pilot hood.
(b) Remove and discard the Natural Gas (NG) orifice. Place the LP orifice in the pilot assembly then replace
the pilot hood, tightening the pilot hood until it is snug (do not over-tighten).
5
Replace the firebox components. Install the
logs and embers. Replace the glass.
6 Remove and discard the screws (see “a” below)
holding the stock regulator in place (see “b”
below). Remove the stock regulator and gasket
(see “c” below). Place the LP regulator in place,
making sure the pre-fitted gasket (see ”c” below)
is in place. NOTE: There is a label on the base of
the regulator knob indicating regulator type (NG or
LP). Secure the regulator with the screws
included with the regulator – tighten to 25 lb-in of
torque (2.82 NM). Place the included label on the
valve body where it can be easily seen to insure
proper identification. NOTE: Leak test this area
after the heater is installed, gas is connected,
and the main burner is lit.
7
Make the gas line connection, bleed the gas line (if applicable), start the heater and thoroughly leak-test all gas
connections and the gas control valve.
a
b
7/16" Wrench
Natural Gas Orifice = .020N (3way)
.018N (2way)
LP (Propane) Orifce = .014LP
.020N
or
.018N
.014LP
a
T-20 Torx or
Slotted Screwdriver
b
c
d