Setting up your imagine wave, Ab c d – Baby Lock Imagine Wave (Previous Model) (BLE3ATW) Instruction and Reference Guide User Manual
Page 10
After removing the packing materials from the box, gently lift your Baby Lock serger by gasping the handle
provided on the top of the machine. Place the machine on a serger sewing table or any level surface that
provides ample work area to the left. Place the foot controller in a pedal stay, if desired, and place it under
the sewing table.
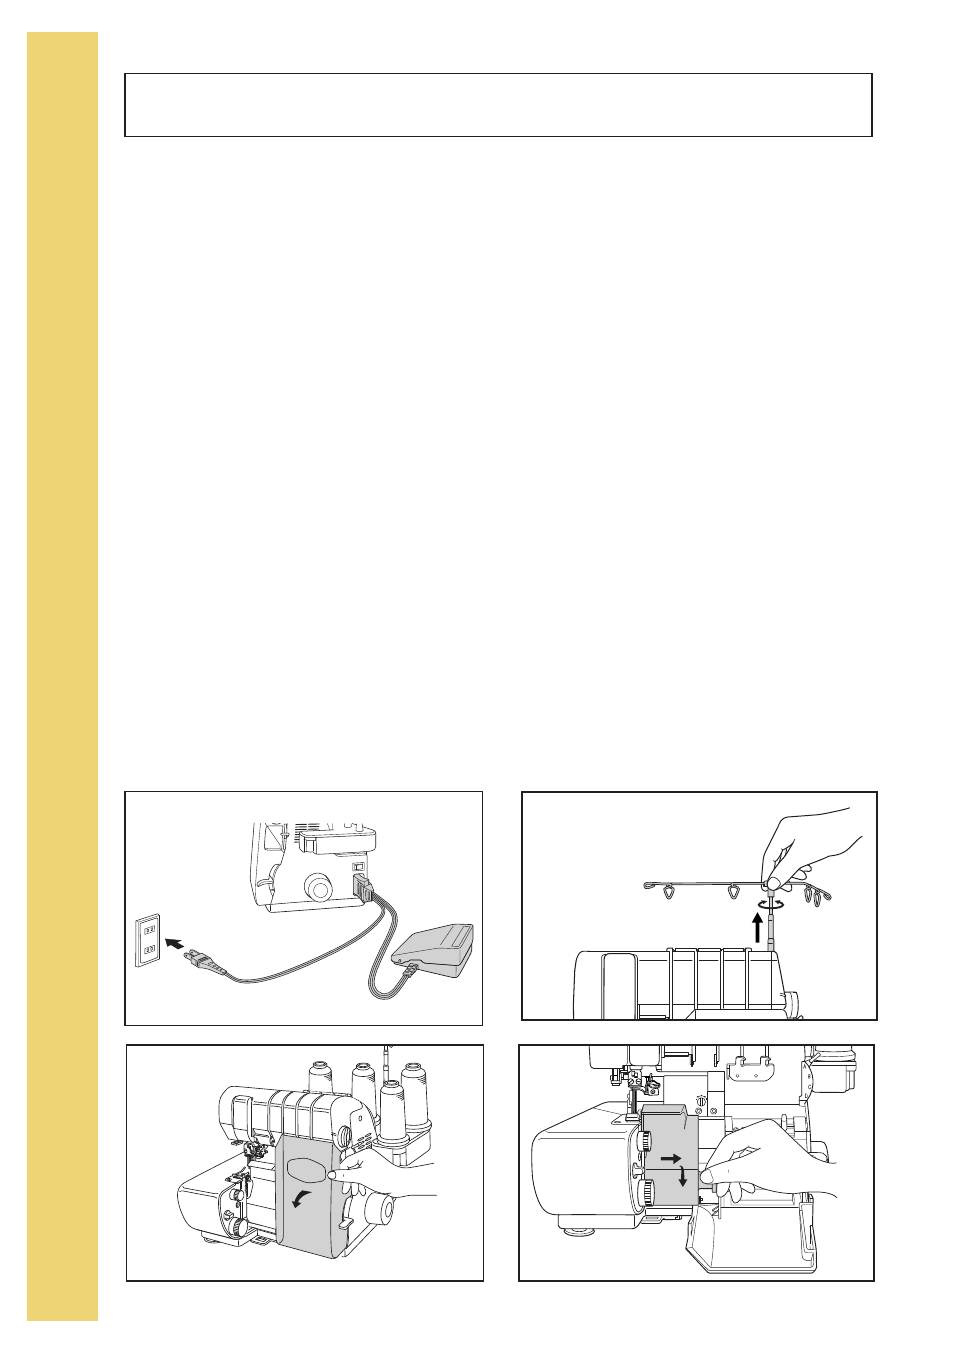
Plug the power cord into the machine first, then into a wall outlet. The power switch is located toward the
back on the right side of the machine. Always make sure the power is off when the machine is not in use
(fig.A).
Available foot controller for U.S.A.: Model YC-482, or YC-420W
This appliance has a polarized plug (one blade wider than the other). To reduce the risk of electric shock,
this plug is intended to fit in a polarized outlet only one way. If the plug does not fit fully in the outlet,
reverse the plug. If it still does not fit, contact a qualified electrician to install the proper outlet. Do not
modify the plug in any way.
The sewing speed of the machine is determined by the amount of pressure applied to the foot controller.
When not in use, do not place anything on the foot controller, or the machine could start inadvertently and
the controller or motor could burn out (fig.A).
Raise the telescopic thread guide to its highest position of 14". Rotate the shaft to the left and right until
each section "clicks" into a locked position (fig.B). The front cover may be opened simply by placing your
fingers behind the tab at the right side and pulling toward you (fig.C).
To open the cutting blade cover, place your thumb against the tab, and slide the cover to the right. A slight
pull forward will allow the cover to swing down, providing access to the loopers, blades, and thread guides
(fig.D).
S
E
R
G
E
R
S
E
T
U
P
8
Setting Up Your Imagine Wave
A
B
C
D
O
A
B
C
D