Securing ends – Baby Lock Imagine Wave (Previous Model) (BLE3ATW) Instruction and Reference Guide User Manual
Page 40
B
A
S
I
C
S
E
R
G
I
N
G
T
E
C
H
N
I
Q
U
E
S
38
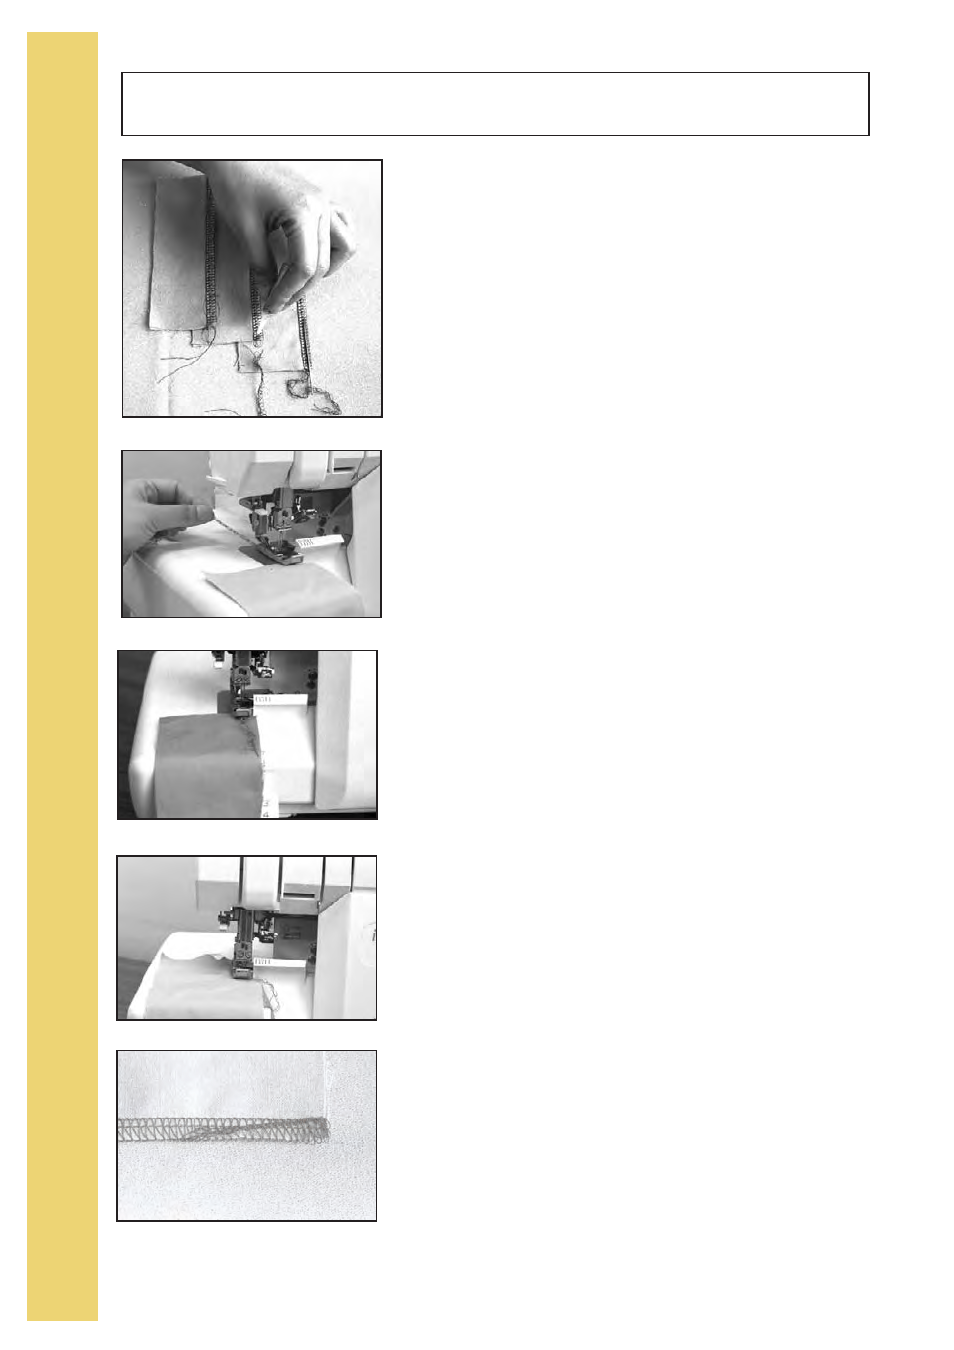
Securing Ends
A
B
C
D
E
The serger stitch will not unravel readily, and in most cases serged
seams are secured by an intersecting seam.
If that's not the case, these are several options for securing seam
(fig. A).
1. Leave a 3 inch (7.5cm) chain, separate the threads and tie a knot.
2. Apply a dot of seam sealant on the thread chain at the fabric edge.
Allow to dry and cut off the excess thread chain.
3. Leave a 3-4 inch (7.5-10cm) thread chain and use a large-eye
tapestry needle or double-eye needle to weave the chain back into
the stitching.
4. Lock the beginning or end of a seam by serging over the previous
stitches.
To lock the beginning of the seam:
1. Manually turn the handwheel toward you taking 2-3 stitches into
the fabric. Leave the needle(s) in the lowest position to anchor the
fabric.
2. Raise the presser foot.
3. Smooth out the thread chain with your fingers (fig. B). Then bring
the chain around and under the foot, so that it aligns with the edge
of the fabric (fig. C).
4. Lower the foot and continue sewing, catching the thread chain in
the stitches for about 1inch (2.5cm). Let the blades cut off any
remaining thread chain (fig. D-E).