3 solenoid cleaning – Bluelab Dosetronic Solenoid Kit User Manual
Page 37
33
Version S1.3 : 260511
Bluelab Dosetr
onic Solenoid Kit
Bluelab Corporation Limited
5
5.3 Solenoid Cleaning
1. Turn off the Dosetronic and solenoid power supplies at the
wall. Refer to system overview for their location.
2. Carefully remove the solenoid valve from the grommet in the
tank (empty your tank first!)
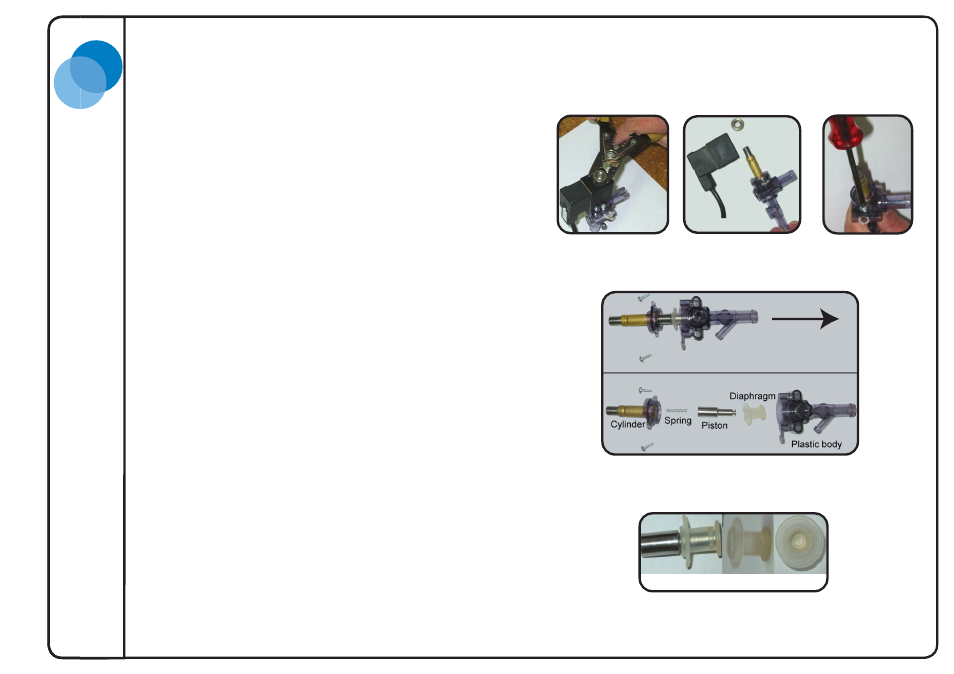
3. Undo the top ring nut on the valve. This should be hand tight,
but it may be necessary to use a pair of pliers if it is too tight,
as shown in Figure 1.
4. Take the black coil off the solenoid, as shown in Figure 2.
5. Undo the two screws on the solenoid as shown in Figure 3.
6. Carefully disassemble the solenoid valve as shown in
Figure
4.
Be very careful not to lose the spring between the
piston and the cylinder. Remove the diaphragm gently – do
not use any sharp tools.
7. Clean the diaphram (Figure 5) using Jif or dishwashing
detergent and a toothbrush if necessary. Check the
diaphragm carefully for holes / splits or any other
damage.
Coil
Valve
Ring Nut
Figure 1:
Remove ring nut
Figure 2:
Solenoid and actuator
separated
Figure 3:
Remove solenoid
screws
Figure 4: Solenoid valve disassembly and completely
disassembled parts
Mounted on piston
Side view
Top view
Figure 5:
Normal, undamaged diaphragm
Valve