Intermediate, Overview, Creating custom roles – BrightSign Network WebUI Permissions User Guide v.1.0 User Manual
Page 10
8
INTERMEDIATE
This chapter will explain how to create and edit custom roles. The roles introduced here are used as examples to help
explain how to conceptualize and create a custom role. The needs of your organization may be different from the
examples included in this section.
Note: In order to create a custom role, you will first need to check the Show Advanced Security Settings and Enable
Custom Roles Management checkboxes located in the Advanced section of the Account page.
Overview
Your company now has 25 donut shops in multiple states, and the central office has many more employees. Though the
BrightSign Network’s default roles have worked well up until this point, they are no longer able to serve a large group of
users with many diverse roles and responsibilities.
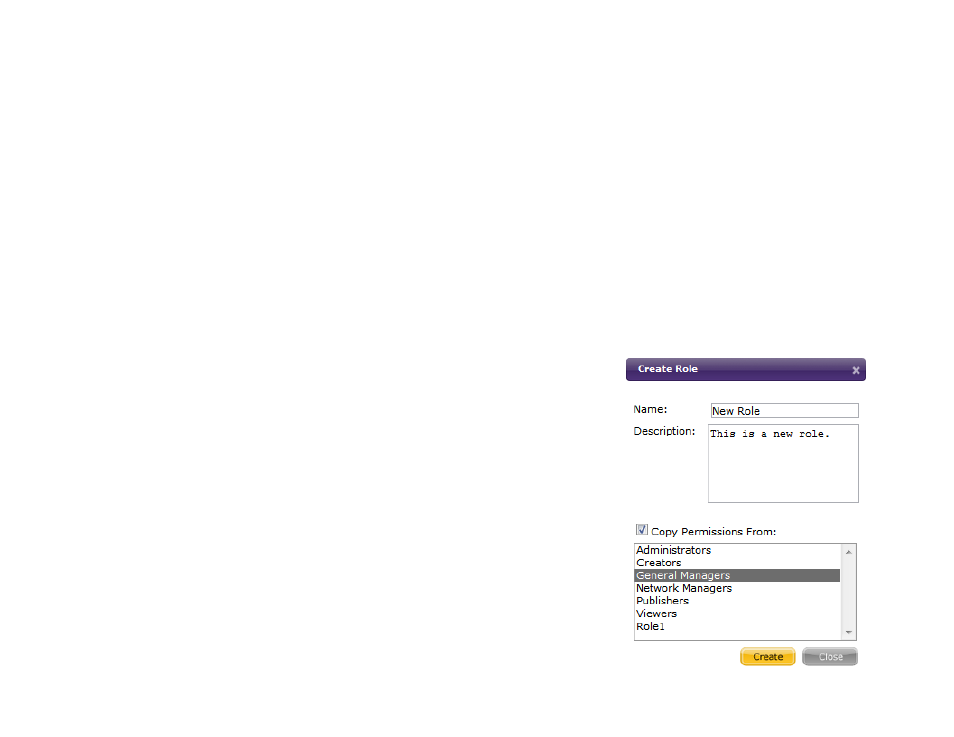
Creating Custom Roles
Since there are nearly 70 individual permissions, it may be easiest to base a
custom role on one of the preexisting default roles.
Note: Default roles cannot be modified.
1. Click the Account button at the top right of the page.
2. Navigate to the Permissions subgroup on the right-hand side of the page.
3. Click the Create New Roles button beside the Roles List.
4. Enter a name and (optional) description for the custom role.
5. Check the Copy Permissions From checkbox to base the custom role’s
permissions on a preexisting role. As long as you have the advanced
settings enabled on the Account page, you will be able to change all
copied permissions.